Step 1. Install the OCP module.
Note: Ensure that the Ethernet adapter is fully seated, and the thumbscrew is securely tightened.
Otherwise, the OCP module will not get full connection and may not function.
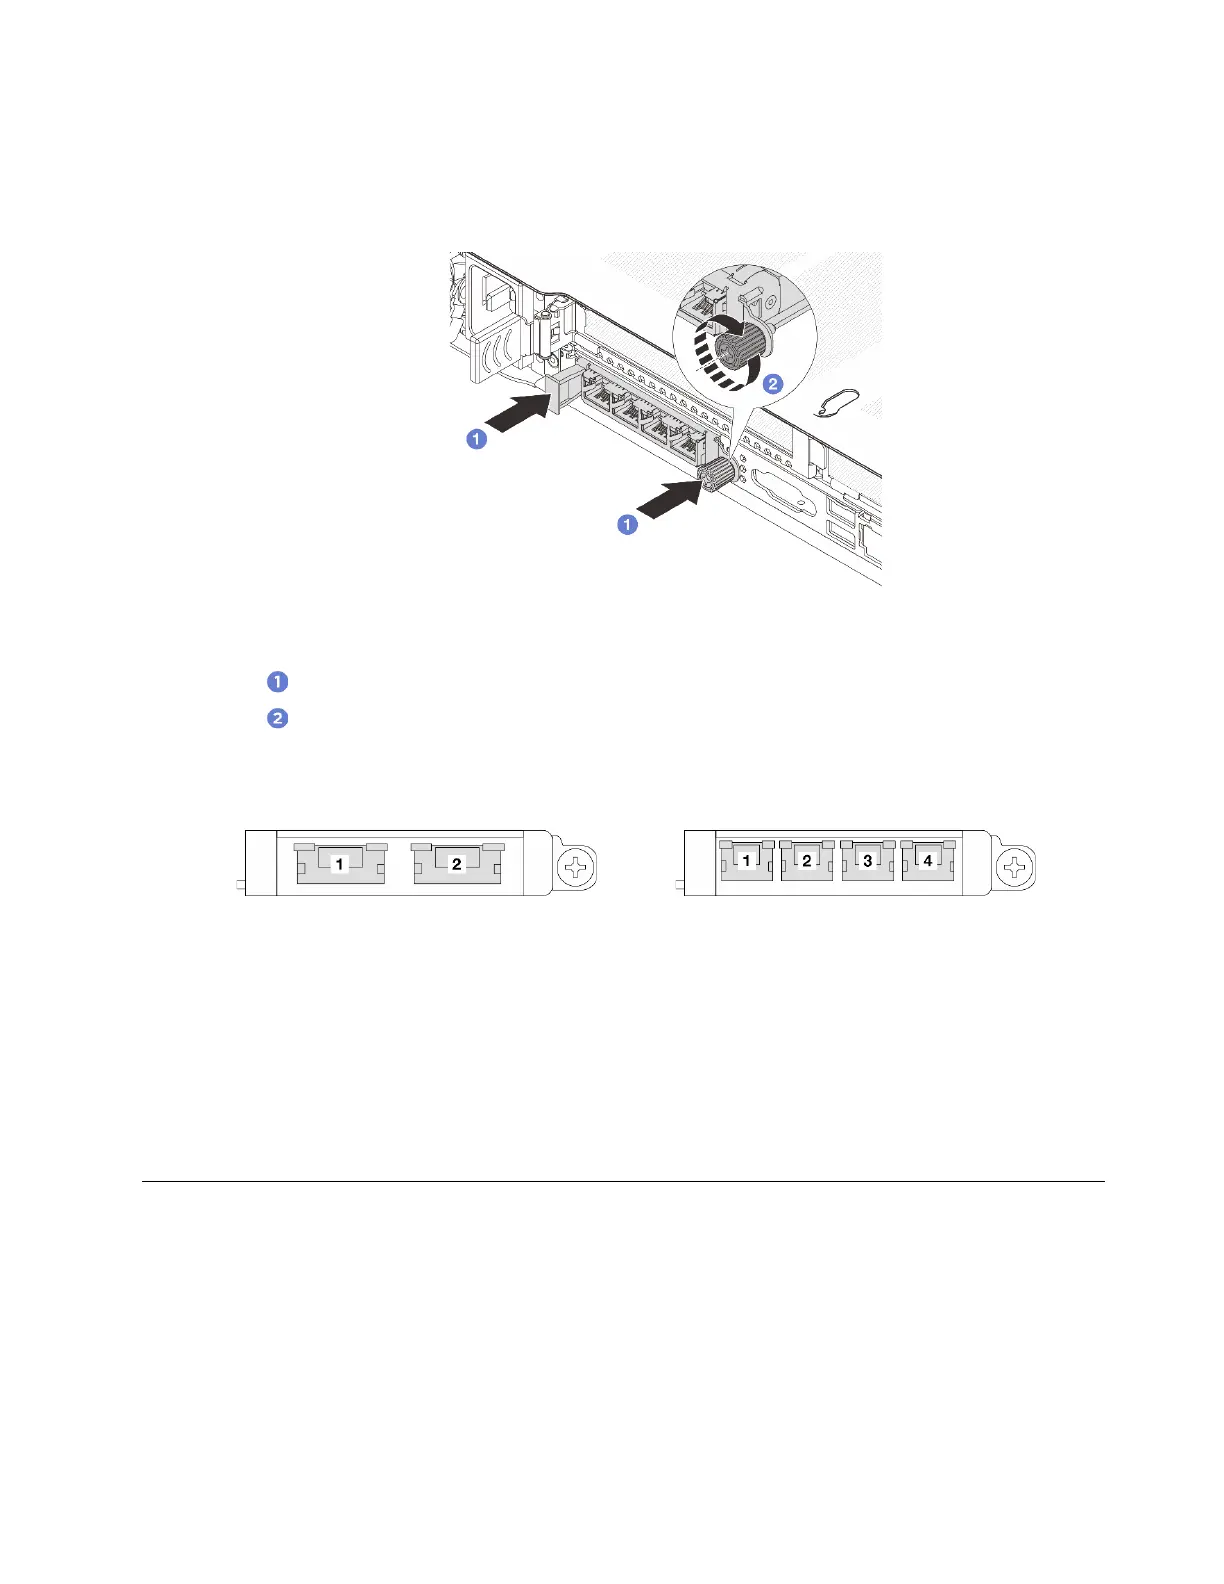
Figure 256. OCP module installation
a.
Push the OCP module until it is fully inserted into the connector on the processor board.
b.
Fully tighten the thumbscrew to secure the adapter. Use a screwdriver if necessary.
Notes:
FFiigguurree 225577.. OOCCPP mmoodduullee ((ttwwoo ccoonnnneeccttoorrss)) FFiigguurree 225588.. OOCCPP mmoodduullee ((ffoouurr ccoonnnneeccttoorrss))
• The OCP module provides two or four extra Ethernet connectors for network connections.
• By default, any Ethernet connector on the OCP module can also function as a management
connector using the shared management capacity.
After you finish
Complete the parts replacement. See “Complete the parts replacement” on page 288.
Rear riser card replacement
Use this information to remove and install a rear riser card.
•
“Server rear configuration and riser assemblies” on page 251
• “The overview of rear riser brackets” on page 254
• “The overview of rear riser cards” on page 254
Server rear configuration and riser assemblies
See this section to identify the correlations between the rear configuration and riser assemblies.
Chapter 5. Hardware replacement procedures 251