Making measurements Chapter 4
Mastersizer 3000 Page 4-19
11. Click Start on the measurement progress bar at the top of the window. Both
the red and blue light values for the background are measured.
12. The system now requests the user to Add Sample - add small quantities of
sample to the dispersion unit until the obscuration is within range (10-20% in
the case of a wet dispersion). Refer to the Help system for more guidance. With
a dry dispersion, the system will skip this step.
Note
With dry dispersions, the whole sample is loaded into the hopper in the
Aero before the measurement process is started.
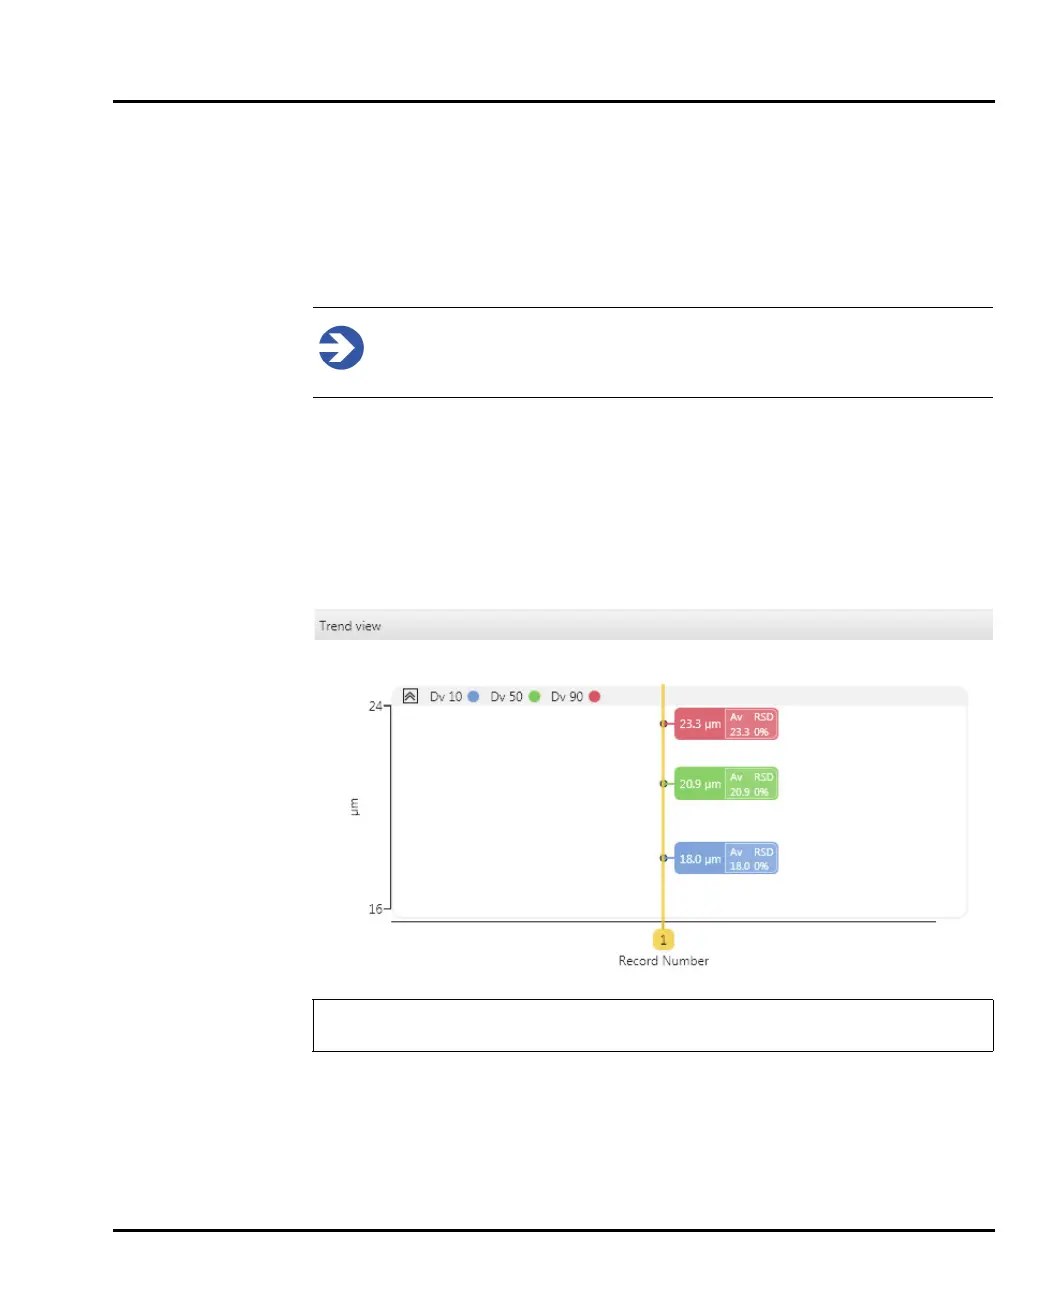
13. Click Start again twice to begin the measurement. First the red and then the
blue light values are measured. When this is complete, the Trend view is
updated with the new measurement figures (see Running an SOP in this
chapter for more detailed information on the Trend view). The particle Size
Distribution graph is shown in the upper right panel. In the example shown
here, just a single measurement was specified in the manual measurement set
-
tings.
14. Continue this final Measure Sample process as many times as required by
clicking Start again. To complete the measurement, just close the Manual
Measurement window. The new records are now added to the Record View.
The Trend view is only available with the Mastersizer 3000 / Mastersizer
3000E with Extended software option.