FX3U Series Programmable Controllers
User’s Manual - Hardware Edition
161
8 Installation In Enclosure
8.7 Connecting Methods for Main Unit and Extension Devices
1
Introduction
2
Features and
Part Names
3
Product
Introduction
4
Specifications
5
Version and
Peripheral
Devices
6
System
Configuration
7
Input/Output
Nos., Unit Nos.
8
Installation
9
Preparation and
Power Supply
Wiring
10
Input Wiring
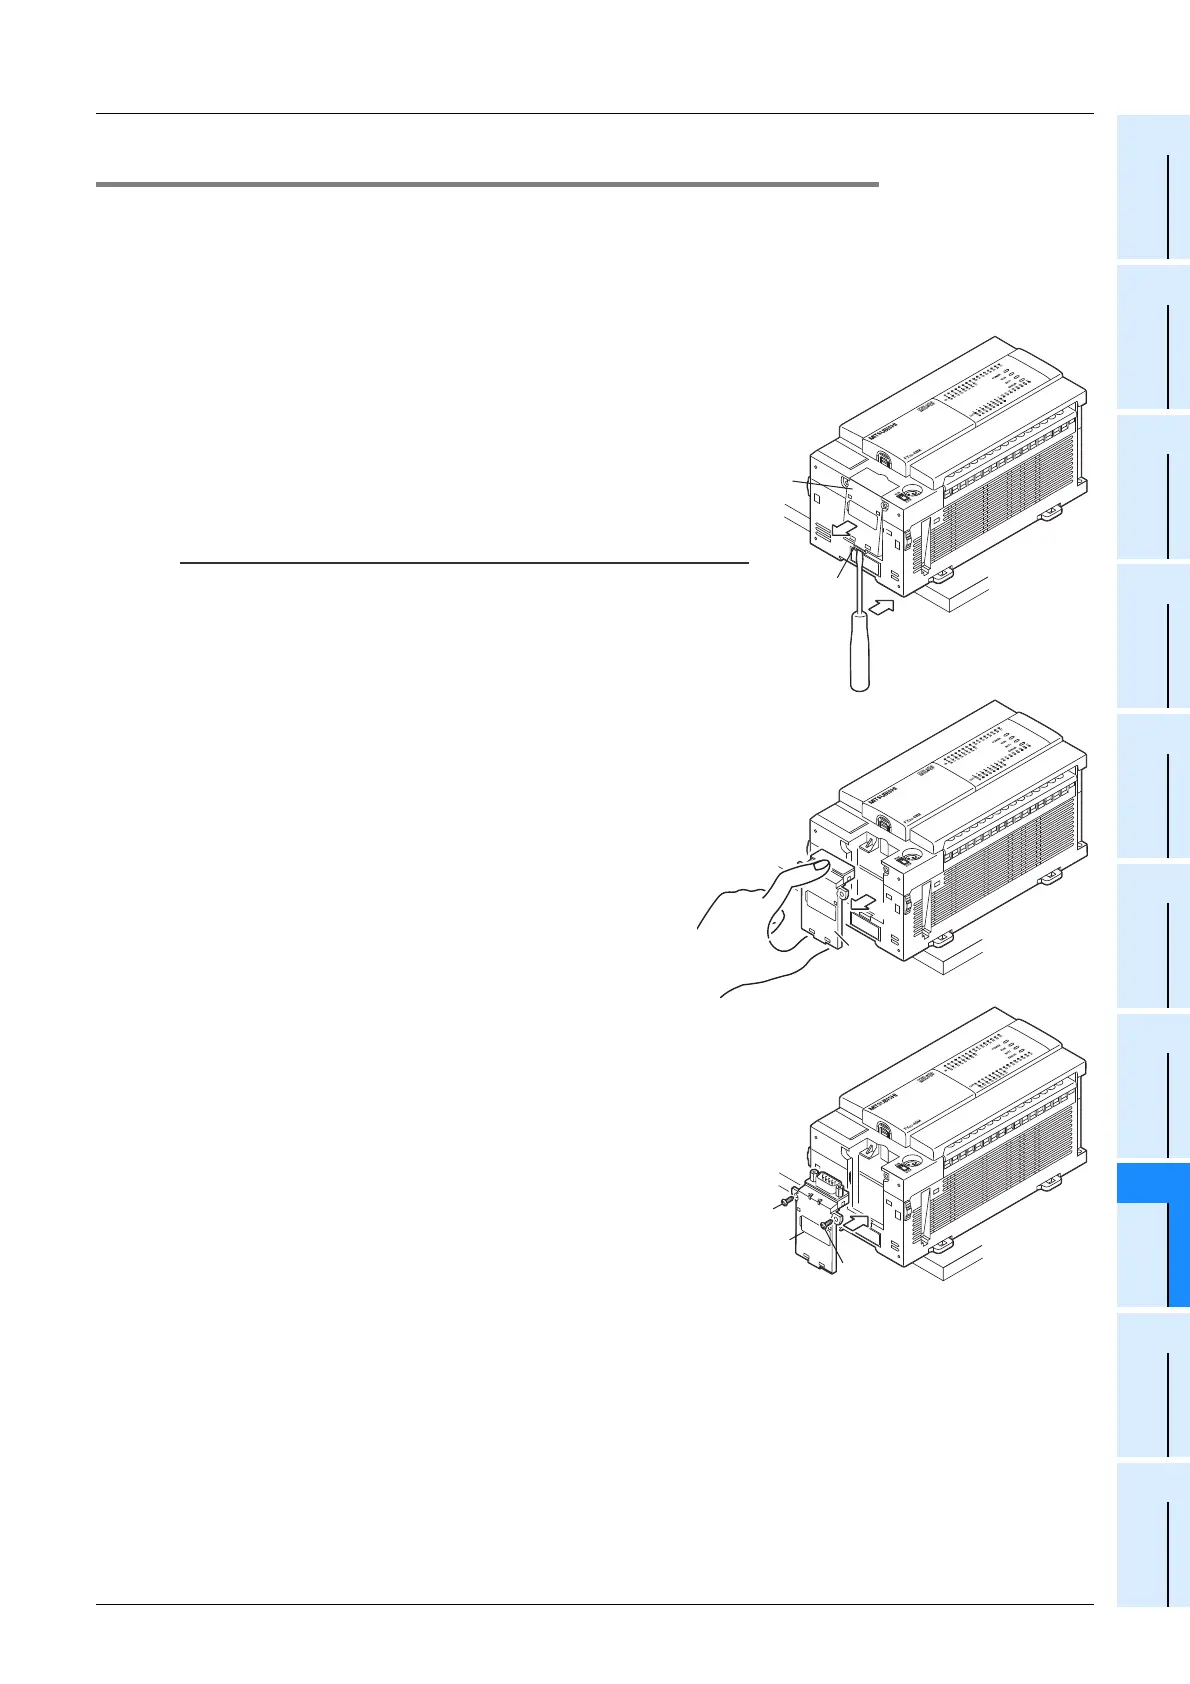
8.7.2 Connecting method A - connection of expansion board
To connect an expansion board to the main unit in the enclosure, it is necessary to remove the main unit from
the enclosure.
→ Refer to Subsection 8.5.4 for the "removal from DIN rail" procedure.
→ Refer to Section 8.6 for the "direct mounting" removal procedure.
1 Insert the tip of a flathead screwdriver into
the part A of the expansion board com-
partment dummy cover (B in the right fig-
ure) on the left side of the main unit, and
slightly lift the dummy cover.
• Put the main unit on the edge of a desk or so to insert the
screwdriver.
Caution
Take care not to damage the wiring board and electronic
components with the screwdriver.
2 Remove the expansion board compart-
ment dummy cover (B in the right figure).
3 Hold the expansion board (C in the right
figure) parallel to the main unit, and fit the
board to the expansion board connector.
4 Secure the expansion board (C in the right
figure) on the main unit with the supplied
M3 tapping screws (D in the right figure).
• Tightening torque: 0.3 to 0.6 N•m
B
A
1
2
B
4
D
D
C
3
 Loading...