9-40 Upgrading Your Server
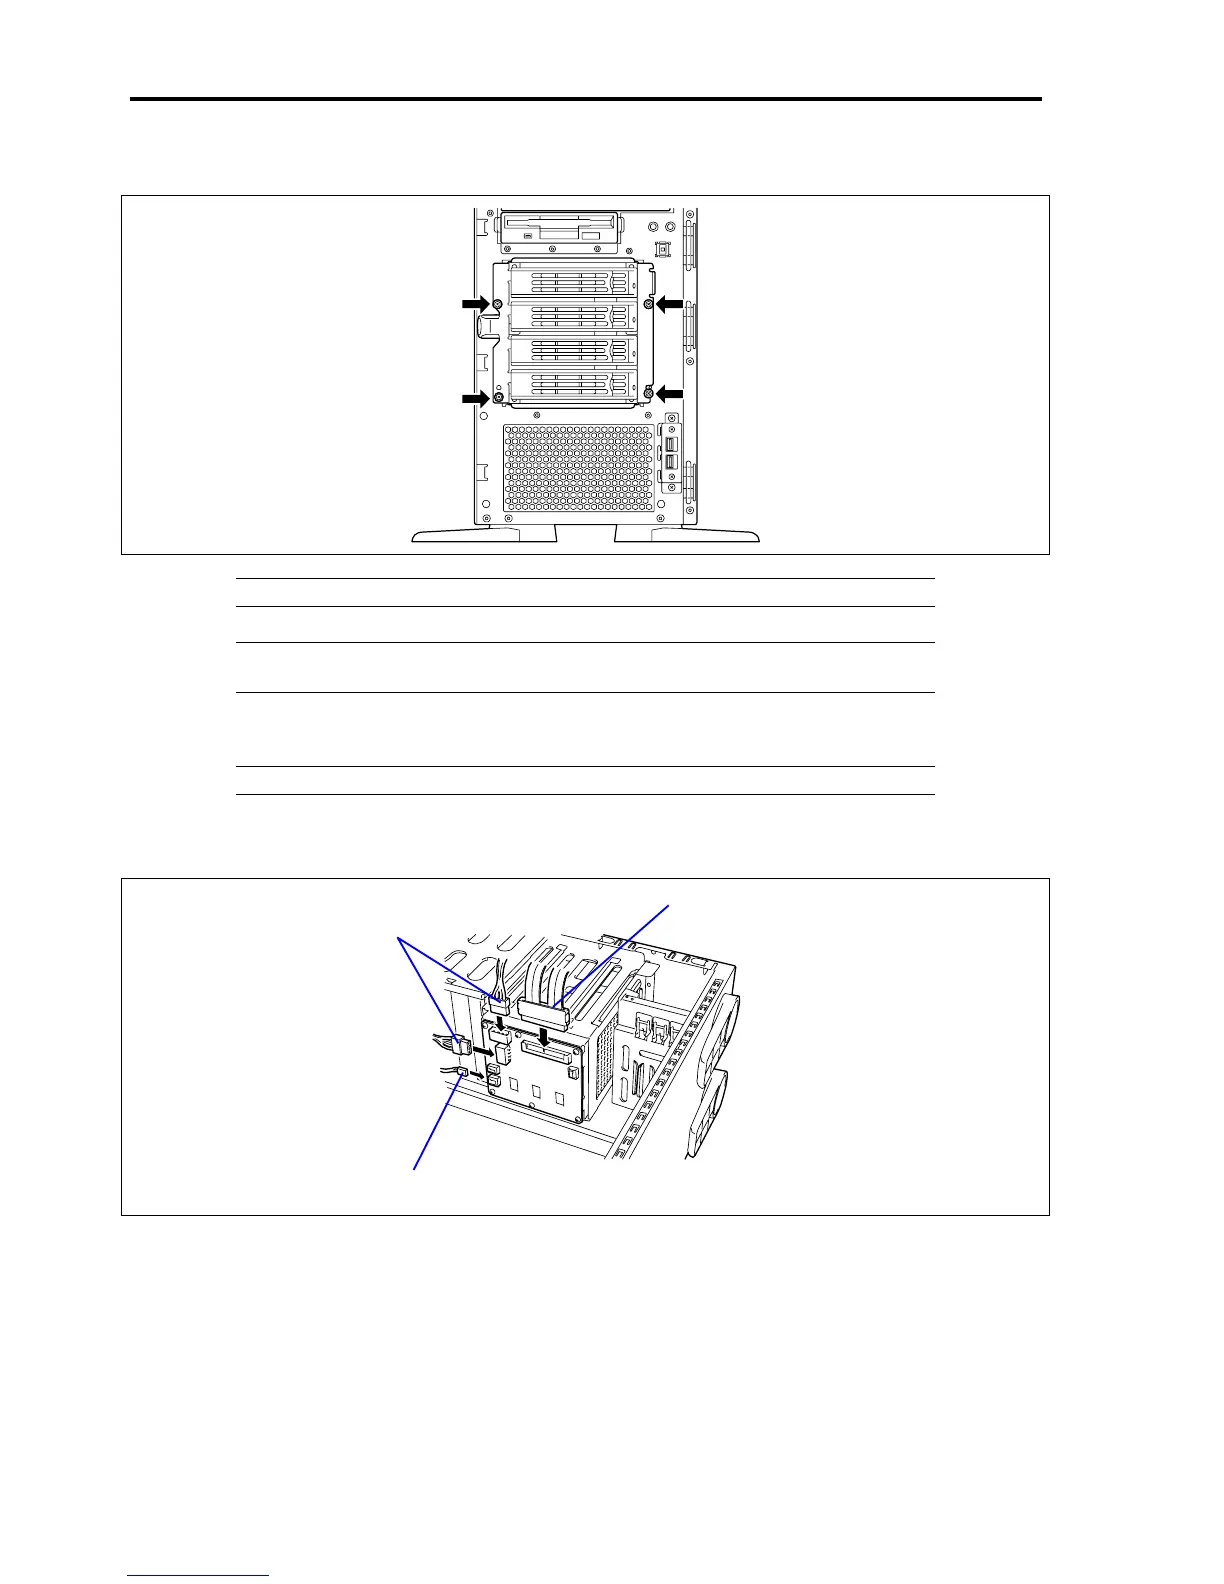
8. Secure the HDD cage to the server with four screws removed in steps 4 to 6.
IMPORTANT: Carefully keep the removed drive carriers or screws for future use.
NOTE: The location of screw holes depends on the cage. Install the HDD cage properly
according to the figure.
9. Make sure that the disk array controller is installed in the server. If not, install it.
NOTE: See Chapter 5 for installing the disk array controller.
10. Connect the SATA cable provided with the HDD cage, I2C cable provided with the server, and power cable
provided with the disk array controller as shown in the figure below.
SATA cable
I2C cable
(4-pin connector)
er cable
(2-pin connector)
Pow
 Loading...