S350 Series 24-Port (PoE+) and 48-Port Gigabit Ethernet Smart Managed Pro Switches
Manage Device Security User Manual233
The login window opens.
4. Enter the switch’s password in the Password field.
The default password is
password.
The System Information page displays.
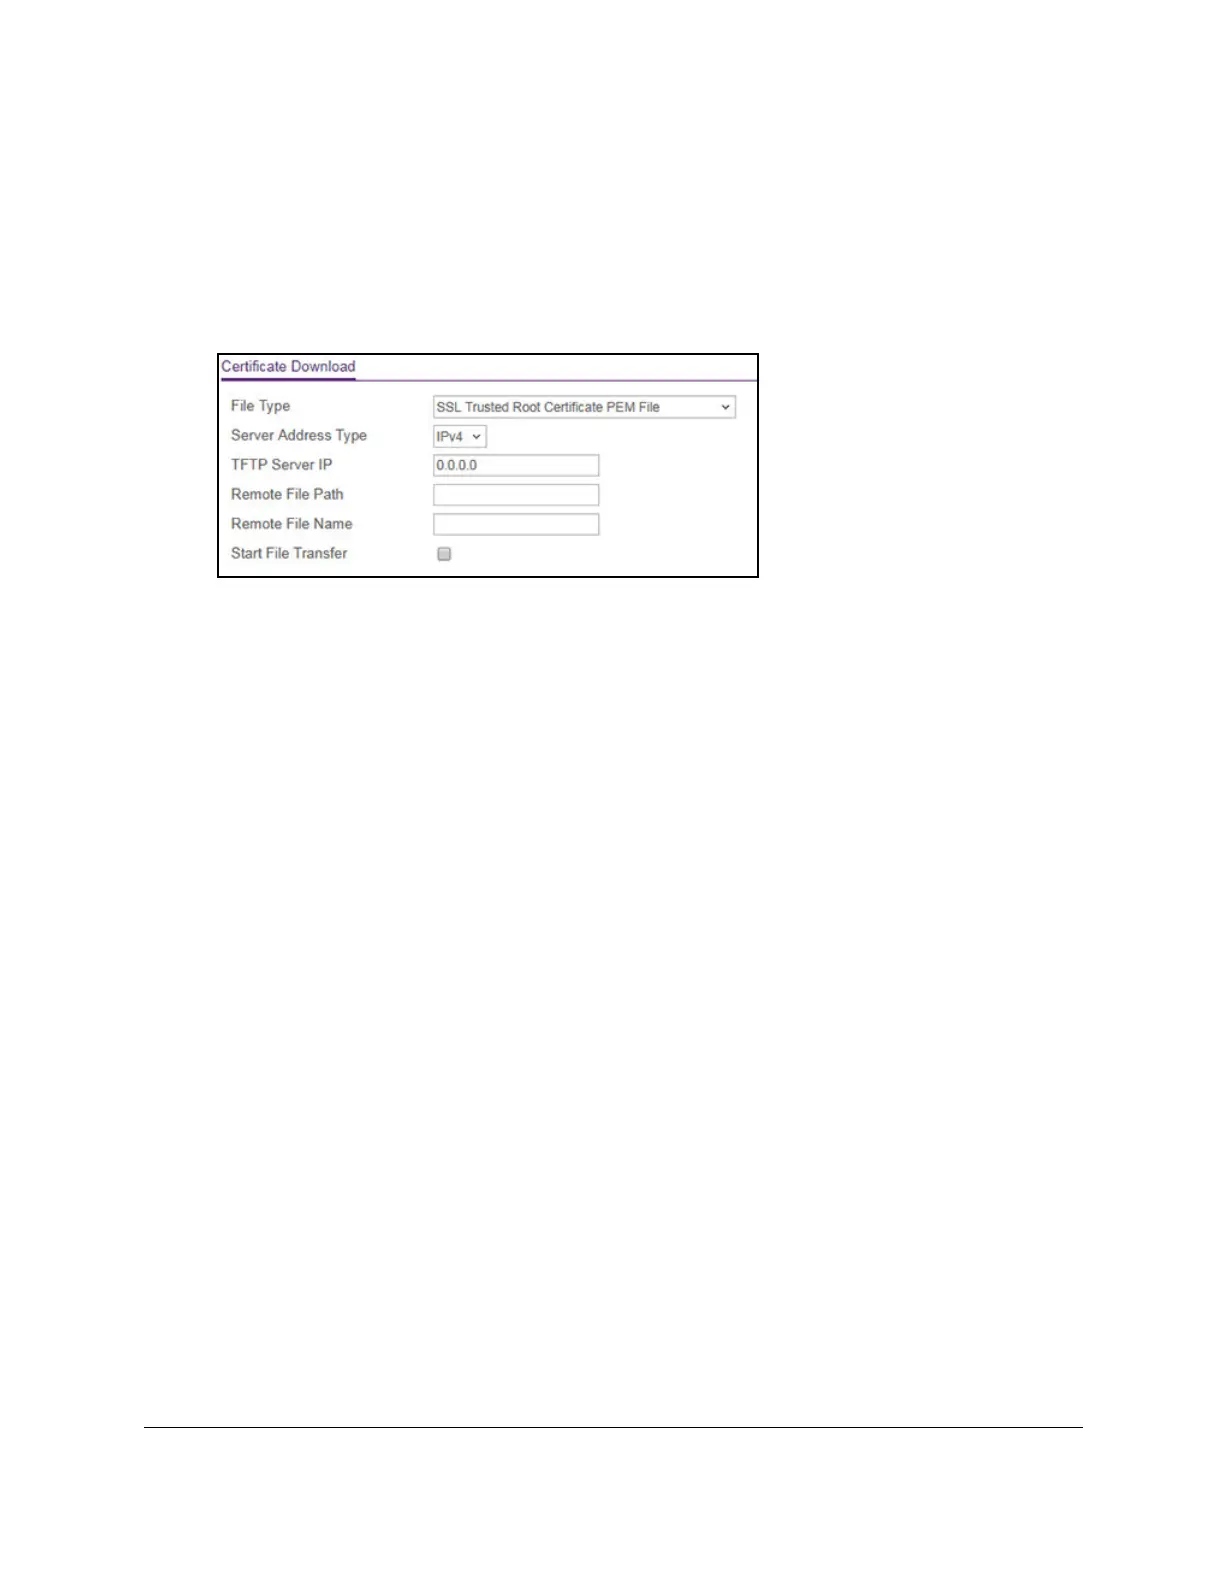
5. Select Security >
Access > HTTPS > Certificate Download.
6. From the File Type menu, select the type of SSL certificate to download, which can be one
of the following:
• SSL Trusted Root Certificate PEM File. SSL
Trusted Root Certificate file (PEM
Encoded)
•
SSL Server Certificate PEM File. SSL Server Certificate File (PEM Encoded)
• SSL DH Weak Encryption Parameter PEM File. SSL Dif
fie-Hellman Weak Encryption
Parameter file (PEM Encoded)
•
SSL DH Strong Encryption Parameter PEM File. SSL Diffie-Hellman Strong
Encryption Parameter File (PEM Encoded)
7. From the Server Address Type menu, select
IPv4 or DNS to indicate the format for the
TFTP Server IP field.
The default is IPv4.
8. In the TFTP Server IP field, specify the address or host name of the TFTP server.
The address can be an IP address in standard x.x.x.x format or a host name.
The host
name must start with a letter of the alphabet.
9. In the Remote File Path field, enter the path of the file to download.
You can enter up to 96 characters. The default is blank.
10. In the Remote File Name field, enter the name of the file on the
TFTP server to download.
You can enter up to 32 characters.
The default is blank.
11. Select the Start File Transfer check box.
12. Click the Apply
button.
The file transfer starts. A status message displays during the transfer and upon
successful completion of the transfer
.
 Loading...