Editing a Form
100 Chapter 4
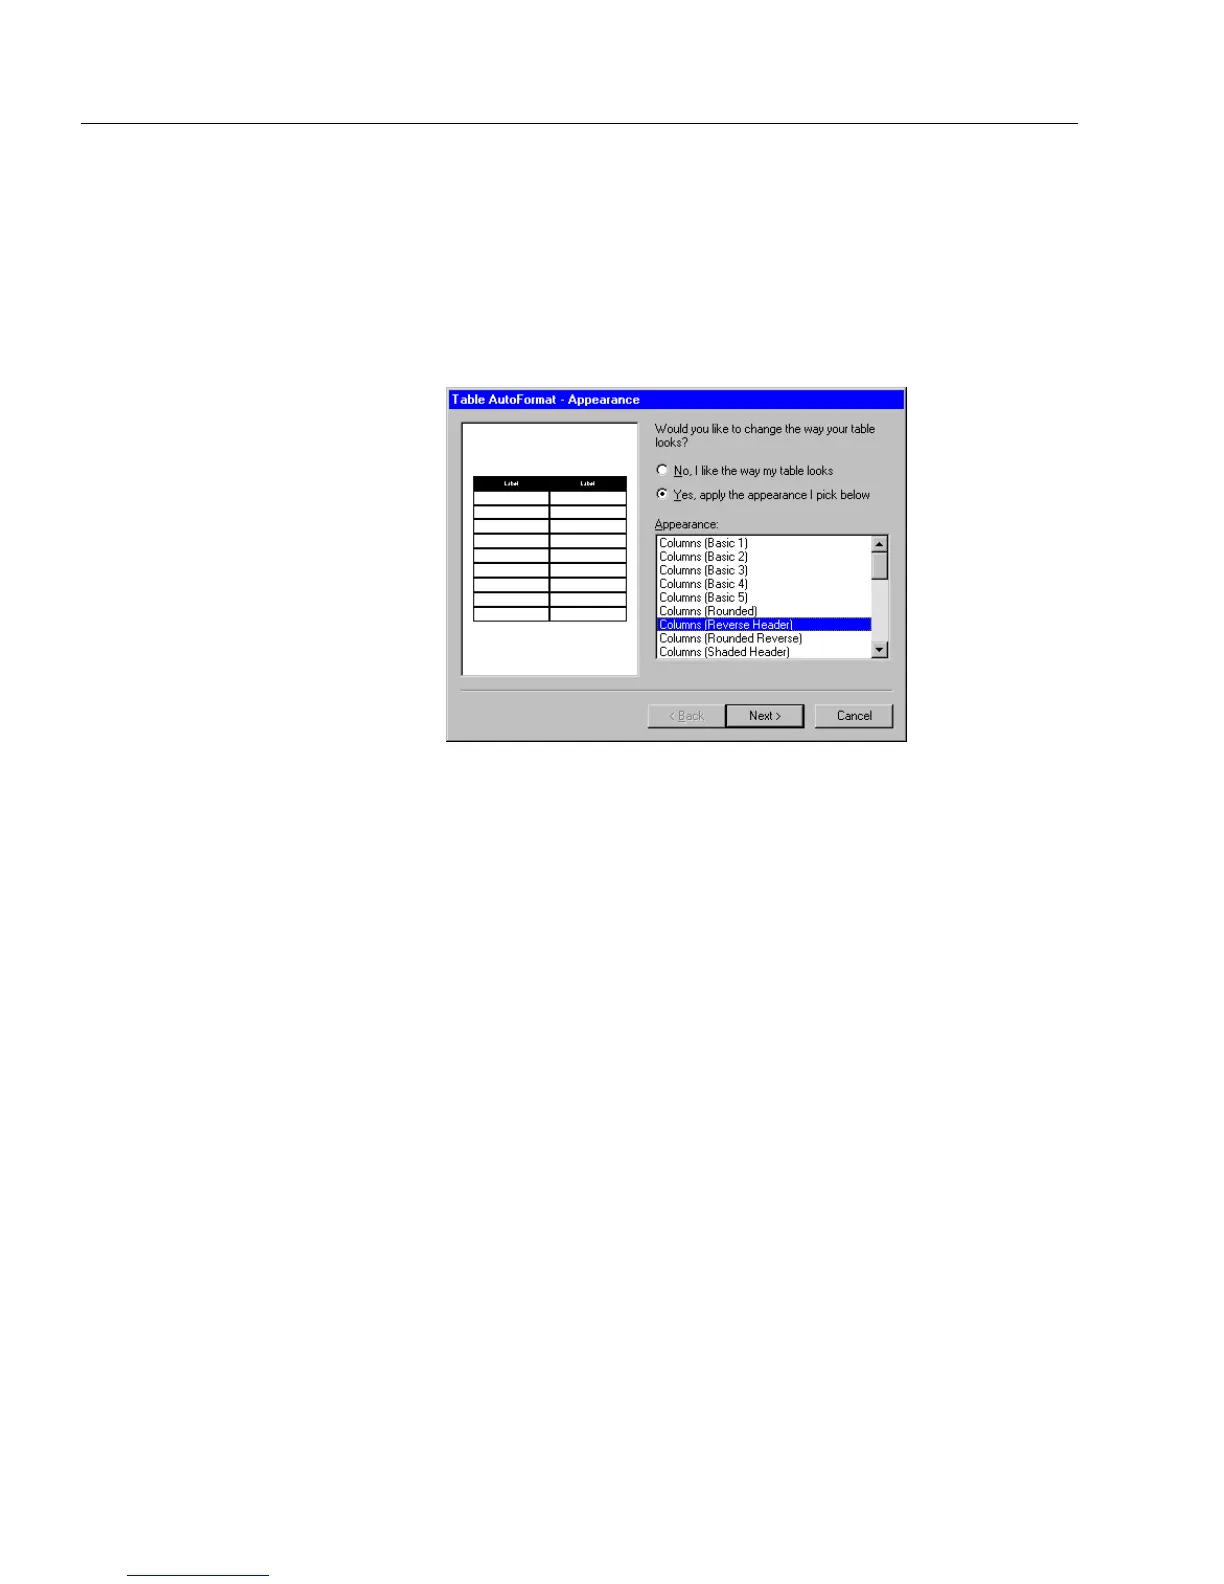
To format a table:
1 Select a table.
2 Choose
Table AutoFormat...
in the Format menu.
The Table AutoFormat dialog box appears.
3 Select the
Ye s
option to enable the
Appearance
list box.
4 Select an appearance option for your table.
5Click
Next>
if it is available to open the
Naming
window.
Depending on your appearance selection, the
Naming
window
may not be available. In that case, click
Finish.
6 Select
Yes, change the column names
if it is available and you want
to change the column names.
• Select a column name, click
Rename,
and type in a new name.
• Repeat these steps for each column name to change.
7 Select
Yes, change the row names
if it is available and you want to
change the row names.
• Select a row name, click
Rename,
and type in a new name.
• Repeat these steps for each row name to change.
8Click
Finish
to apply the changes to your table.
See “Placing Objects in Table Cells” on page 106 for additional
information on tables.
Breaking a Table Apart
Use
Break Table Apart
in the Format menu to break a selected table in
sections. This option is useful if you need to rearrange the elements of
your table.