Proofing a Form
32 Chapter 3
8 Begin to fill or edit your form.
See Chapter 4, “Designing a Form,” for detailed information on
defining, moving, resizing, and creating fields, as well as other design
functions.
See Chapter 6, “Filling a Form,” for detailed information on the kinds of
fields you may find on a form and how to fill them.
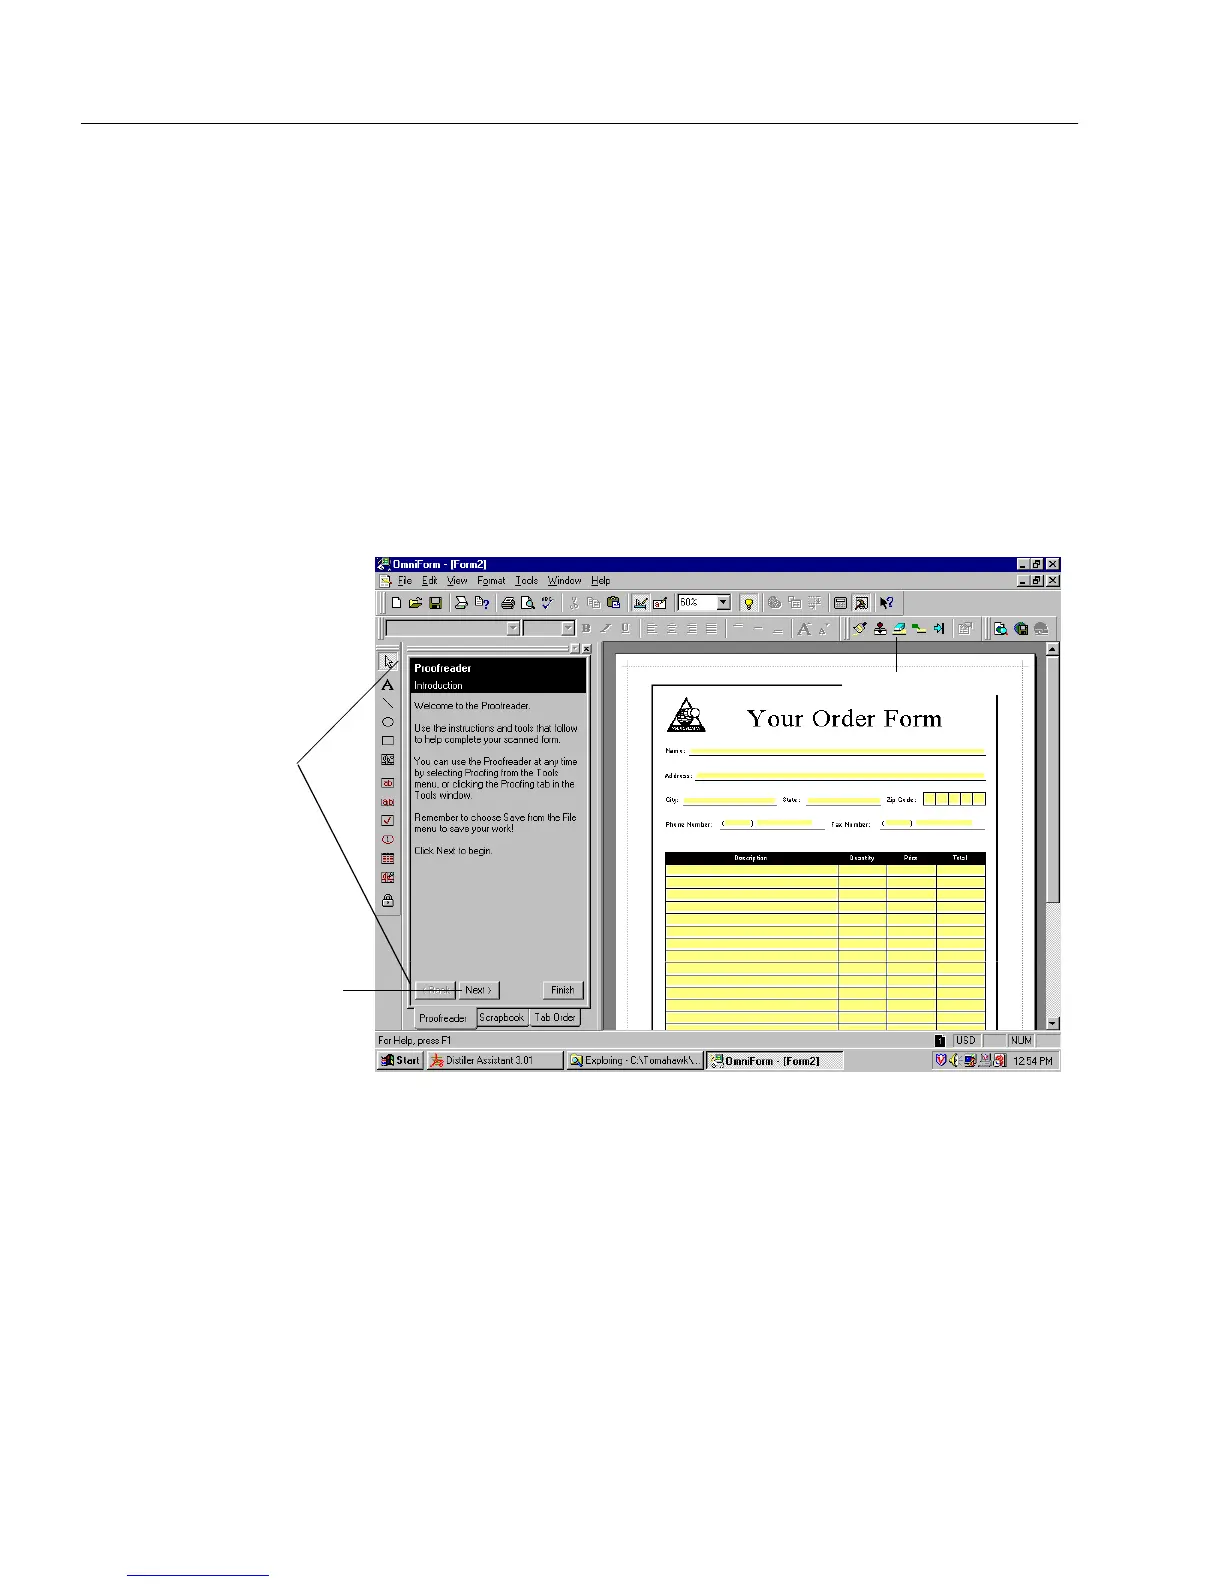
Proofing a Form
After you scan or import an image file, you can use the Proofreader
option to make improvements to your form. If you have selected
Show
Proofreader after recognition
, the Proofreader window appears to the left
of the main window immediately after you scan or import a form.
If the Proofreader does not appear, choose
Proofreader
in the Tools menu.
If you do not want the Proofreader window to appear, you can turn it
off. Choose
Options...
in the Tools menu and click the
Recognition
tab. In
the
Recognition
tab, deselect
Show Proofreader after recognition
.
To begin proofing:
1Click
Next>
in the Proofreader window and follow all
instructions in the panels that appear.
2Click
Finish
to display the Proofreader Index panel.
Proofing toolbar
Click Next> to begin the
Proofreader.
Proofreader window