EasyManuals Logo

Oce PlotWave 340 User Manual

Oce PlotWave 340
384 pages
To Next Page IconTo Next Page
To Previous Page IconTo Previous Page
Page #225 background imageLoading...
Page #225 background image
Copy by set
Introduction
You can use the 'Create set' option to make multiple sets of copies.
How to copy by set
1.
Feed the original face up and centred on the original feeding table.
Note:
You do not need to centre the original precisely. The exact position of the original is au-
tomatically detected by the scanner.
2.
Tap the 'Copy' tile. A window with a list of presets opens.
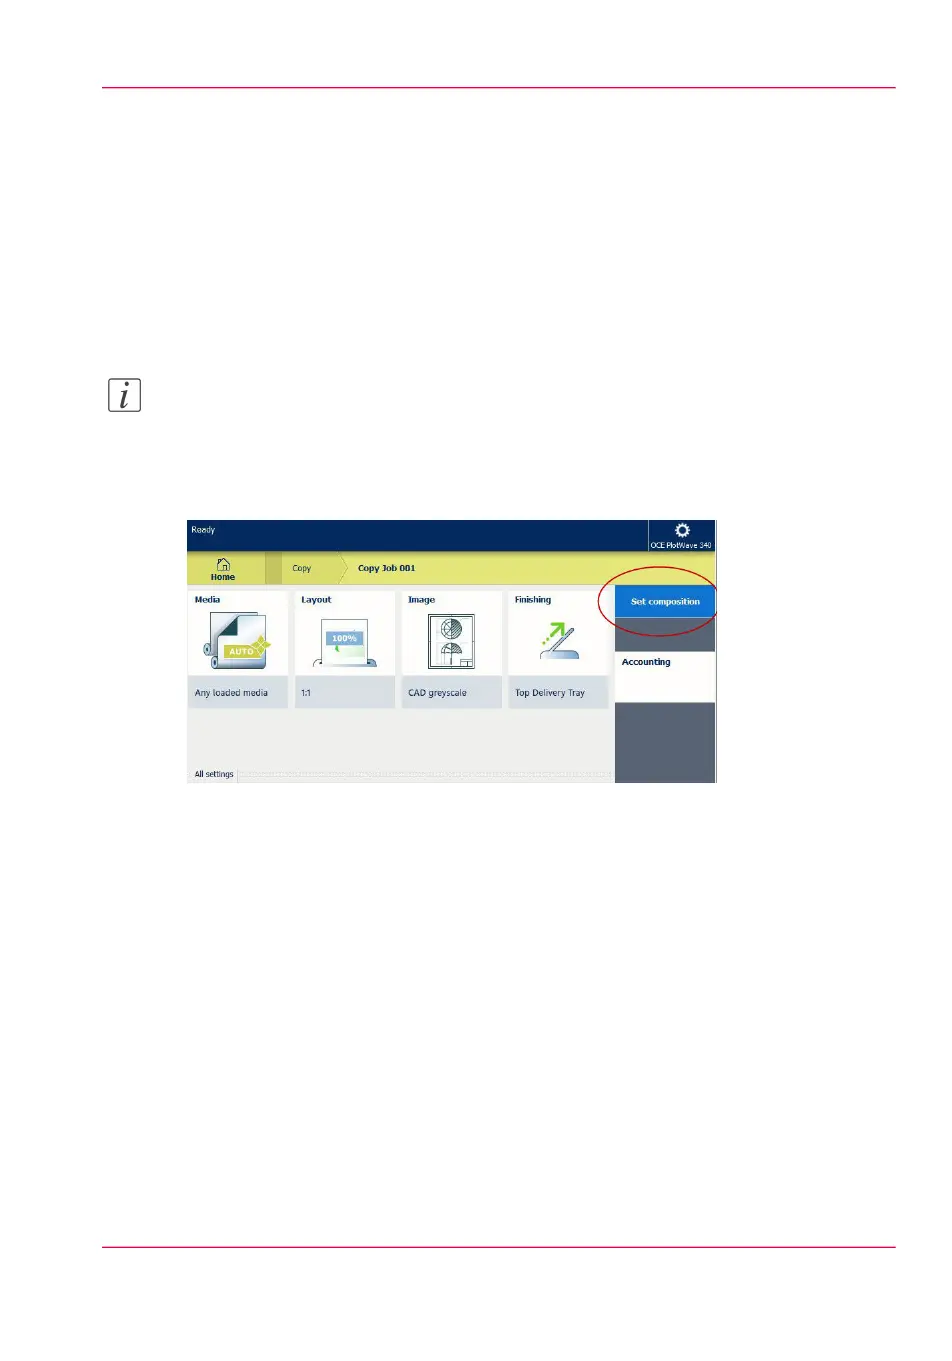
3.
In the job pane on the right, tap 'Set composition'.
The green button changes colour and displays 'Add'.
4.
Tap the button to start scanning.
5.
When the printer releases the original, insert the next original.
6.
Tap the green button. The scan is added to the set.
Repeat this step until your set is complete.
7.
Tap the 'Finish set' tile, to finish the set.
Result
The printer copies the set of originals.
Chapter 4 - Use the Printing System 225
Copy by set

Table of Contents

Other manuals for Oce PlotWave 340

Questions and Answers:

Question and Answer IconNeed help?

Do you have a question about the Oce PlotWave 340 and is the answer not in the manual?

Oce PlotWave 340 Specifications

General IconGeneral
Print Resolution600 x 1200 dpi
Maximum Roll Width36 inches
Memory2 GB
Hard Drive500 GB
Maximum Print LengthUnlimited
Maximum Print Width36 inches
Media HandlingRoll feed
ConnectivityEthernet 10/100/1000Base-T
Media Width297 - 914 mm
Media TypesRecycled
Media Thickness0.07 - 0.3 mm
Operating Systems SupportedWindows, Linux

Related product manuals