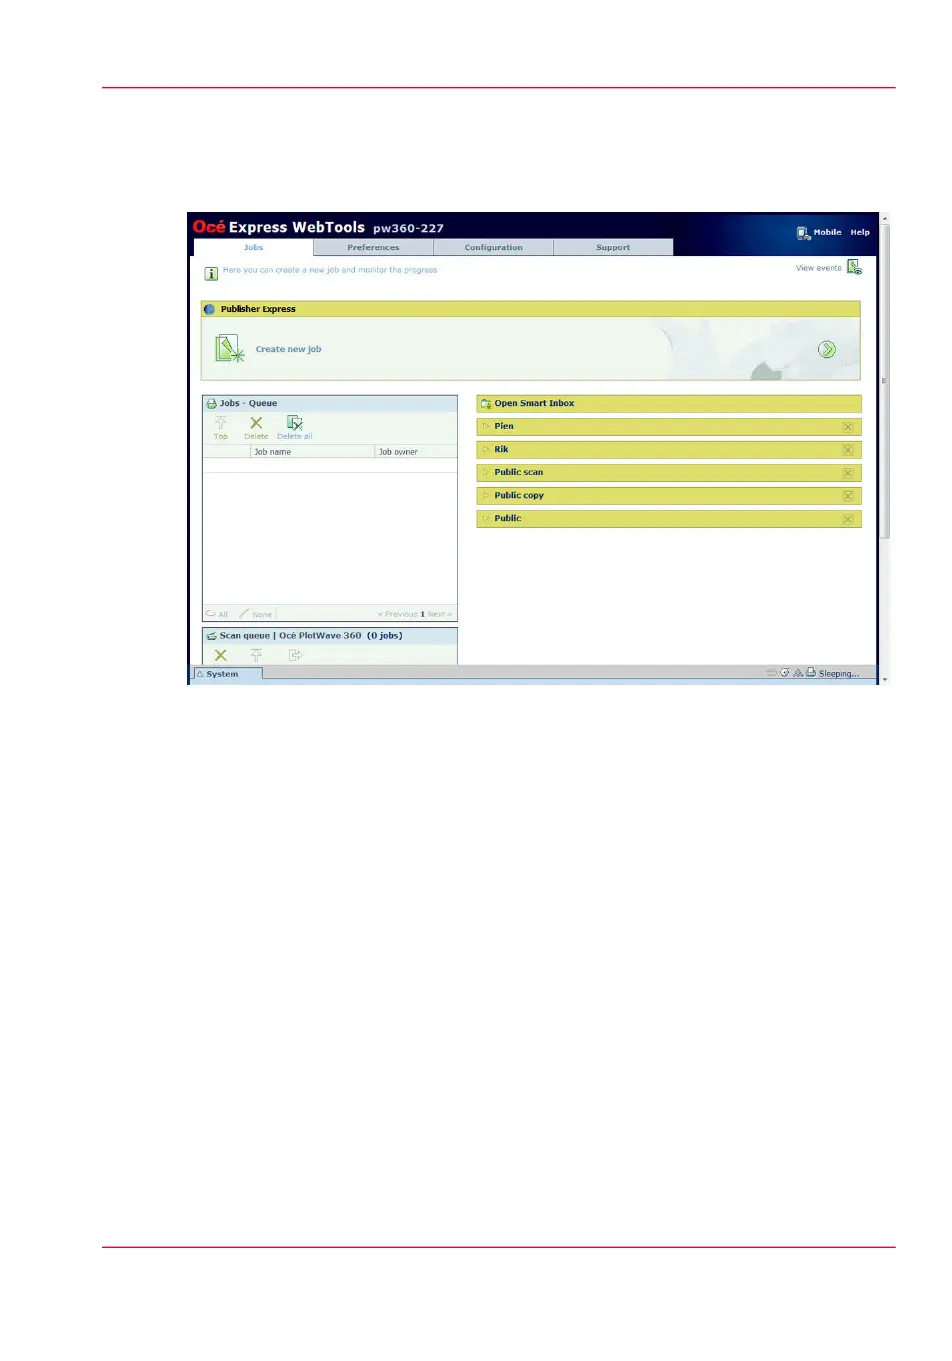
The 'Jobs' tab
Illustration
The 'Jobs' tab
Remote control on the system's workflow.
Create a new job in the Océ Publisher Express section.
•
When you want to submit a new job, click 'Create new job'. A new window opens,
here you can define some basic job settings and browse the file you want to print. For
more information, see ‘Use Océ Publisher Express to send a print job’ on page 189.
Monitor jobs in the Queue section.
•
In the 'Jobs - Queue' and Scan Queue you get an overview of the jobs waiting to be
printed, or scans waiting to be sent. The options listed above the Queue section allow
you to move a selected job to the top of the queue or to delete the job. When you
click 'Delete all' all jobs are deleted from the queue. For more information, see ‘The
'Smart Inbox' and the Queue concept’ on page 107.
Control your jobs in the 'Smart Inbox' section.
•
When you click 'Open Smart Inbox' and enter a name, the new Smart Inbox imme-
diately appears in the Smart Inbox overview. This Smart Inbox is used for print jobs,
Chapter 3 - Define your Workflow with Océ Express WebTools 79
The 'Jobs' tab