179
Make a copy and add a strip
Make a copy and add a strip
Introduction
You can use a strip to file a drawing. Use 'Add strip' to copy an original without a
strip and add a strip to the copy. Use 'Remove strip' to copy an original with a strip
and remove the strip from the copy. You can adjust a strip at the leading or trailing
side of a copy.
Before you begin
If you must enter the same value for a setting very often, you can set this value as the
default value for that setting in the Océ Settings Editor.
After you press the start key, the scanner operator panel always shows the job
number and status of the job. A copy job appears temporarily in the printer queue of
the Océ Queue Manager, a scan-to-file job appears in the selected destination of the
Océ Scan Manager.
How to make a copy and add a strip
1. Place the original face down and right aligned.
The scanner takes the original.
2. Define the job settings.
■ Select 'Copy' with the upper-left softkey.
The copy job templates appear.
■ Open a copy job template with a left softkey.
The top 5 settings display.
■ Scroll to 'Add strip' and open this setting with the left softkey.
■ Select 'Leading' or 'Trailing' with the left softkey and define the value with the
scroll wheel or numeric keys.
[65]
3. Define the number of copies if necessary and press the green start key.
Note: To measure the size of a strip you can use the ruler available at the scanner
(metric).
Result
The Océ TCS500 adds a trailing or leading strip from the copy.
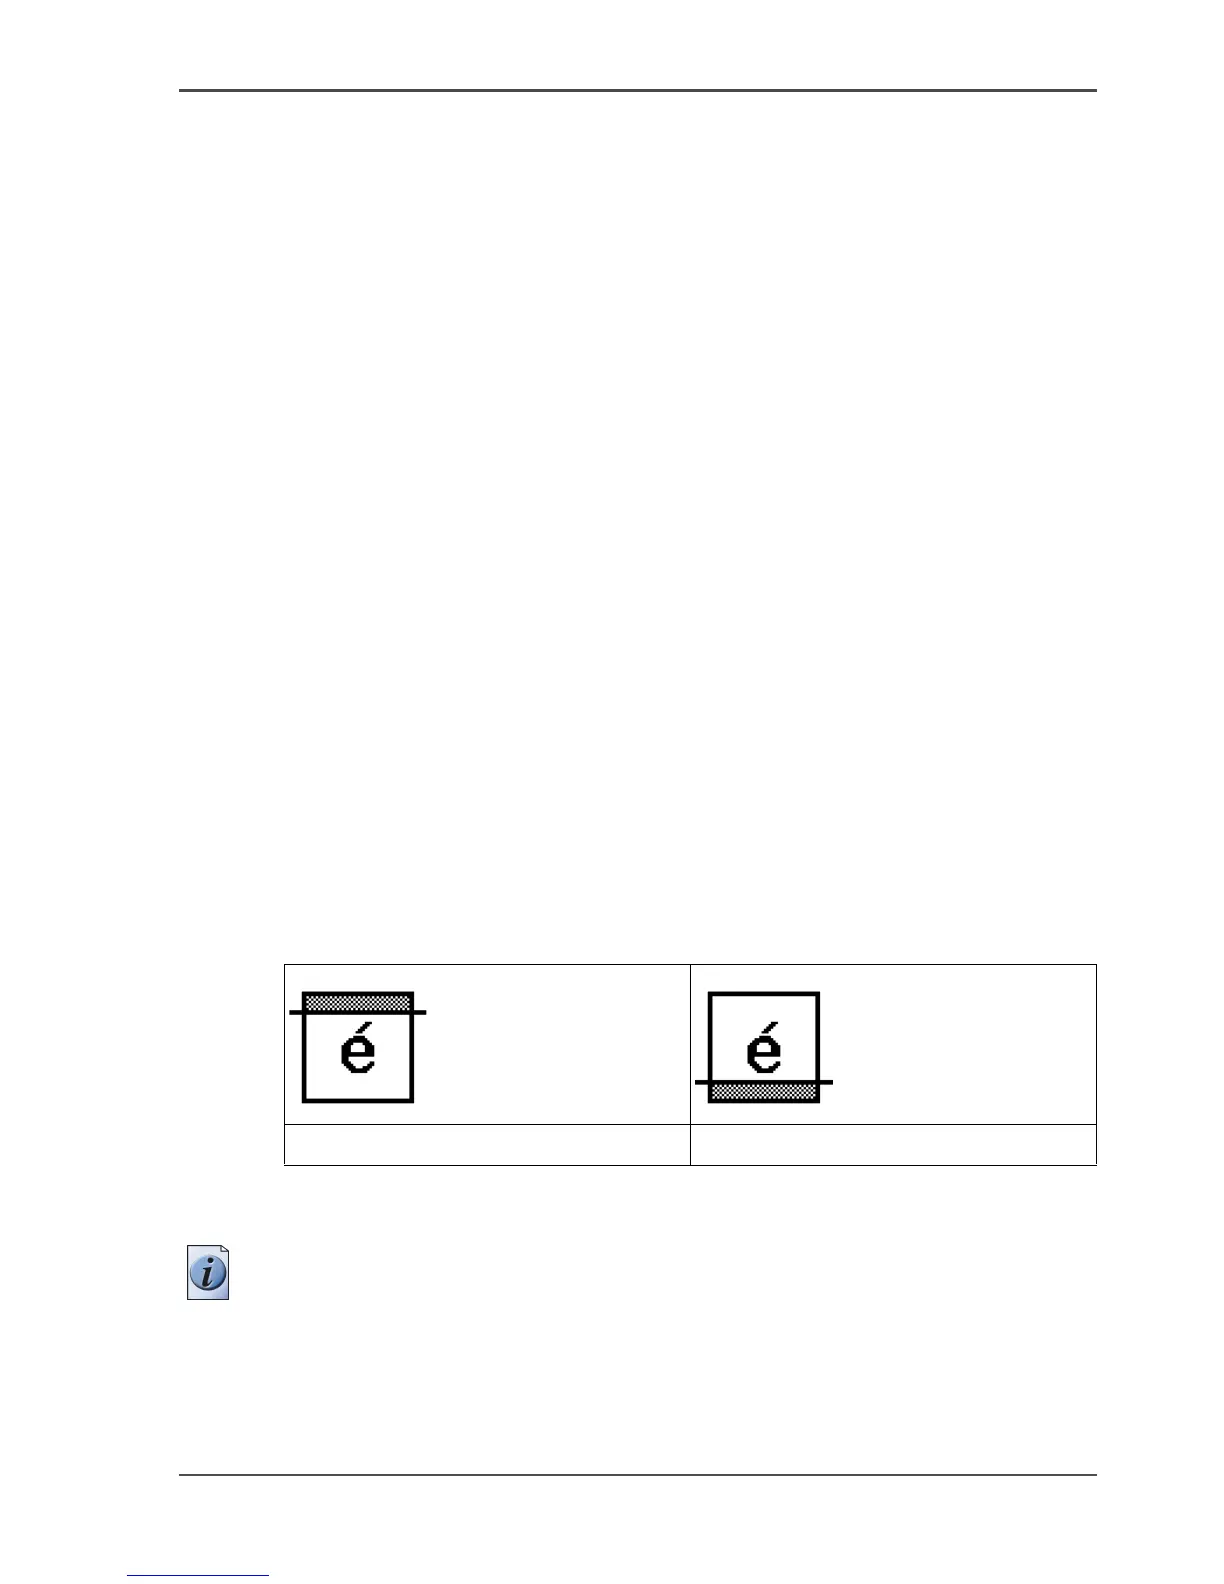
[151] [152]
The 'Leading' strip The 'Trailing' strip