Chapter F - ADJUSTMENTS
F-6 Planmeca Compact i
MECHANICAL ADJUSTMENTS
Technical Manual
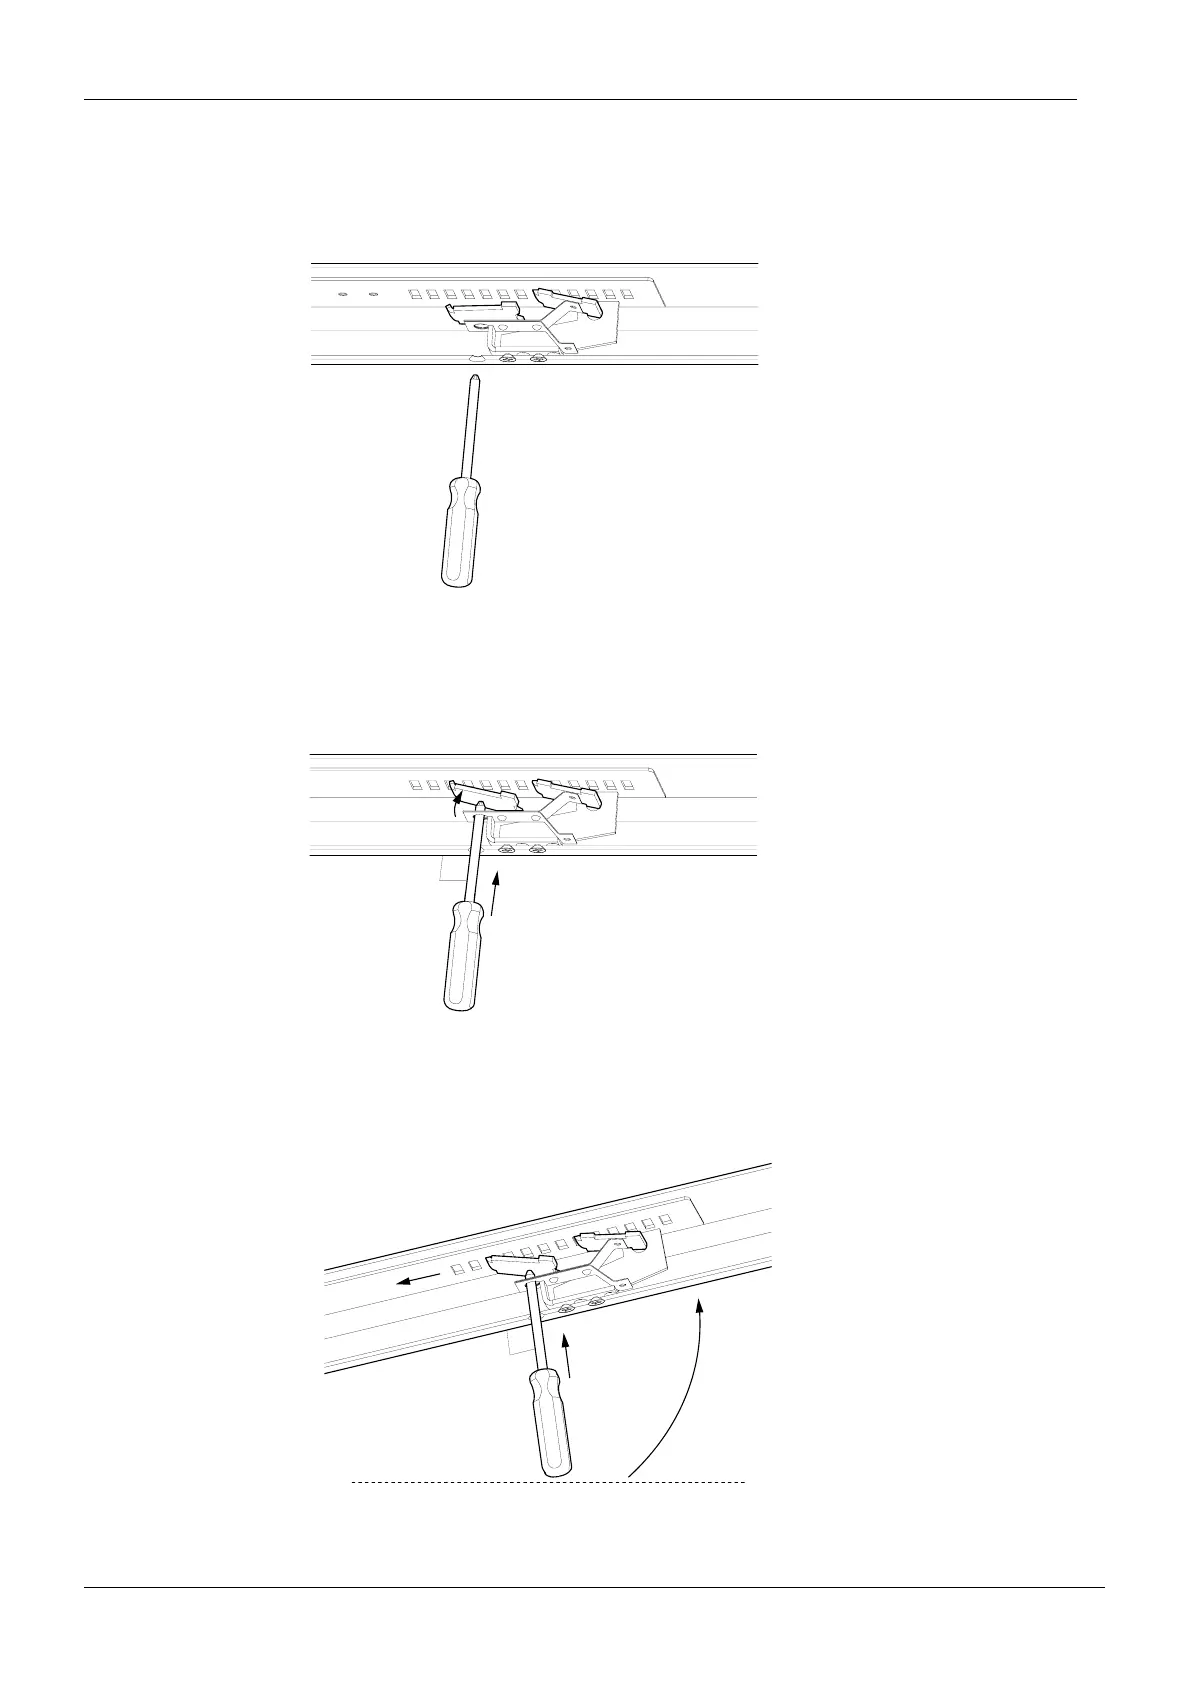
Decreasing tension of the gas spring (less load)
D-1) Move the console arm to horizontal position (or a little below the horizontal plane).
D-2) Insert a screwdriver into the arm (through the opening at the under side of the arm) and
push the adjusting hook (inside the arm) into a groove of the adjustment plate. Make
sure that the screwdriver goes through the hole in the y-spring. Insert the screwdriver
into the arm at the right angle (90°) compared to the arm.
D-3) Hold the screwdriver inside the arm in the same position compared to the arm and lift
the arm to its highest position.
varsikuvaD-1.eps
The spring support is holding the gas spring at the
preset tension. Adjusting hook is hanging freely.
90˚
varsikuvaD-2.eps
Adjusting hook goes into a groove of the adjustment plate.
90˚
varsikuvaD-3.eps
Both the adjusting hook and the spring support
stay in the grooves of the adjustment plate.