Chapter F - ADJUSTMENTS
Planmeca Compact i F-5
MECHANICAL ADJUSTMENTS
Technical Manual
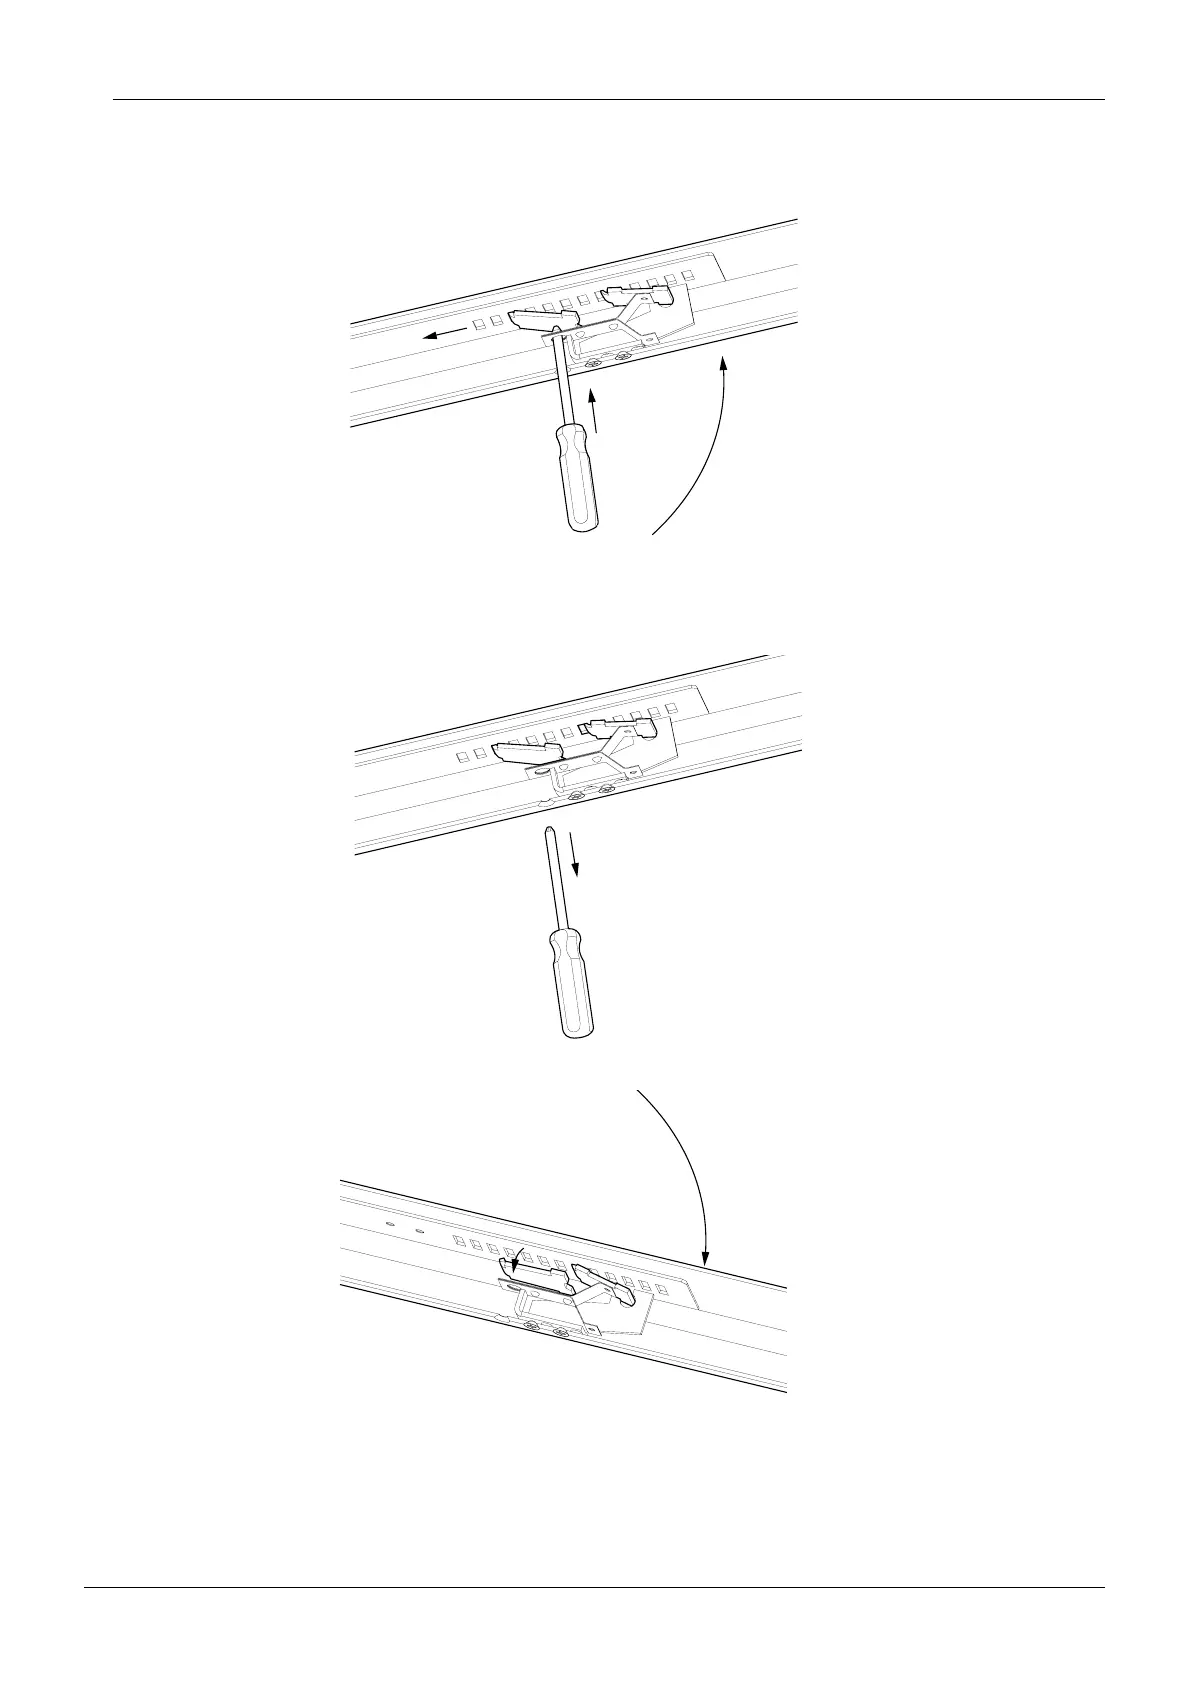
I-3) Hold the screwdriver inside the arm and lift the arm to its highest position, while
keeping the screwdriver in the same position compared to the arm.
I-4) Remove the screwdriver from the arm.
I-5) Lower and lift the arm a couple of times.
I-6) Repeat the procedure if necessary. There are totally seven steps to increase the
tension of the gas spring (from the fully decreased spring).
varsikuvaI-3.eps
Adjusting hook moves the adjustment plate away from
the instrument console and the hook of the spring
support moves to the next groove of the adjusting plate.
varsikuvaI-4.eps
The adjusting hook stays in the groove of
the adjustment plate.
varsikuvaI-5.eps
The adjusting hook releases from the groove. The spring
inside the adjustment mechanism pushes the spring support
into a groove of the adjustment plate. The tension of the gas
spring is now increased by one step.