Polycom RealPresence Collaboration Server (RMX)1500/2000/4000 Deployment Guide for Maximum Security Environments
1-4 Polycom, Inc.
Procedure 1: Hardware Installation and Setup
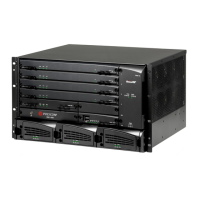
In a well ventilated area, mount the RMX 1500/RMX 2000/RMX4000 unit in a 19” rack. It is
important to adhere to the Site Safety Requirements as described in the RealPresence
Collaboration Server 1500/2000/4000 Hardware Guides, "Site Safety Requirements” on page 1-5.
The following procedures have to be performed to install the RMX System in your site:
• Installing the RMX in a rack or as a standalone. When installing the RMX unit on a rack,
this process is done in two stages:
— Installing the telescopic rail runners on the rack. This stage is identical to all RMX
system types.
— Mounting the RMX on the rack using the previously installed rail runners
• Connecting the RMX to the power source
• Connecting the network (LAN and ISDN) cables to the RMX.
To maximize conferencing performance, especially in high bit rate call environments, a 1Gb
connection is recommended for all RMX types.