Chapter 1-First Time Installation and Configuration
Polycom, Inc. 1-9
4 Repeat steps 2 and 3 for the right rack rail runner.
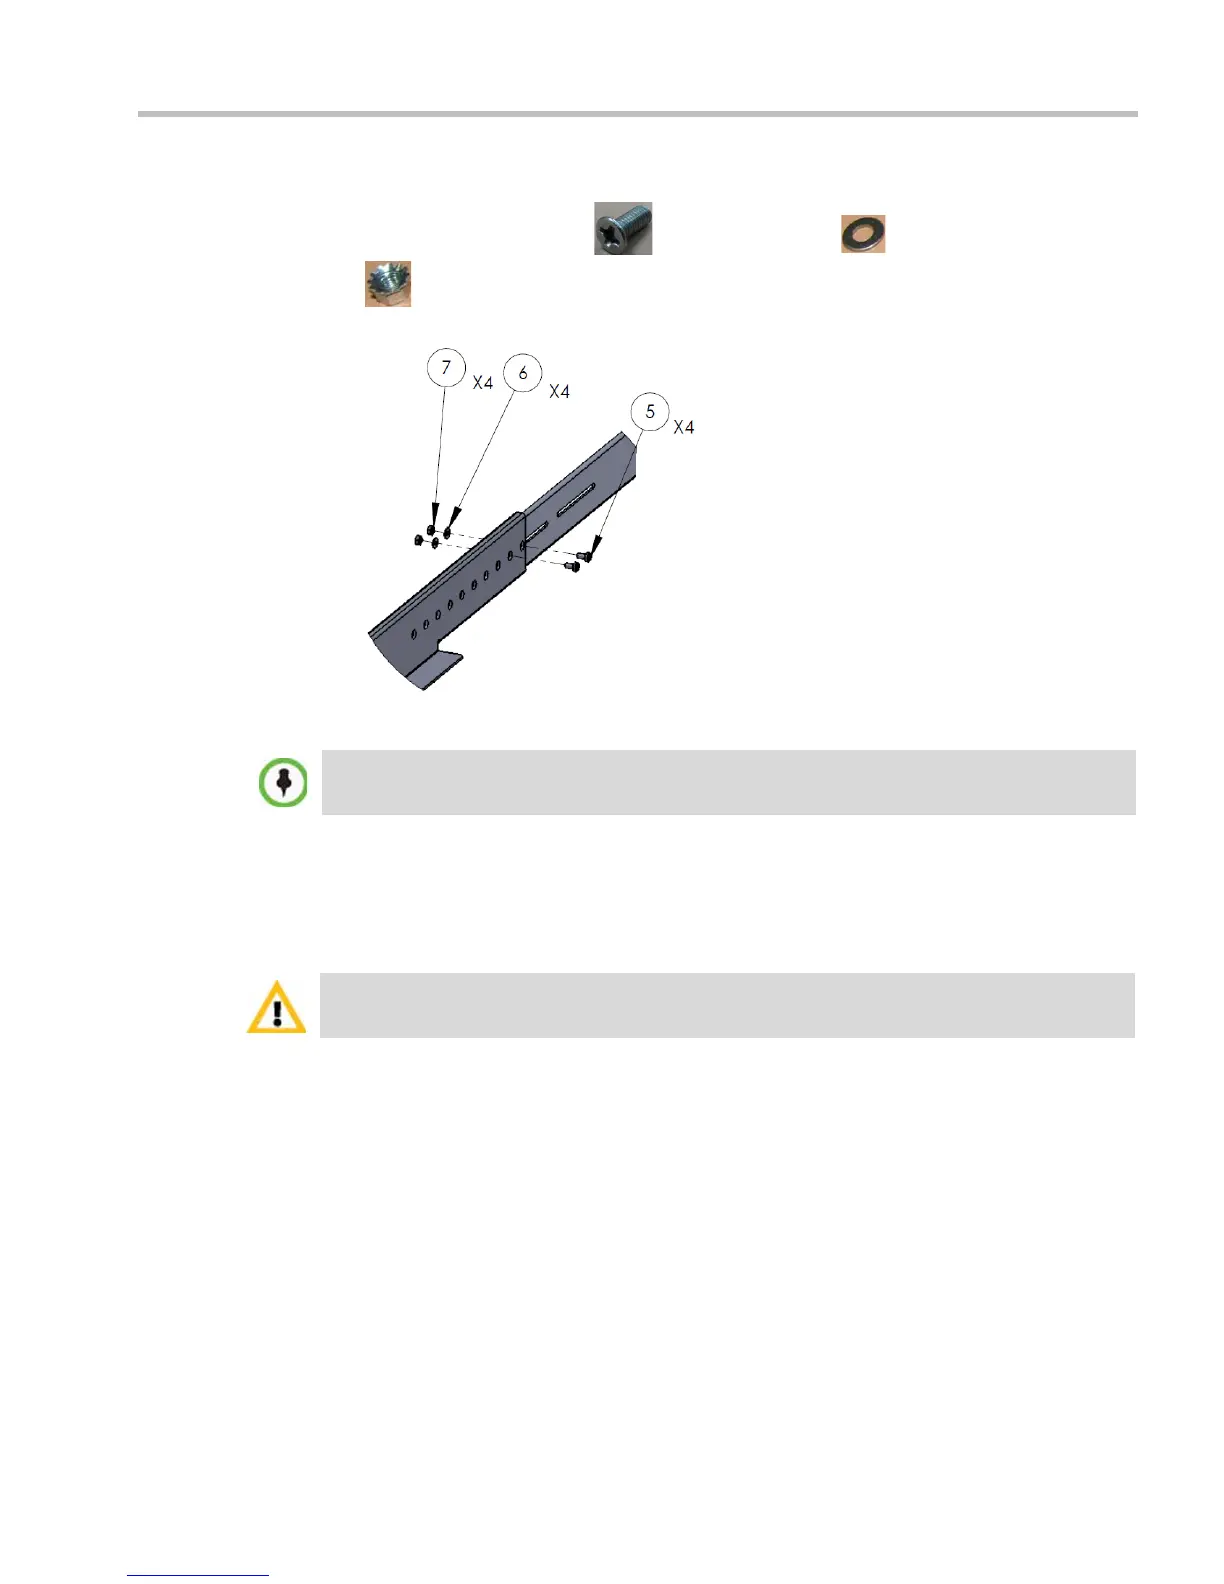
5 Install the flat head screw (item 5), flat washer (item 6) and nut spring
(item 7) in the middle of the telescopic rack rail runner for added stability as
shown in Figure 1-4.
Figure 1-4 Detail of Left Rail Runner (front internal view)
6 Repeat step 5 for the right rack rail runner.
Installing the RealPresence Collaboration Server (RMX) 1500
The following procedures have to be performed to install the RMX 1500 in your site:
• Optional. Installing the RTM ISDN card on the RMX (Optional)
• Installing the RMX in a rack or as a standalone
• Connecting the RMX to the power source
• Connecting the network (LAN, IP and ISDN) cables to the RMX.
Optional. Installing the RTM ISDN 1500 Card on the RMX 1500
If the ISDN option was purchased with your RMX, the ISDN card is shipped separately and
must be manually installed into the rear of the RMX 1500. It is recommended to install the
ISDN card before the RMX 1500 is placed in a rack.
Removing the blank cover from the rear of the RMX 1500
1 Ensure that the power switch on the RMX is turned OFF (O).
2 Remove the cover by unscrewing the captive screws that fasten the card to the MCU.
The number of screws to install depends on the rack width.
For detailed instructions, precautions and requirements for installing the RMX 1500 refer to the
RealPresence Collaboration Server (RMX) 1500 Hardware Guide.