21
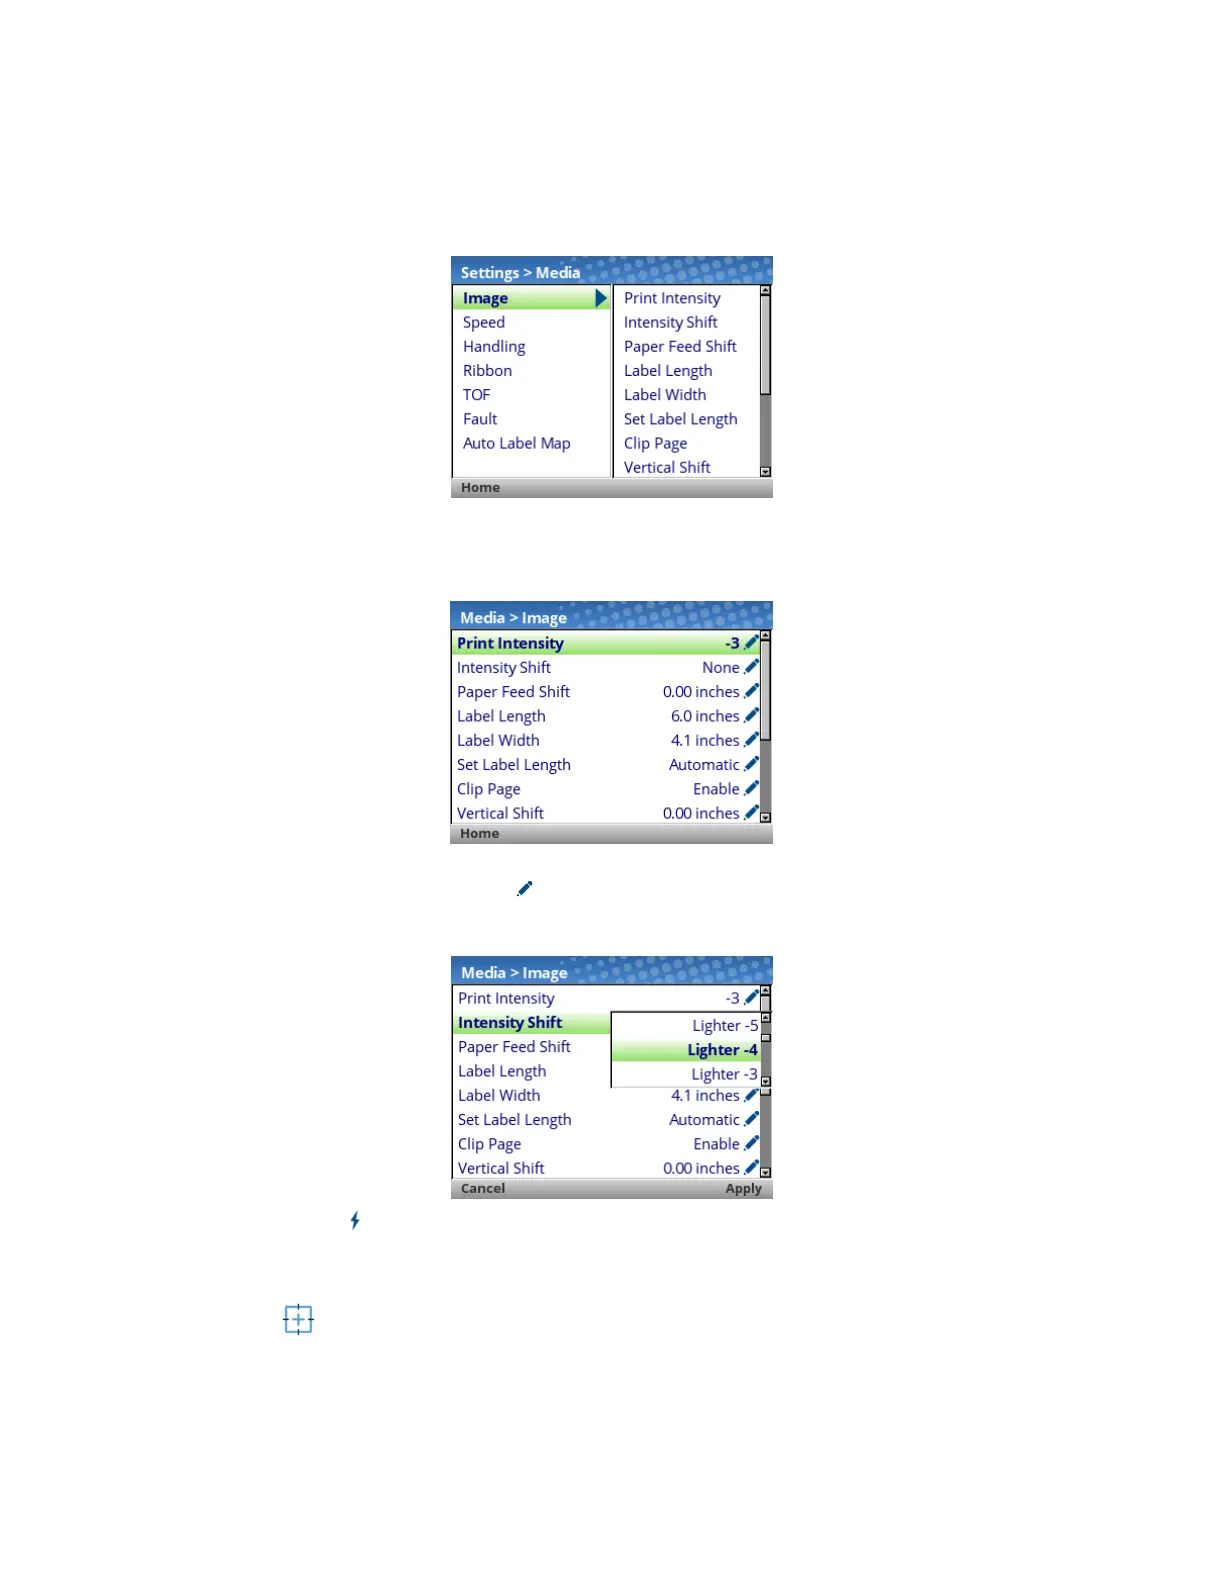
When an ICON is selected, the user moves into the View Level in which their screen is divided with the
submenus on the left and the menus on the right. As they traverse the submenus using the up/down arrow
keys, the menus on the right change so that users can quickly see the menu contents.
To view the full contents of a particular subsection or edit their menus, the user can either press ENTER or
use the RIGHT ARROW key to get into the Edit Level. Conversely, the user can hit the LEFT ARROW key
to return to the previous screen.
When in the Edit Level, the user can scroll the menus and their values using the up/down arrow keys. The
user can edit any menu that has the icon by pressing the ENTER key, changing the value, and
confirming their change using the “Apply” soft key. There is also a “Cancel” soft key if the user does not
want to accept the change.
If the menu has a bolt icon, this is an executable menu and pressing the ENTER key will result in a
particular action (e.g., running a print test, clearing statistics). If the menu does not have any icon, then it is
a read-only menu and pressing ENTER key will not have any effect.
Calibration
Calibration must be performed whenever new media or ribbon is installed or any configuration parameter
that affects sensors is modified. Selecting this shortcut ICON and pressing the ENTER key will activate the
Auto-Calibrate function, also available in Sensors > Calibrate > Auto Calibrate.