277
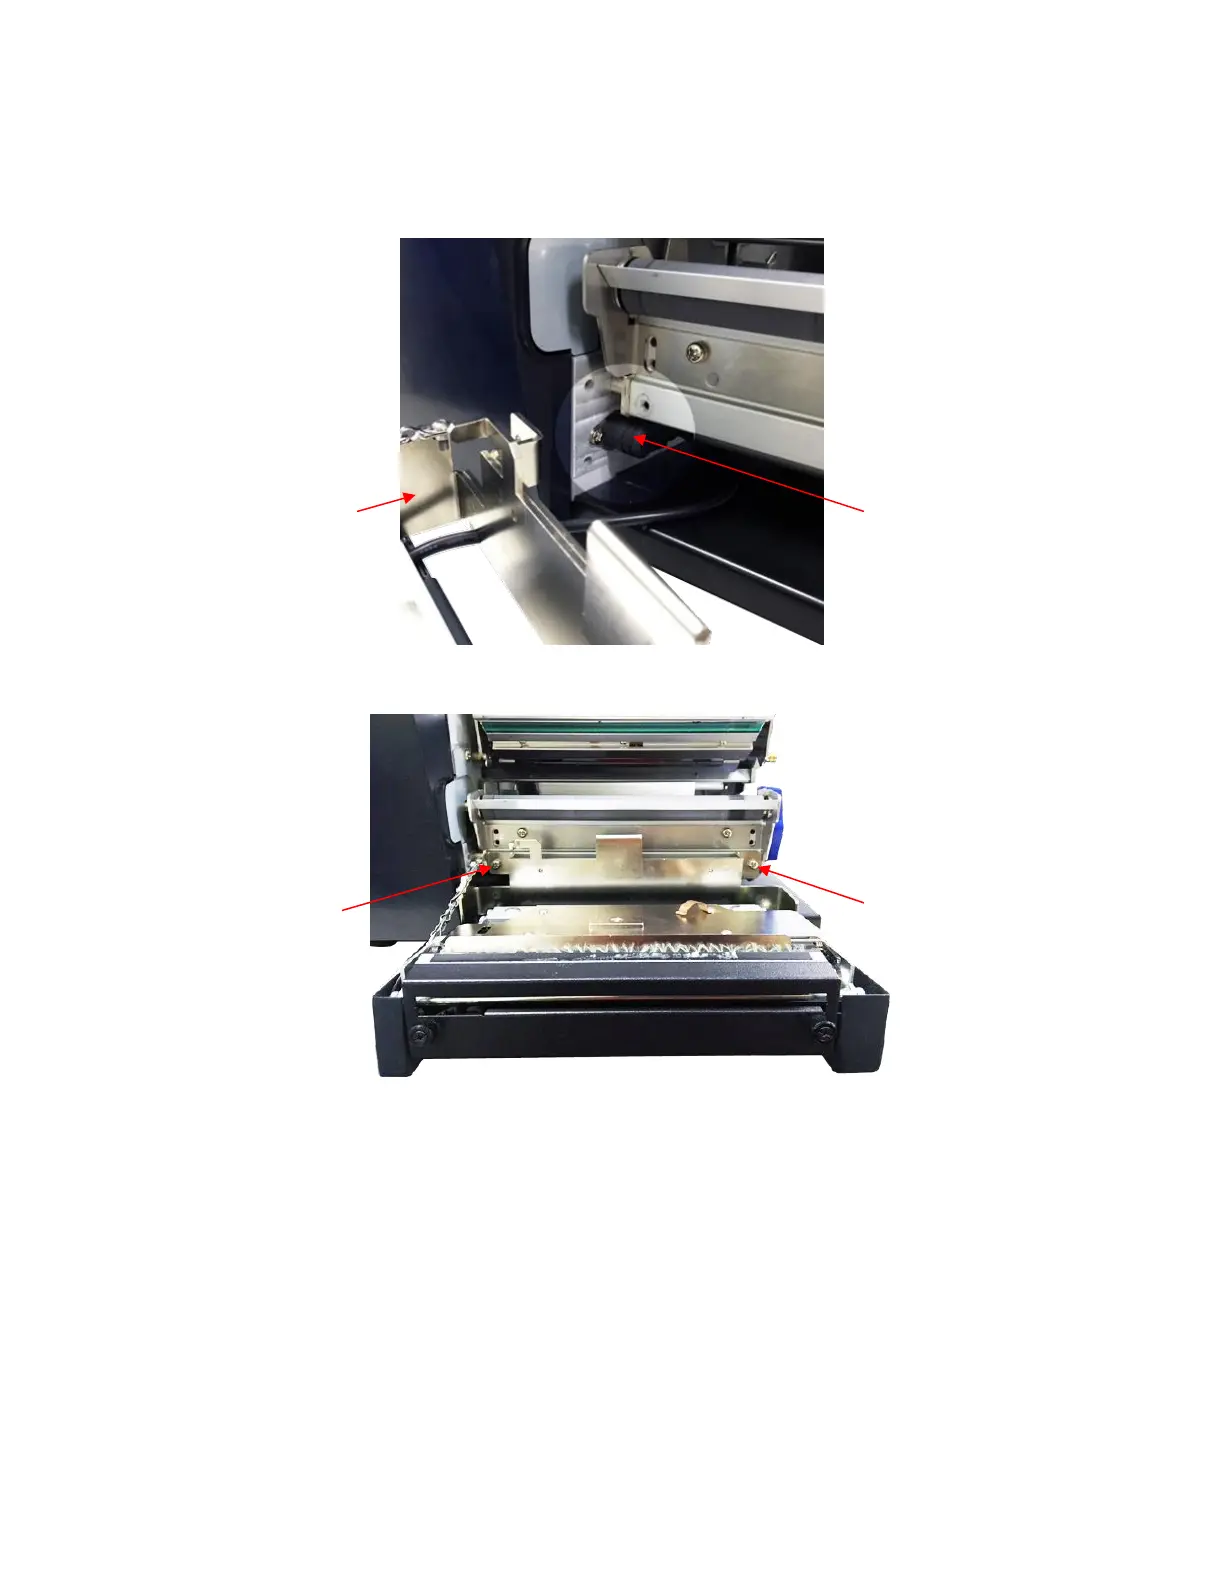
2. Plug the cutter assembly mini DIN cable connector into the printer receptacle (the flat section of the
plug must be at the top).
3. Place the cutter assembly in position. Use the two screws provided in the cutter kit to install the
cutter assembly on the lower support assembly.
4. Close the cutter assembly. NOTE: The cutter must be in the closed (up) operating position before
the printer is powered on or an “OPTION NOT INSTALLED” message will display when “Cut”
Media Handling mode is selected.