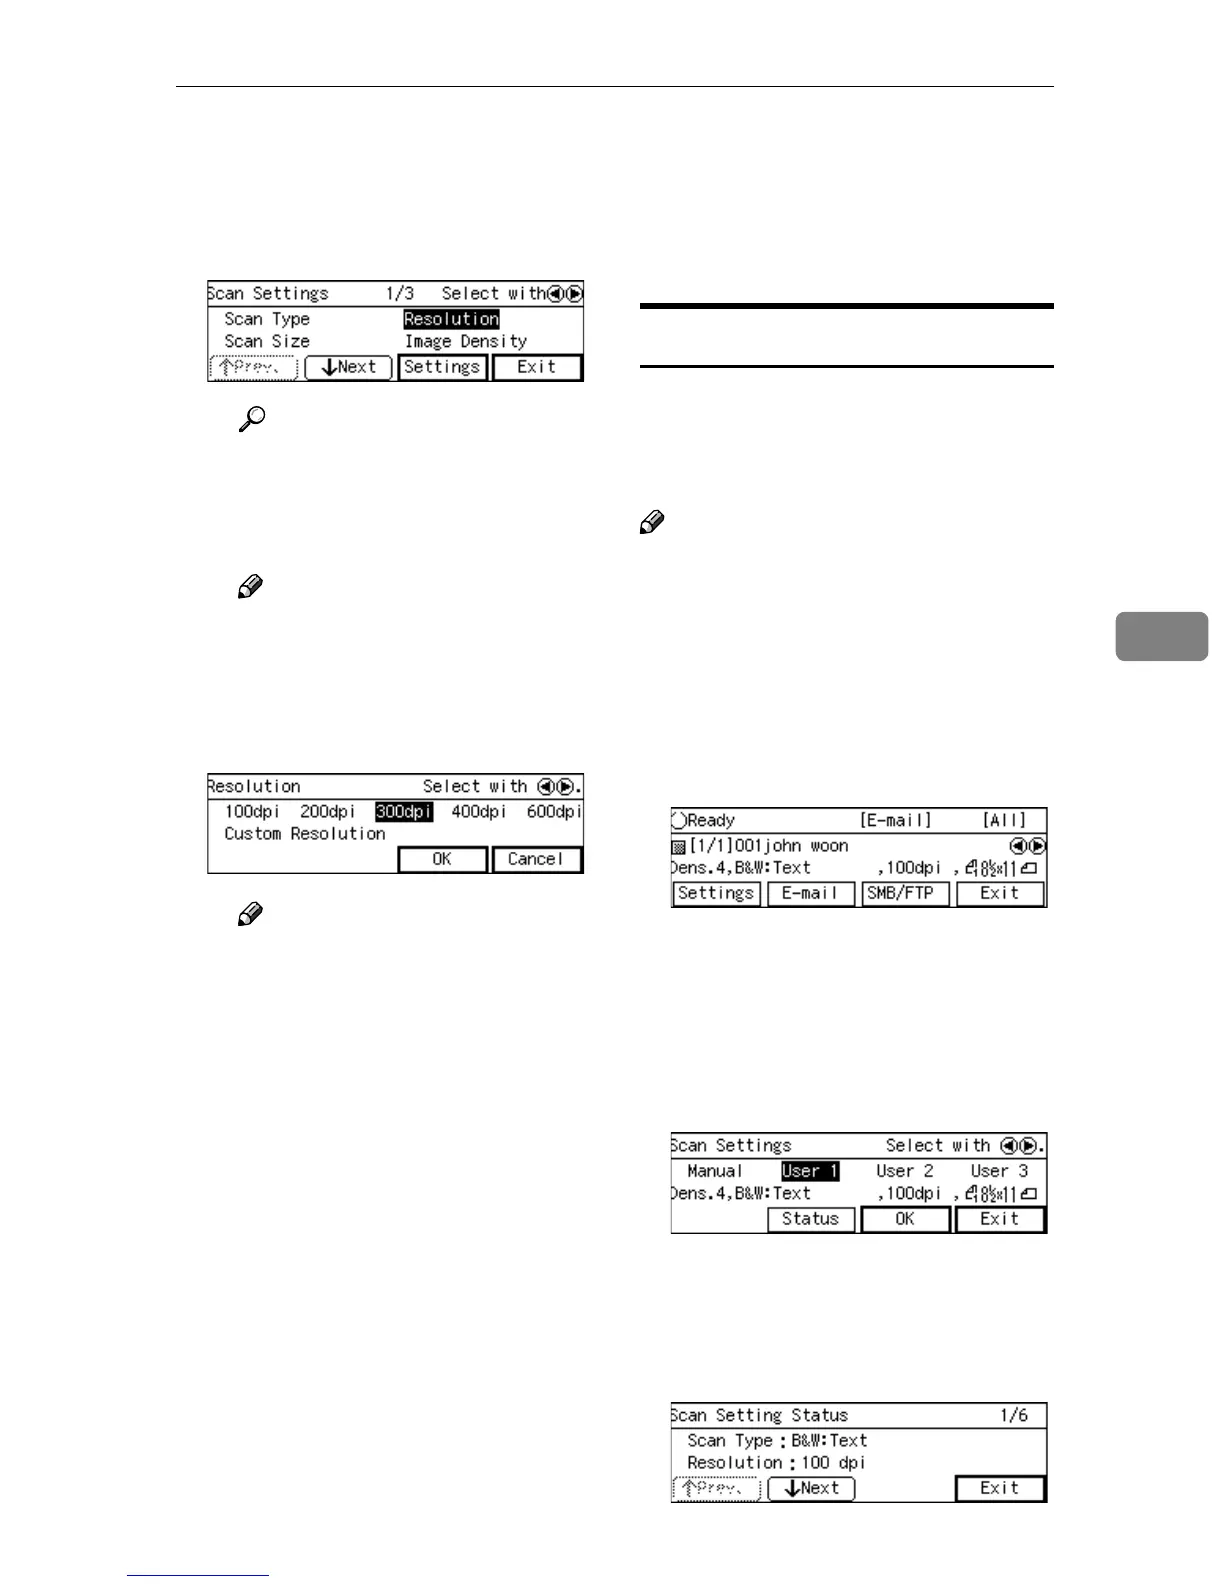
Making Scan Settings
137
5
B Use [↓
↓↓
↓Next] or [↑
↑↑
↑Prev.] to scroll
through the pages, use the {
{{
{1
11
1}
}}
}
or {
{{
{0
00
0}
}}
} key to highlight the set-
up item you want to change,
and then press [Settings].
Reference
See p.75 “Information to Reg-
ister in [Scan Settings]” for
details about each of the set-
up items.
Note
❒ For example, [Resolution] is
selected here.
C Highlight the option you want
to select by using the {
{{
{1
11
1}
}}
} or
{
{{
{0
00
0}
}}
} key, and then press [OK].
Note
❒ Pressing [Cancel] discards the
selected option, and returns
to the previous screen.
❒ When you select “Custom
Resolution” for [Resolution]
and/or “Custom Area Set-
ting” for [Scan Size], use the
number keys to specify the
values.
D Repeat steps B
BB
B and C
CC
C as nec-
essary.
E When you are finished, press
[Exit].
This returns to the Scan Settings
screen.
F Press [OK].
This returns to the E-mail/Send
File standby screen, and the cur-
rent scan settings are displayed
on the third line of the screen.
Confirming the Scan Settings
You can confirm the current scan set-
tings, or the scan settings that you
have registered to [Default], [User 1],
[User 2] or [User 3].
Note
❒ You can confirm the [Default] set-
tings by selecting [Manual] in step B
below, unless you configure the
scan settings manually. After you
have manually configured the scan
settings, selecting [Manual] displays
the current settings.
A
AA
A
Press [Settings].
The Scan Settings screen is dis-
played.
B
BB
B
Use the {
{{
{1
11
1}
}}
} or {
{{
{0
00
0}
}}
} key to high-
light [Manual], [User 1], [User 2] or
[User 3] on the screen, and then
press [Status].
The status screen appears.
C
CC
C
Use [↓
↓↓
↓Next] and [↑
↑↑
↑Prev.] to display
the setting of the setup item you
want to confirm.