Configuring the Scanner Settings
86
3
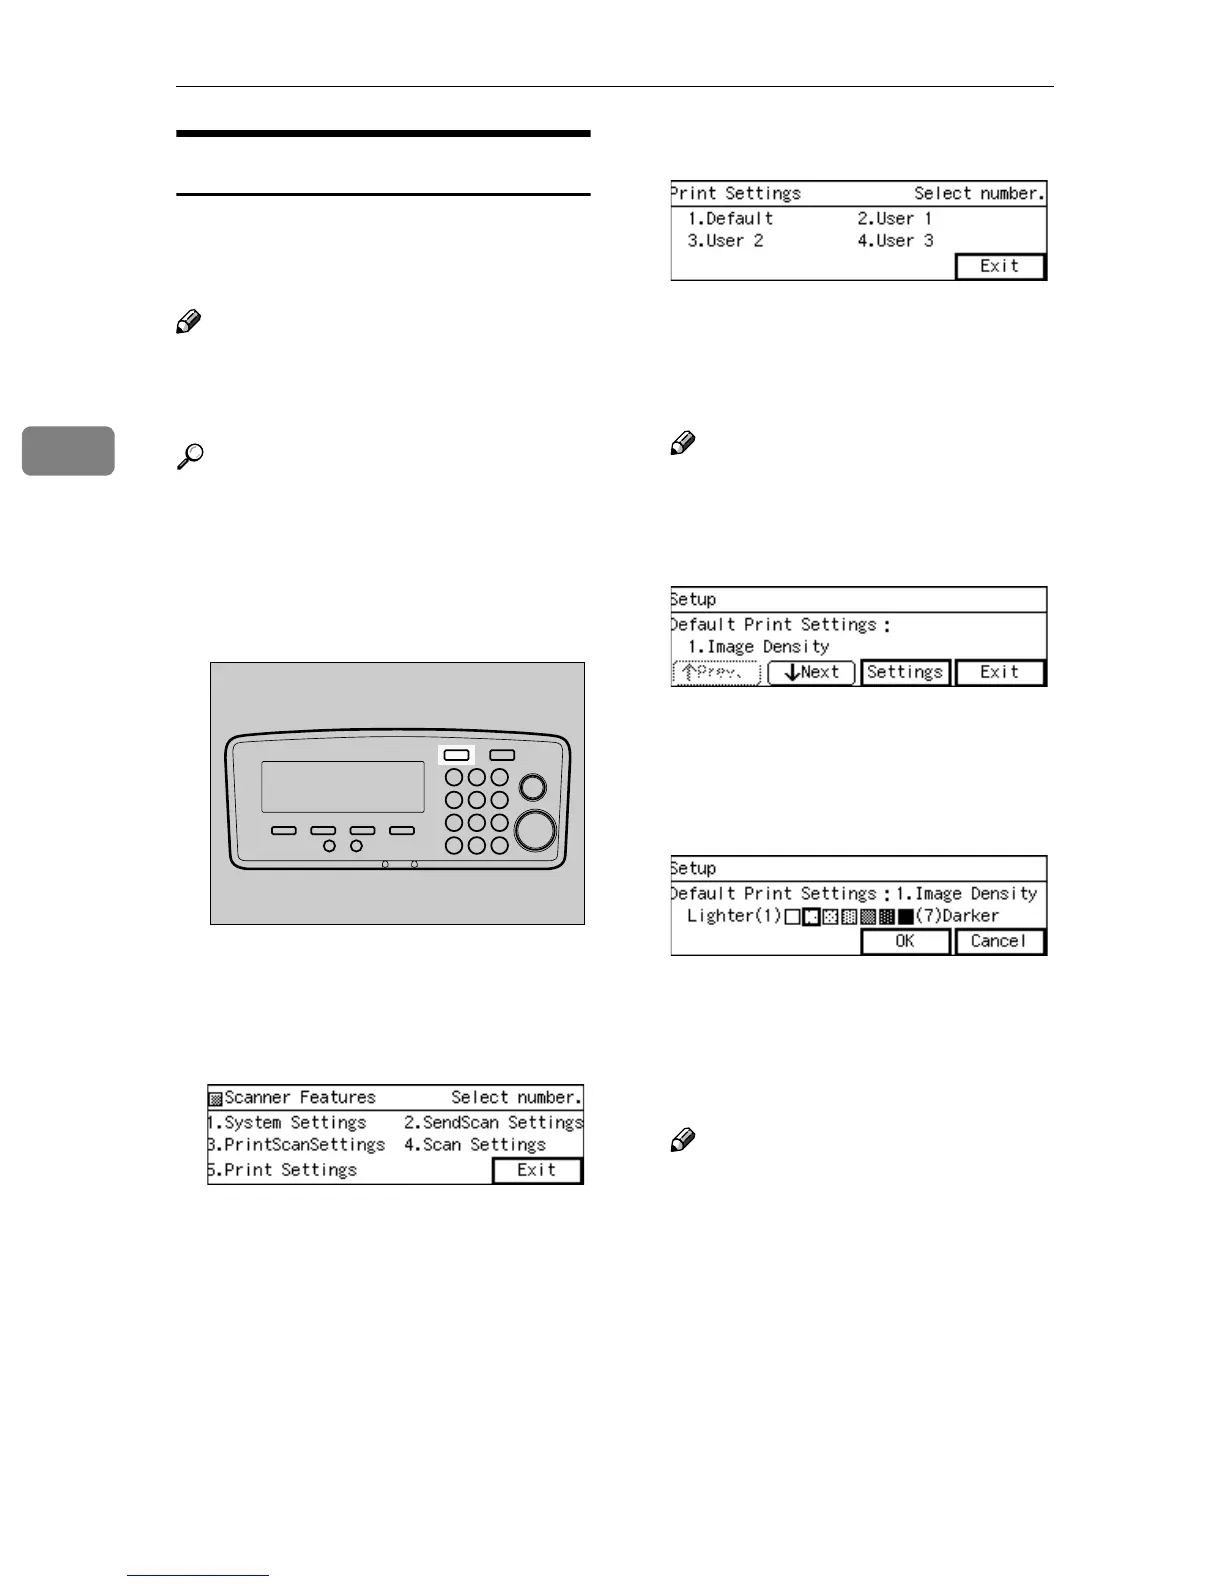
Registering [Print Settings]
Follow the steps below to configure
and register Print Settings using the
control panel of this machine.
Note
❒ You can also configure these set-
tings using the Web Status Moni-
tor.
Reference
See p.14 “Using Keys Displayed
on the Screen” for information
about how to select items dis-
played on the screen.
A
AA
A
Press the {
{{
{User Tools}
}}
} key.
The Scanner Features menu is dis-
played.
B
BB
B
Press the {
{{
{5}
}}
} key.
The Print Settings menu is dis-
played.
On this menu, you can select a
memory area (“Default”, “User 1”,
“User 2”, or “User 3”) for register-
ing the Print Settings configura-
tion.
C
CC
C
Press the {
{{
{1}
}}
} key.
The Default Print Settings menu is
displayed, and “1. Image Density”
appears as the setup item currently
selected.
Note
❒ Pressing [Exit] returns to the
parent menu screen.
D
DD
D
Press [Settings].
The setting screen for “1. Image
Density” appears.
E
EE
E
Use the {
{{
{1
11
1}
}}
} and {
{{
{0
00
0}
}}
} keys to
highlight the setting you want.
F
FF
F
Press [OK].
This saves the setting you have se-
lected, and returns to the Default
Print Settings menu.
Note
❒ Pressing [Cancel] discards the
selected setting, and returns to
the Default Print Settings menu.
G
GG
G
Press [↓
↓↓
↓Next].
“2. Original Size” appears as the
setup item currently selected.
AFJ004S