Configuring the Scanner Settings
90
3
To access this machine from a Web browser
A
AA
A
Start up a web browser on a client computer.
B
BB
B
Input “http://xxx.xxx.xxx.xxx/” (“xxx.xxx.xxx.xxx” is the IP address for this
machine) in the web browser’s address bar, and then press the {
{{
{Enter}
}}
} key.
The top page of the “Web Status Monitor” is displayed on the web browser,
which means that you succeed in accessing to this machine.
Note
❒ The Web Status Monitor is embedded in this machine, so it is not necessary
to install it to a client computer. You can use the Web Status Monitor to
make settings or administering the status of this machine.
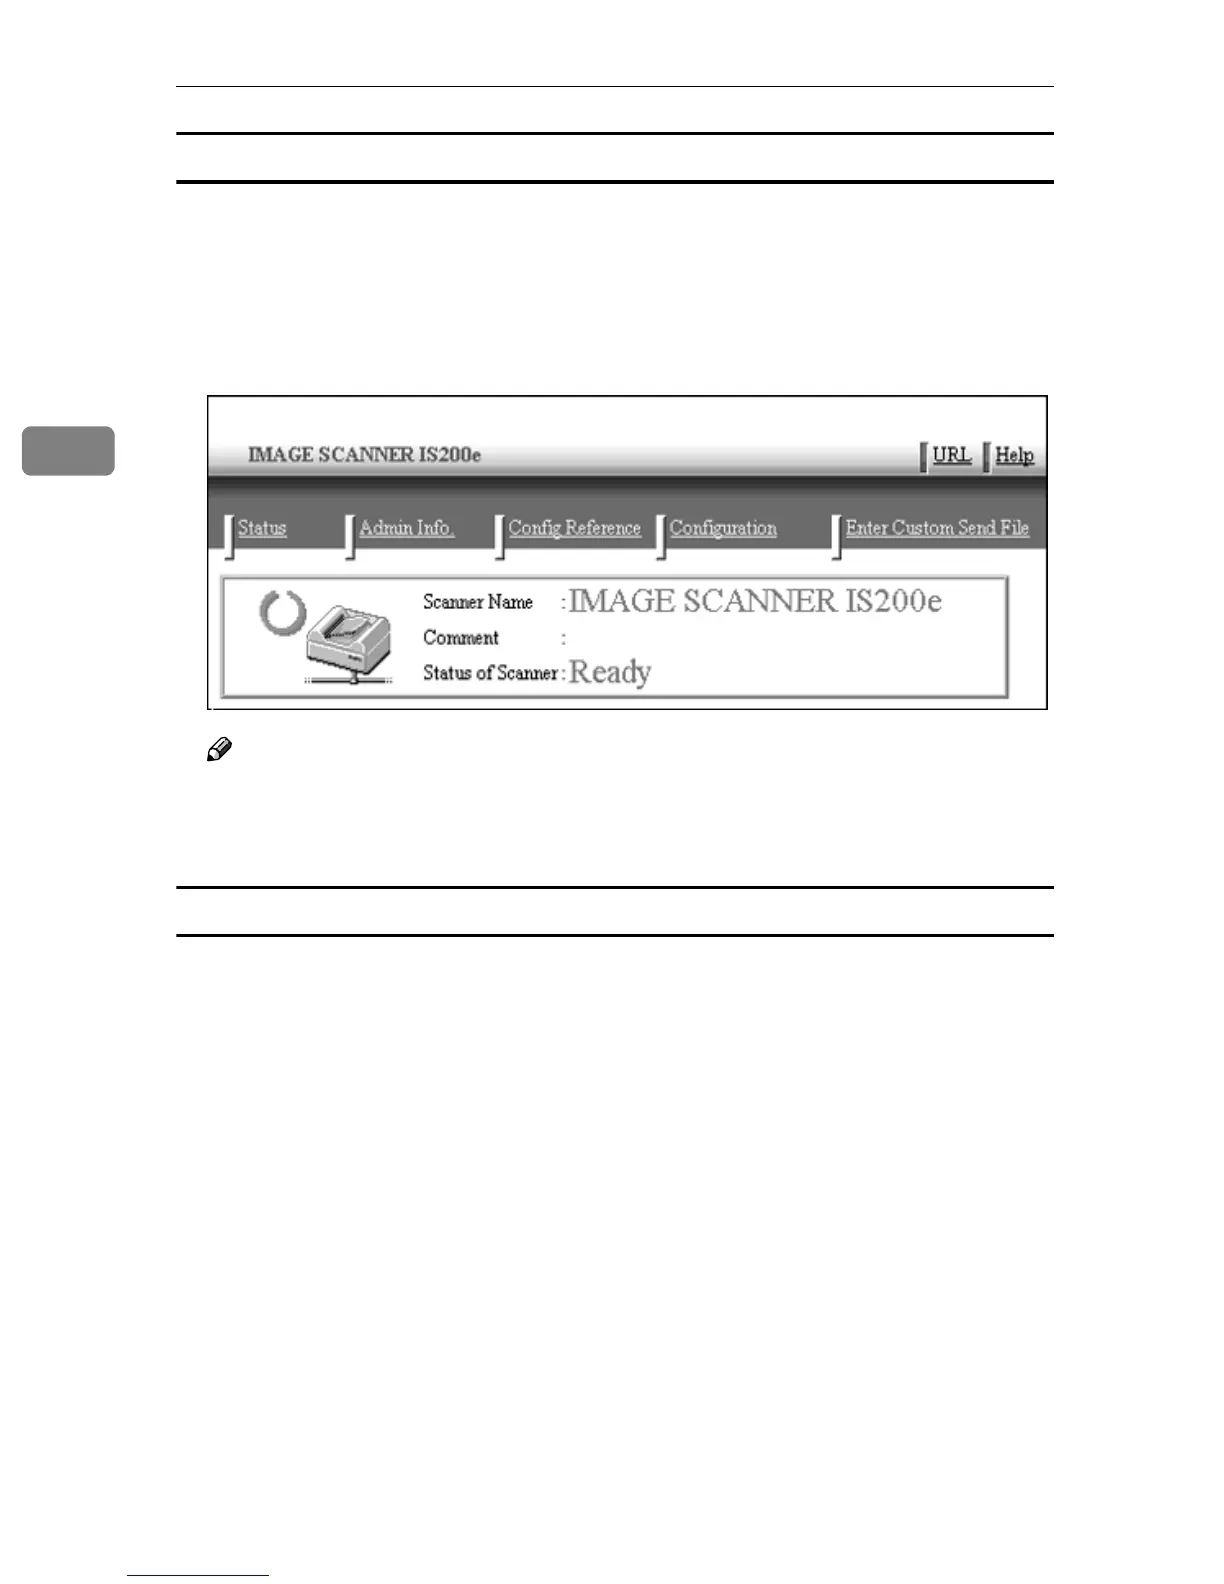
General guide to the Web Status Monitor
There are five main menus on the Web Status Monitor; namely, [Status], [Admin
Info.], [Config Reference], [Configuration] and [Enter Custom Send File].
In [Configuration] particularly, there are sub-menus that you can configure this
machine to optimally utilise according to your needs.
For details about configuring the respective menus, refer to the [Help] menu.
The figure below shows a screen of the Web Status Monitor when the following
menus are selected: [Configuration] main menu → [Basic Settings] sub-menu →
[Scanner] sub-menu.