Printing Scanned Image Files
166
8
Note
❒ Press [Cancel] if you want to use
the settings you have registered
to [Default].
❒ You cannot edit and save the
settings that you have regis-
tered to [User 1], [User 2] and [Us-
er 3] here. If you want to use one
of the user settings while chang-
ing some of them, recall the user
setting you want to use by high-
lighting it and pressing [OK]
first. And then, change the set-
tings by selecting [Manual].
To recall a registered print
settings
A Use the {
{{
{1
11
1}
}}
} or {
{{
{0
00
0}
}}
} key to
highlight [User 1], [User 2] or
[User 3] on the screen, and then
press [OK].
This returns to the Print Scan
Ready screen, and the corre-
sponding print settings are dis-
played on the third line of the
screen.
To configure print settings
manually
A Use the {
{{
{1
11
1}
}}
} or {
{{
{0
00
0}
}}
} key to
highlight [Manual] on the
screen, and then press [Set-
tings].
The first page of the Print Set-
tings screen ( Print Settings 1/2)
is displayed.
B Use the {
{{
{1
11
1}
}}
} or {
{{
{0
00
0}
}}
} key to
highlight the setup items you
want to change, and then press
[Settings].
Reference
See p.84 “Information to Reg-
ister in [Print Settings]” for
details about each of the set-
up items.
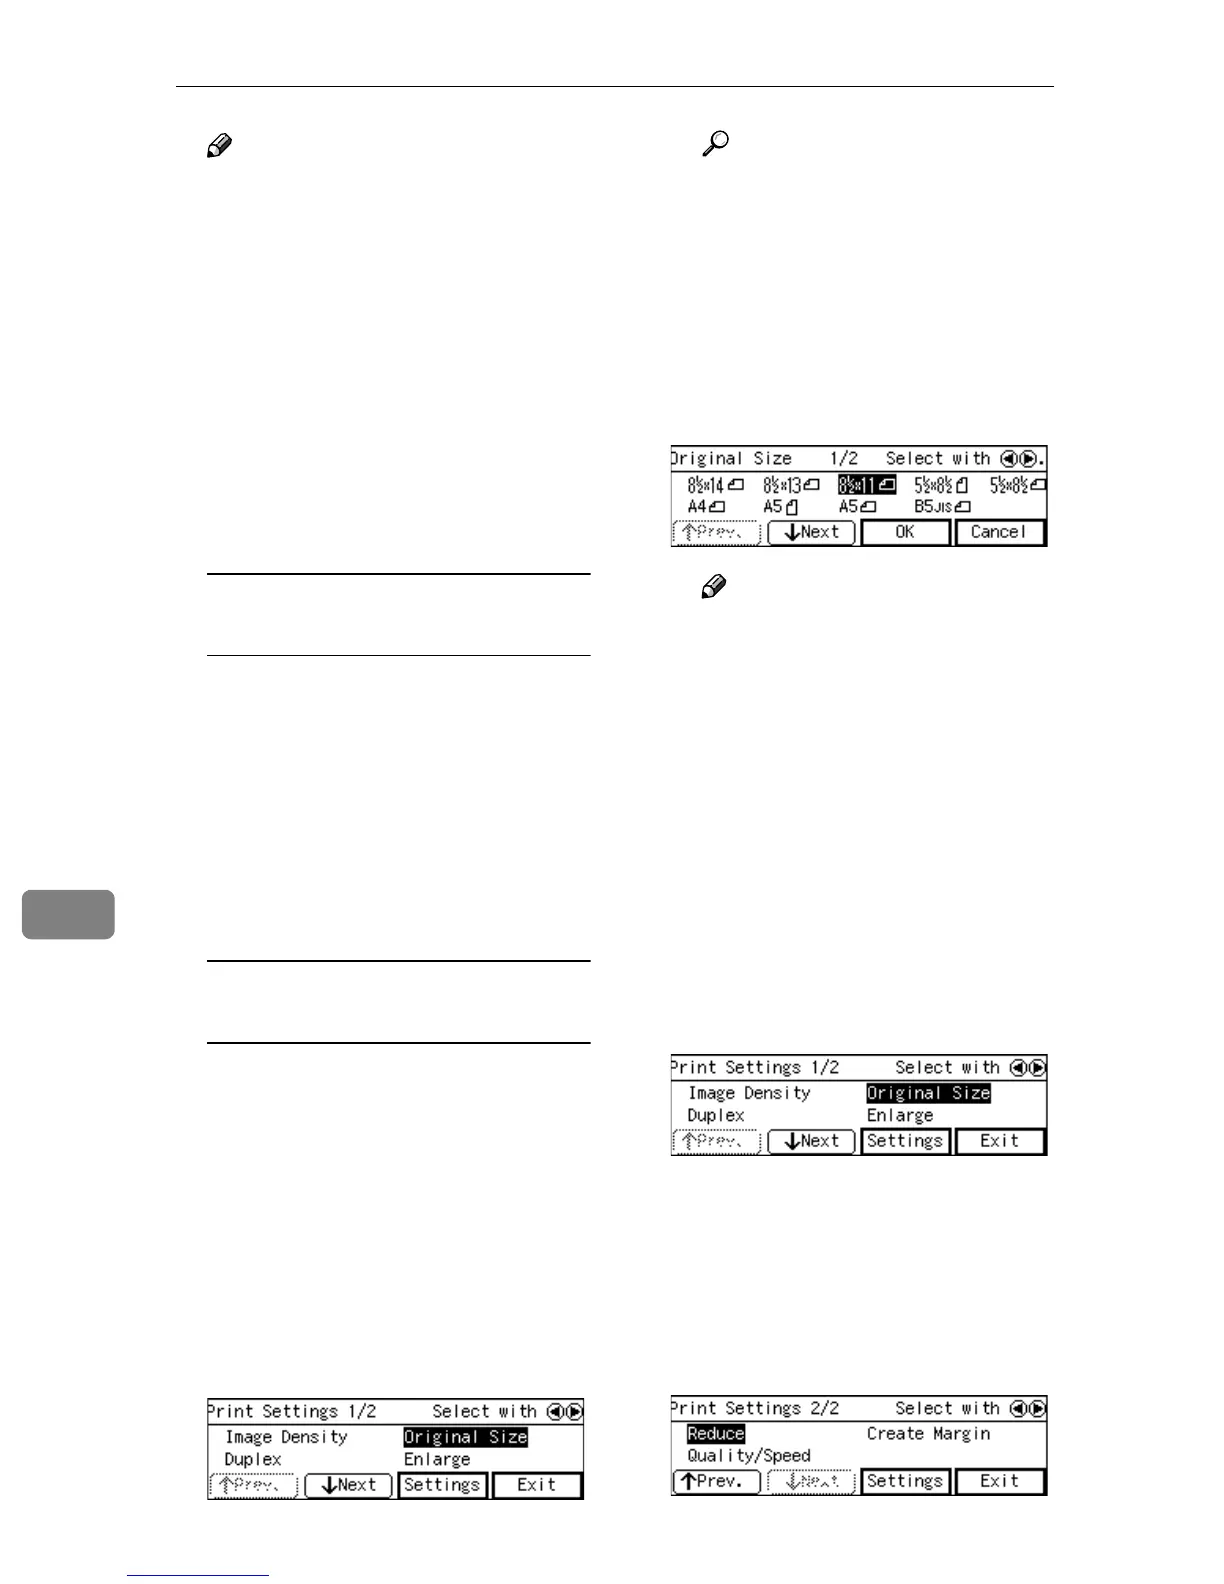
C Highlight the option you want
to select by using the {
{{
{1
11
1}
}}
} or
{
{{
{0
00
0}
}}
} keys (and [↓
↓↓
↓Next] or
[↑
↑↑
↑Prev.] if necessary), and then
press [OK].
Note
❒ Pressing [Cancel] discards the
selected option, and returns
to the previous screen.
❒ When you select [Custom
Size], use the number keys to
enter the dimensions of the
scan area (width and height).
D Repeat steps B
BB
B and C
CC
C as nec-
essary.
When you are finished, make
sure that the first page of the
Print Settings screen (Print Set-
tings 1/2) is displayed.
E Press [↓
↓↓
↓Next].
The second page of the Print
Settings screen (Print Settings
2/2) is displayed.
F Use the {
{{
{1
11
1}
}}
} or {
{{
{0
00
0}
}}
} key to
highlight the setup items you
want to change, and then press
[Settings].