Order No.
35 MHz: F 8042
40 MHz: F 8043
41 MHz: F 8044
FX-30
10. MENU STRUCTURE, METHOD OF NAVIGATING
The menu structure is divided up into three distinct Select
menus: System, Base and Model. From each Select menu you
can then move on to the various Set-up menus. Some Select
menus and Set-up menus have a second page or sub-level.
Set-up menus which are frequently needed, e.g. the Fre-
q
uency Select menu, can be accessed directly from the Start
screen (see also the description of the Start screen on the pre-
vious page).
The process of finding your way around the menu system is
simple and logically arranged. The ‘3-D hot-key’ and the
Select button S1 are used to control the menu system.
• The S1 button is used to leaf through within the Select
menu level; it is also used to lock and unlock the 3-D hot-
key.
• When you stop using the 3-D hot-key, after an interval of
five seconds the control is automatically blocked, in order
to prevent you changing values accidentally whilst flying a
model.
•
Hold the S1 button pressed in for at least 0.6 second to
unlock the 3-D hot-key again.
• Holding the S1 button pressed in for one second returns
you directly to the Start screen.
• The 3-D hot-key features two operating functions:
• To confirm a selection it must be pressed in; this equates to
an ‘EDIT’ function.
• Rotating the hot-key changes the data values.
• For example, turning the 3-D hot-key to the right increases
the % value in a sub-menu, whereas turning it to the left
reduces the value.
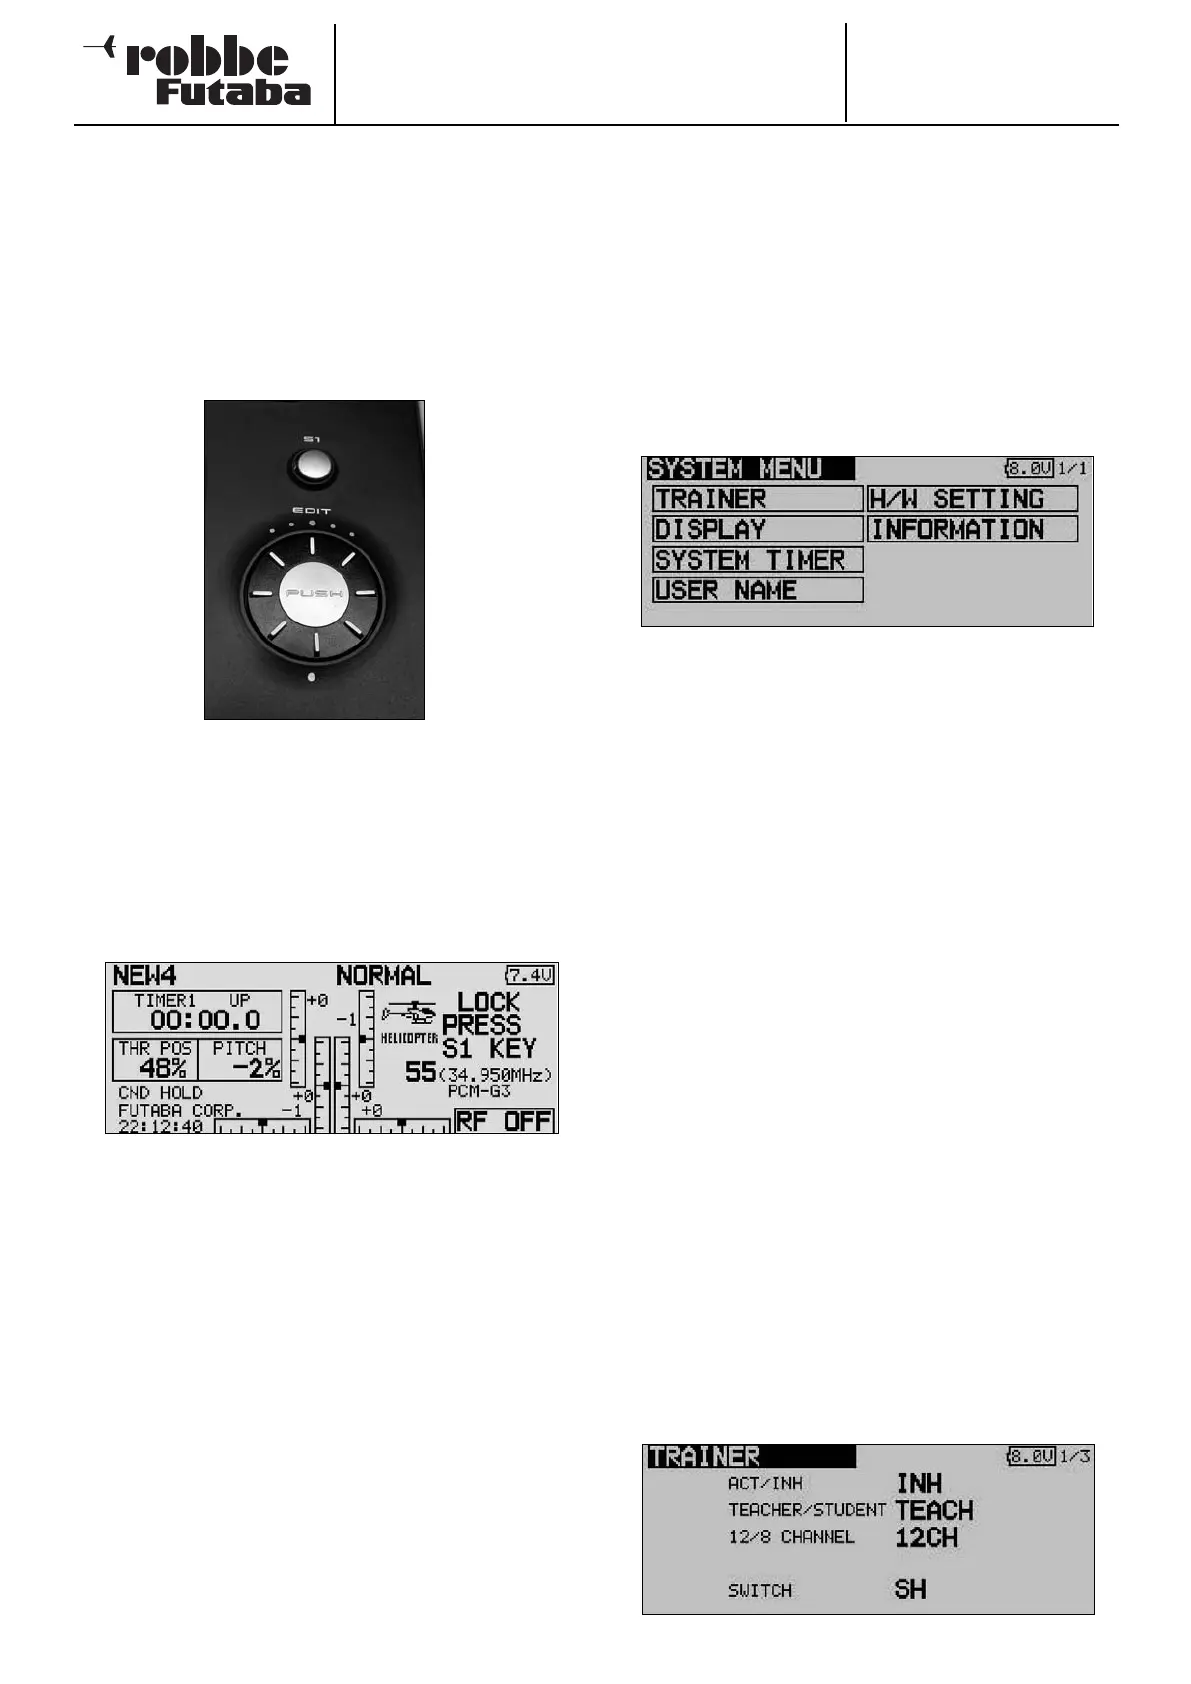
11. SYSTEM MENU
This menu is used to adjust basic transmitter settings which
apply to all models, i.e. they are not specific to any model
memory. Settings entered in this menu apply to all model
memories. It is not possible to change or influence the data
s
tored in any model memory whilst you are using this menu.
Exception: Trainer mode; this data is stored individually with
each model memory.
Use the 3-D hot-key to mark the ‘SYSTEM’ field in the HOME
menu, and confirm your selection with ‘EDIT’. This action calls
up the overview of the System menu on the screen:
Rotating the ‘3-D hot-key’ selects one of the available func-
tions. These are as follows:
• Trainer: Trainer mode settings
• Display: Screen contrast
• System timer: Operating hours timer, alternatively
model memory timer
• User name: User name
• H/W control setting: Hardware transmitter control reverse
• Information: Software version, SD card capacity
11.1 TRAINER MODE
Trainer (teacher - pupil, buddy-box) operations make it possi-
ble for newcomers to learn the art of model flying with the help
of an experienced pilot (Teacher).
The FX-30 transmitter is equipped as standard with a socket
to which a Trainer cable can be connected. The socket is loca-
ted at the bottom of the transmitter on the left-hand side.
Section 4.7 on page 10 of these instructions lists the other
transmitters from the robbe / Futaba range which can be used
in combination with the FX-30 transmitter, acting either as the
Teacher or as the Pupil transmitter. These lists also contain
information on the Trainer leads and modules which have to be
used for particular combinations, together with safety notes
relating to Trainer mode operations.
Important note:
If you intend to use the FX-30 transmitter as the Teacher unit,
then it is absolutely essential to set the modulation on the
Pupil transmitter to PPM.
Exception: systems with PCM 2048 (G3) modulation: in this
case you can select eight-channel or twelve-channel mode.
Use the 3-D hot-key to mark the ‘TRAINER’ option in the Sys-
tem menu, and press EDIT to confirm your choice.
22
Taste-S1
‘3-D-Hotkey’,
‘EDIT’-Taste,