Auto
Wall-Mount Adjustment
(Sold
separately)
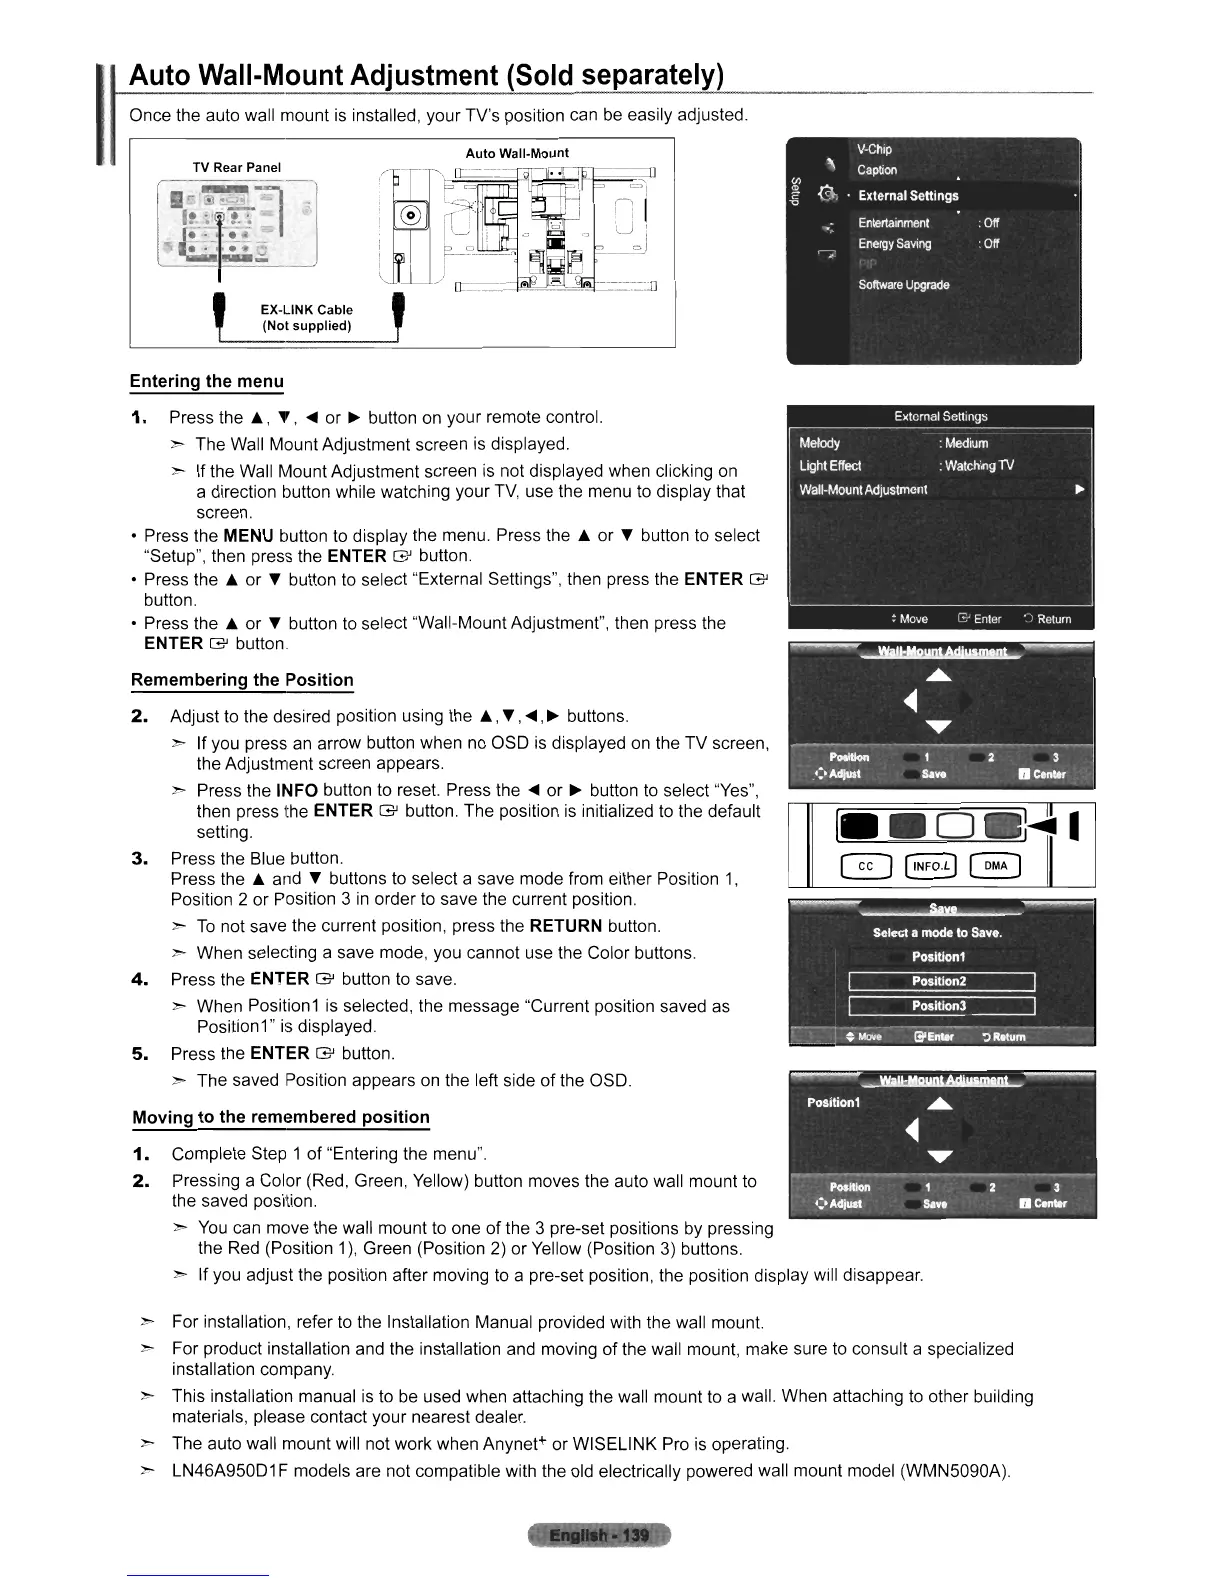
Once the auto wall mount
is
installed, your TV's position can
be
easily adjusted.
Auto
Wall-Mount
TV Rear Panel
EX-LINK Cable
(Not supplied)
Remembering the Position
2.
Adjust to the desired position using
the"',
~
,~,
~
buttons.
~
If you press
an
arrow button when
no
OSO
is
displayed
on
the TV screen,
the Adjustment screen appears.
~
Press the INFO button to reset. Press the
~
or
~
button to select "Yes",
then press the
ENTER
G'
button. The position
is
initialized to the default
setting.
3.
Press the Blue button.
Press
the'"
and
~
buttons to select a save mode from either Position
1,
Position 2 or Position 3
in
order to save the current position.
~
To
not save the current position, press the RETURN button.
> When selecting a save mode, you cannot use the Color buttons.
4.
Press the ENTER
G'
button to save.
> When Position1 is selected, the message "Current position saved
as
Position1" is displayed.
5.
Press the ENTER
G'
button.
~
The saved Position appears
on
the left side
of
the OSO.
Moving to the remembered position
1.
Complete Step 1 of "Entering the menu".
2.
Pressing a Color (Red, Green, Yellow) button moves the auto wall mount to
the saved position.
>
You
can move the wall mount to one of the 3 pre-set positions
by
pressing
the Red (Position 1), Green (Position 2) or Yellow (Position
3)
buttons.
> If you adjust the position after moving to a pre-set position, the position display will disappear.
Entering the menu
1.
Press
the"',
~,
~
or
~
button
on
your remote control.
~
The Wall Mount Adjustment screen
is
displayed.
~
If the Wall Mount Adjustment screen
is
not displayed when clicking
on
a direction button while watching your
TV,
use the menu to display that
screen.
• Press the
MENU button to display the menu. Press
the'"
or
~
button to select
"Setup", then press the
ENTER
G'
button.
• Press
the'"
or
~
button to select "External Settings", then press the ENTER
G'
button.
• Press
the'"
or
~
button to select "Wall-Mount Adjustment", then press the
ENTER
G'
button.
> For installation, refer to the Installation Manual provided with the wall mount.
> For product installation and the installation and moving
of
the wall mount, make sure to consult a specialized
installation company.
~ This installation manual
is
to
be
used when attaching the wall mount to a wall. When attaching
to
other building
materials, please contact your nearest dealer.
> The auto wall mount will not work when Anynet+ or WISELINK Pro
is
operating.
> LN46A95001 F models are not compatible with the old electrically powered wall mount model (WMN5090A).