205
Using the Configurator
3. For switch number 1, double-click <unassigned> and select Phone Sel.
4. Repeat steps 1 and 2 for nodes 2 and 3.
Correlate the phone selector switches across nodes
1. Select the Telephone/Page Selector under node 1’s Main Display.
2. Select the row for switch number 0, and then click Insert - Add Correlations.
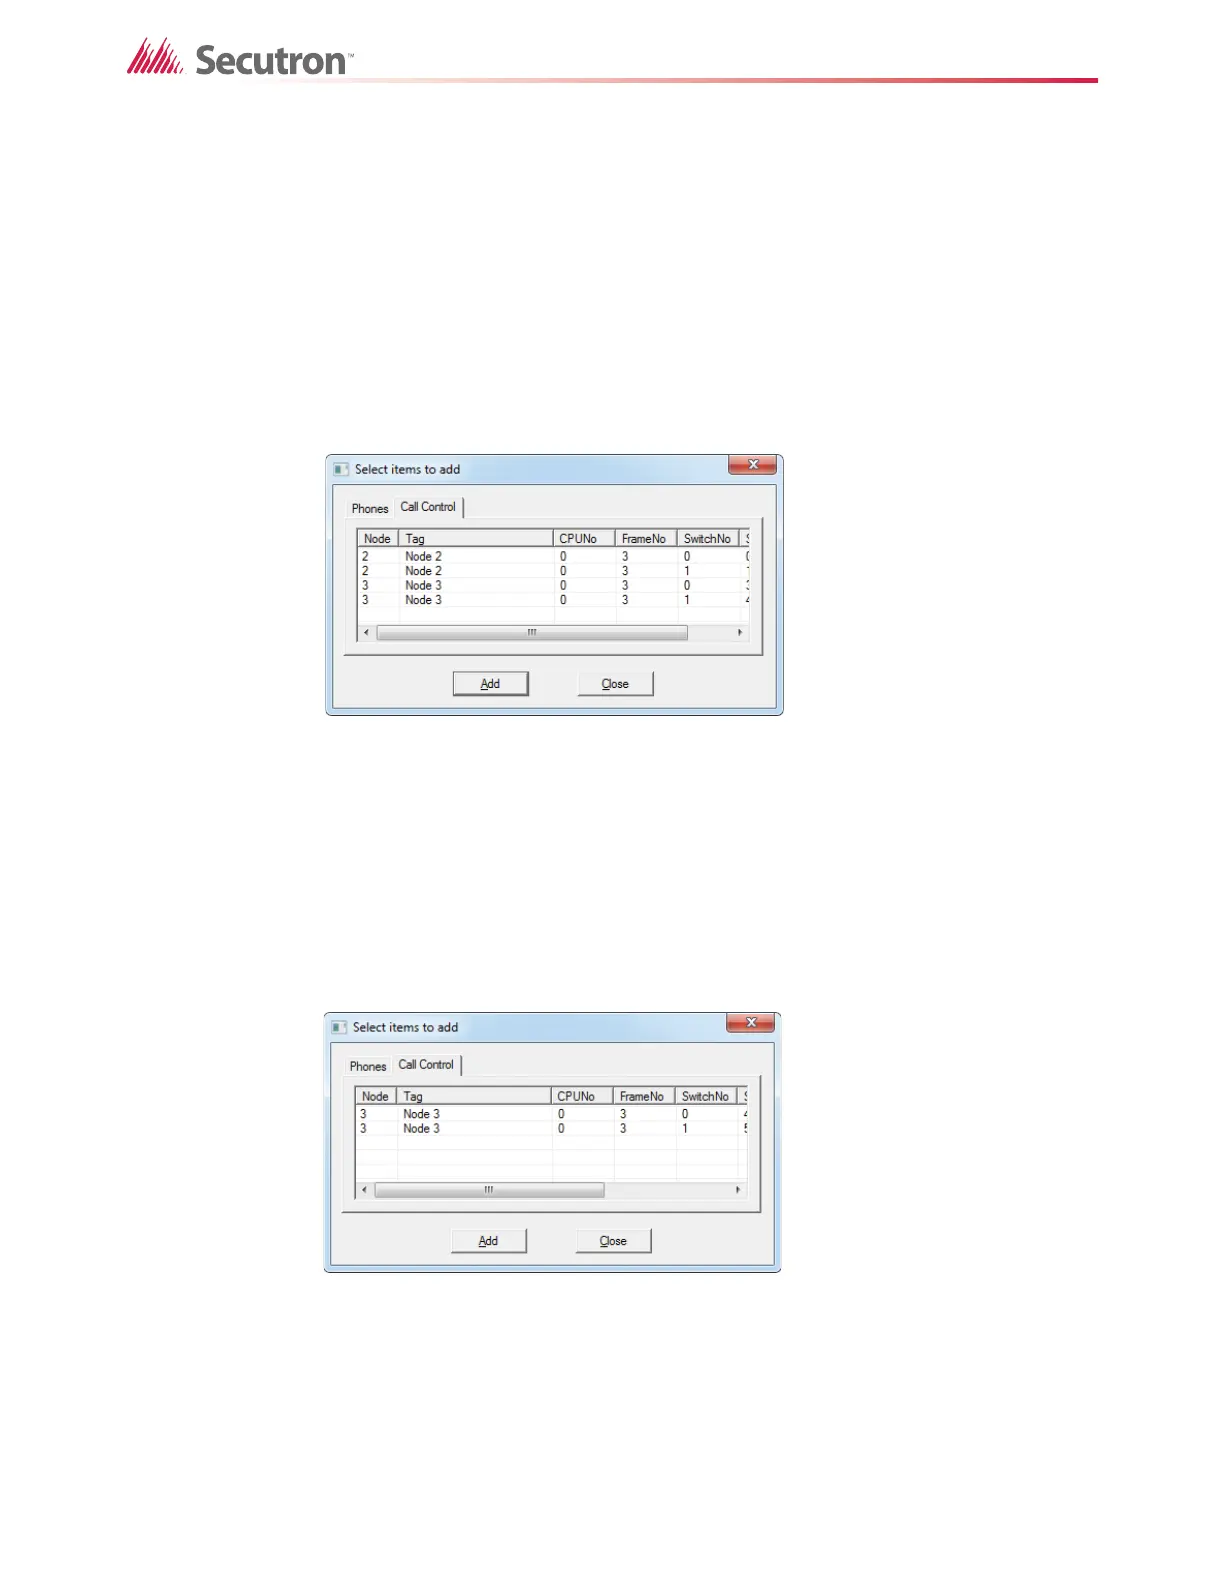
3. In the Select items to add window, click the Call Control tab.
All the phone selector switches available for correlation appear here. Figure 149 shows
that switch numbers 0 and 1 on node 2, and switch numbers 0 and 2 on node 3 are
available for correlation.
Figure 149 Add Correlations to a Phone Selector Switch
4. Select switch number 0 for Node 2, and then click Add.
5. Click Close.
6. Select the row for switch number 1, and then click Insert - Add Correlations.
7. In the Select items to add window, click the Call Control tab.
All the phone selector switches available for correlation appear here. Figure 150 shows
that switch numbers 0 and 2 on node 3 are available for correlation. Node 2 is not
available because it was correlated with switch number 0 earlier.
Figure 150 Add Correlations to a Phone Selector Switch
8. Select switch number 0 for Node 3, and then click Add.
9. Click Close.
10. Select the Telephone/Page Selector under node 2’s Main Display.
11. Select the row for switch number 1, and then click Insert - Add Correlations.
12. In the Select items to add window, click the Call Control tab.