11-2
The following checklist should be completed by the installer. (Note that all pcbs are
electronically tested and adjusted before being fitted to the FIP).
1. CABINET & GENERAL
A) Cabinet colour - Standard Cream Wrinkle (BFF 998 CW)
- Other: ____________________________________
B) Cabinet undamaged (Paint OK)
C) Door aligned correctly
D) Window undamaged and fitted correctly
F) Cabinet Door locks firmly, operates microswitch (if fitted)
G) Lock - 003 Type & two keys supplied
H) Door seals fitted to top and sides
I) Display Keypad and 4U door fitted & aligned correctly
J) Label LB0602 fitted to l.h.s. of Operator Interface
K) Card bays fitted
L) Operator Manual and battery leads included
M) Panel rating label completed, fitted
N) AS1668 Warning label fitted if Fan Control Modules used
O) Applique label fitted to front.
2. MODULES, CARDS & WIRING
A) SPS fitted securely, pcb & components undamaged
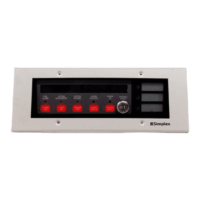
B) LED switch modules fitted correctly, spaced evenly
C) FRCs connecting 64/64 Controller & modules fitted correctly
D) Earth wires fitted to display door, card bays and bay front panels
E) All 4100 style cards fitted to motherboards
F) All 4100 style motherboards connected
G) All 4” x 5” modules fitted securely
H) All cards, modules addressed as per configuration sheet (see note 1 below)
I) The Lithium battery is fitted to the holder on the CPU card
J) Link P3 on the CPU card is fitted to the BAT ON position (see note 2)
K) The CPU card is fitted to its motherboard and the 2 FRCs are connected
I) All fan control zone name labels fitted.
Notes
1. The 64/64 Controller Modules are addressed but the LED/Switch modules are not.
2. The Lithium battery on the CPU Card (Master Controller) that stores time and date is
disconnected during shipping by fitting link P3 to the BAT OFF position. It must be
reconnected at time of installation.
Installation Checklist
Overview