Installation and Setup 67
2006792 Rev B – 200228
Variable-Speed Conveyors
Variable-speed conveyors require an Encoder to help the print timing match the product
flow. Once the Encoder has been properly installed. Follow the directions below:
1. Set up test products on the conveyor, physically spaced exactly as they would be
when actually printing.
2. Ensure that a Photocell is properly connected and in position (see “Installing a
Photocell” on page 49). The Photocell will tell the printer when a product is passing
by it.
3. Confirm that an Encoder is properly connected and in position (see “Installing an
Encoder” on page 51). The JetStream will automatically use data from the Encoder
as long as it is physically connected.
4. With the Printhead properly positioned to print on the passing product – throw
distance of 1.2" (30 mm) or less – run the conveyor.
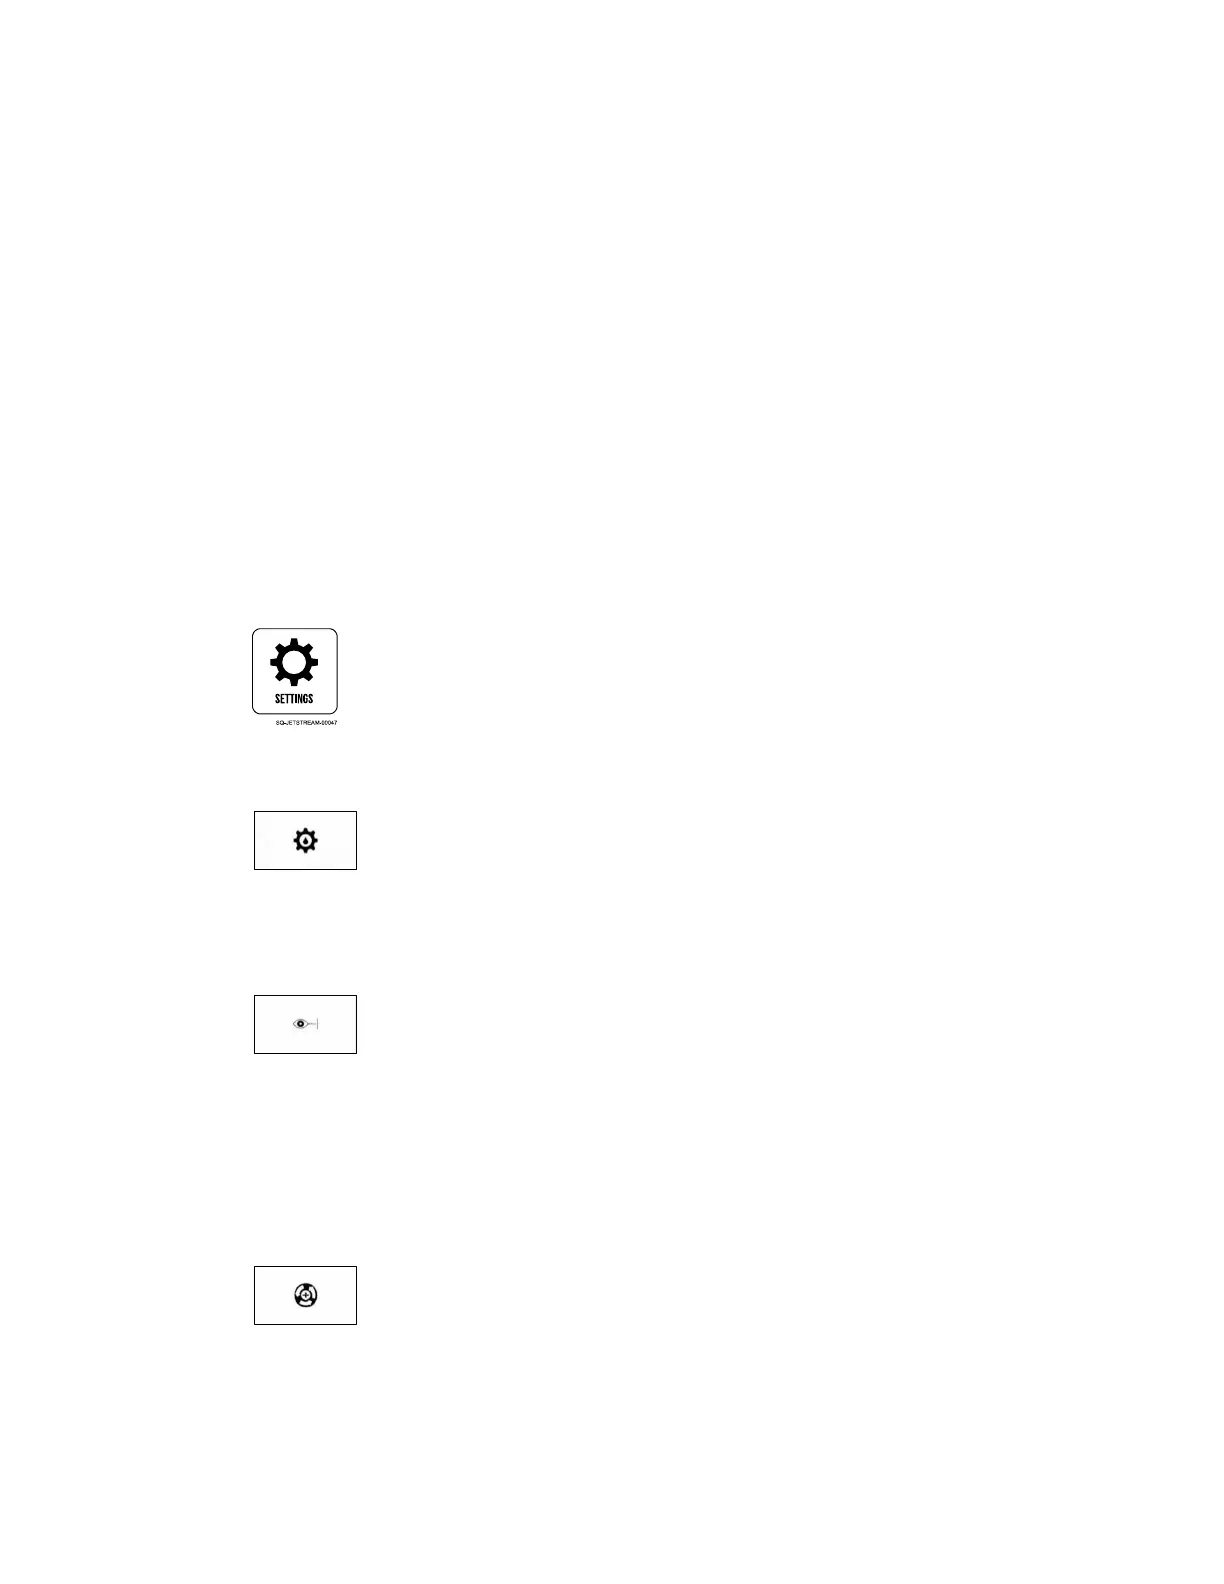
5. From the Main screen, select Settings:
6. In the upper left of the Settings screen, select Print Setting.
7. In the middle panel, select Basic:
8. Under “Trigger Mode,” select “Photocell.”
9. Under “Printing Speed,” input 1000.
10. In the middle panel, select Photocell:
11. Under “Trigger Edge,” choose whether the leading or trailing edge of the product
should trigger printing as it passes under the Photocell on the conveyor.
12. Under “Initial Print Delay,” set how many milliseconds the printer should wait to print
after the Photocell is triggered. This will affect where on the product the JetStream
prints. Adjust this number until printing is in the correct location on the product.
13. In the middle panel, select Encoder:
14. Adjust “Encoder Divider” (see “Encoder” on page 97) until the printing is going onto
the product at the right size. A lower “Encoder Divider” value results in faster printing
of columns of ink, so the printing is more horizontally compressed and the conveyor
speed can be faster.