Customer Replaceable Units Oven Door Latch
Page 188
© Copyright 2020 Stratasys. All rights reserved.
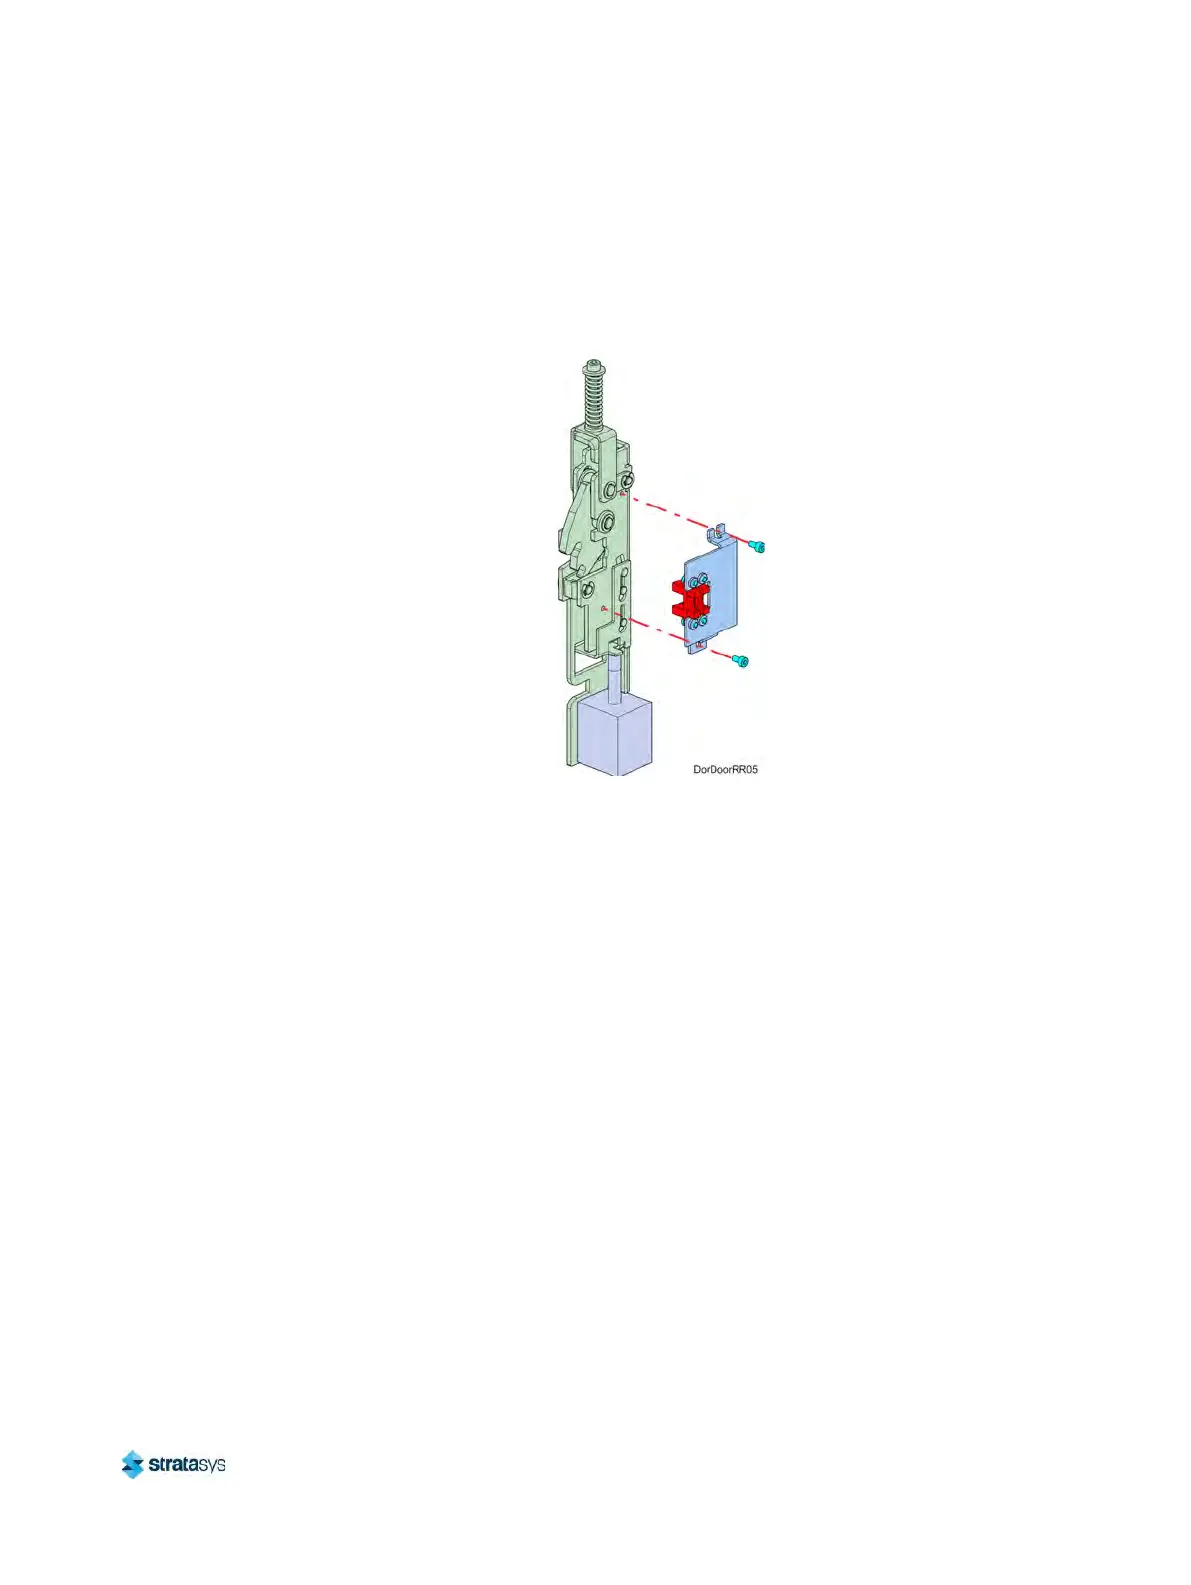
9. Using a 2.5 mm hex wrench, remove the sensor bracket mounting screws (2). See
Figure 42.
10. Remove the sensor and bracket from the latch assembly and retain them for re-installation.
S
ee Figure 42.
Figure 42: Door latch sensor mounting bracket detail
Installing the Oven Door Latch
1. Using a 2.5 mm hex wrench, install the sensor bracket mounting screws (2) to secure the
sensor mounting bracket to the oven door latch assembly. See Figure 42 (page 188).
2. Using a 4 mm socket wrench, install the door latch assembly mounting nuts (2) to secure
t
he door latch assembly inside the oven door assembly. See Figure 41 (page 187).
3. Connect the door latch assembly sensor cable connectors (2).
4
. Install the inside door panel into the door assembly. See F
igure 43.
a. Angle the inside door panel slightly and insert the pivot nuts into the lower notches on
b
oth sides of the door frame.
b. Gently press down on the door panel until the pivot nuts are fully seated inside the door
f
rame.
c. Rotate the top of door panel toward the door assembly. Gently press in the pivot arms
t
o insert them into the upper notches on both sides of the door frame.
 Loading...


