HANDLEBARS
4-63
• Left handlebar
NOTE:
Fit the projections on each handlebar into the
holes in the upper bracket, making sure that the
handlebars are installed in the same position.
6. Install:
• Handlebar bolts “1”
(temporarily)
• Handlebar nuts “2”
(temporarily)
7. Tighten:
• Handlebar bolts
• Handlebar nuts
NOTE:
First tighten the bolts, then tighten the nuts.
8. Install:
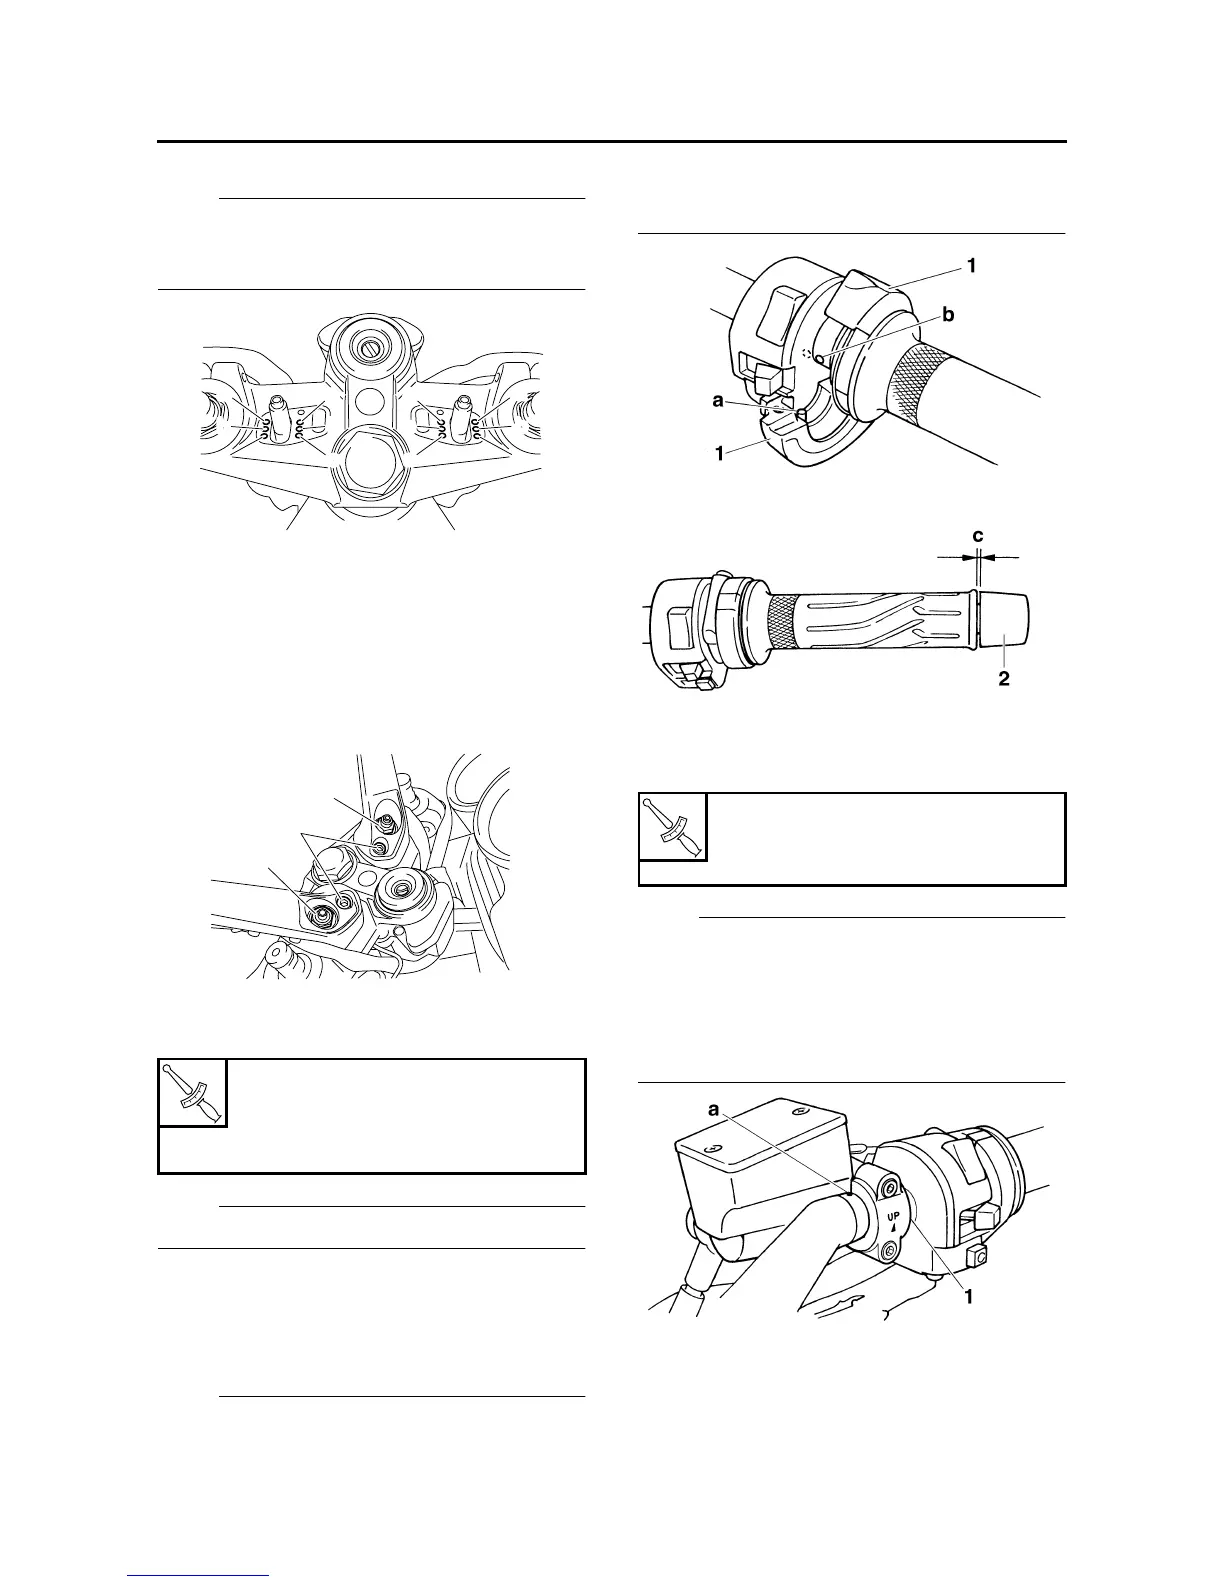
• Throttle grip
• Throttle cables
• Throttle cable housing “1”
• Grip end “2”
NOTE:
• Align the projection “a” on the throttle cable
housing with the hole “b” in the right handlebar.
• There should be 1–3 mm (0.04–0.12 in) of
clearance “c” between the throttle grip and the
grip end.
9. Install:
• Front brake master cylinder assembly
• Front brake master cylinder holder “1”
NOTE:
• Install the brake master cylinder holder with the
“UP” mark facing up.
• Align the mating surfaces of the brake master
cylinder holder with the punch mark “a” on the
right handlebar.
• First, tighten the upper bolt, then the lower bolt.
10.Install:
• Clutch master cylinder assembly
• Clutch master cylinder holder “1”
a. Front position
b. Standard position
c. Rear position
T
R
.
.
Handlebar bolt
23 Nm (2.3 m·kg, 17 ft·lb)
Handlebar nut
65 Nm (6.5 m·kg, 47 ft·lb)
a
b
c
a
b
c
a
b
c
a
b
c
2
2
1
T
R
.
.
Front brake master cylinder hold-
er bolt
10 Nm (1.0 m·kg, 7.2 ft·lb)