CAMSHAFTS
5-15
▲▲▲▲▲▲▲▲▲ ▲ ▲▲▲▲▲▲▲▲▲ ▲ ▲▲▲▲ ▲ ▲▲▲▲ ▲▲▲
3. Install:
• Exhaust camshaft caps
• Intake camshaft caps
NOTE:
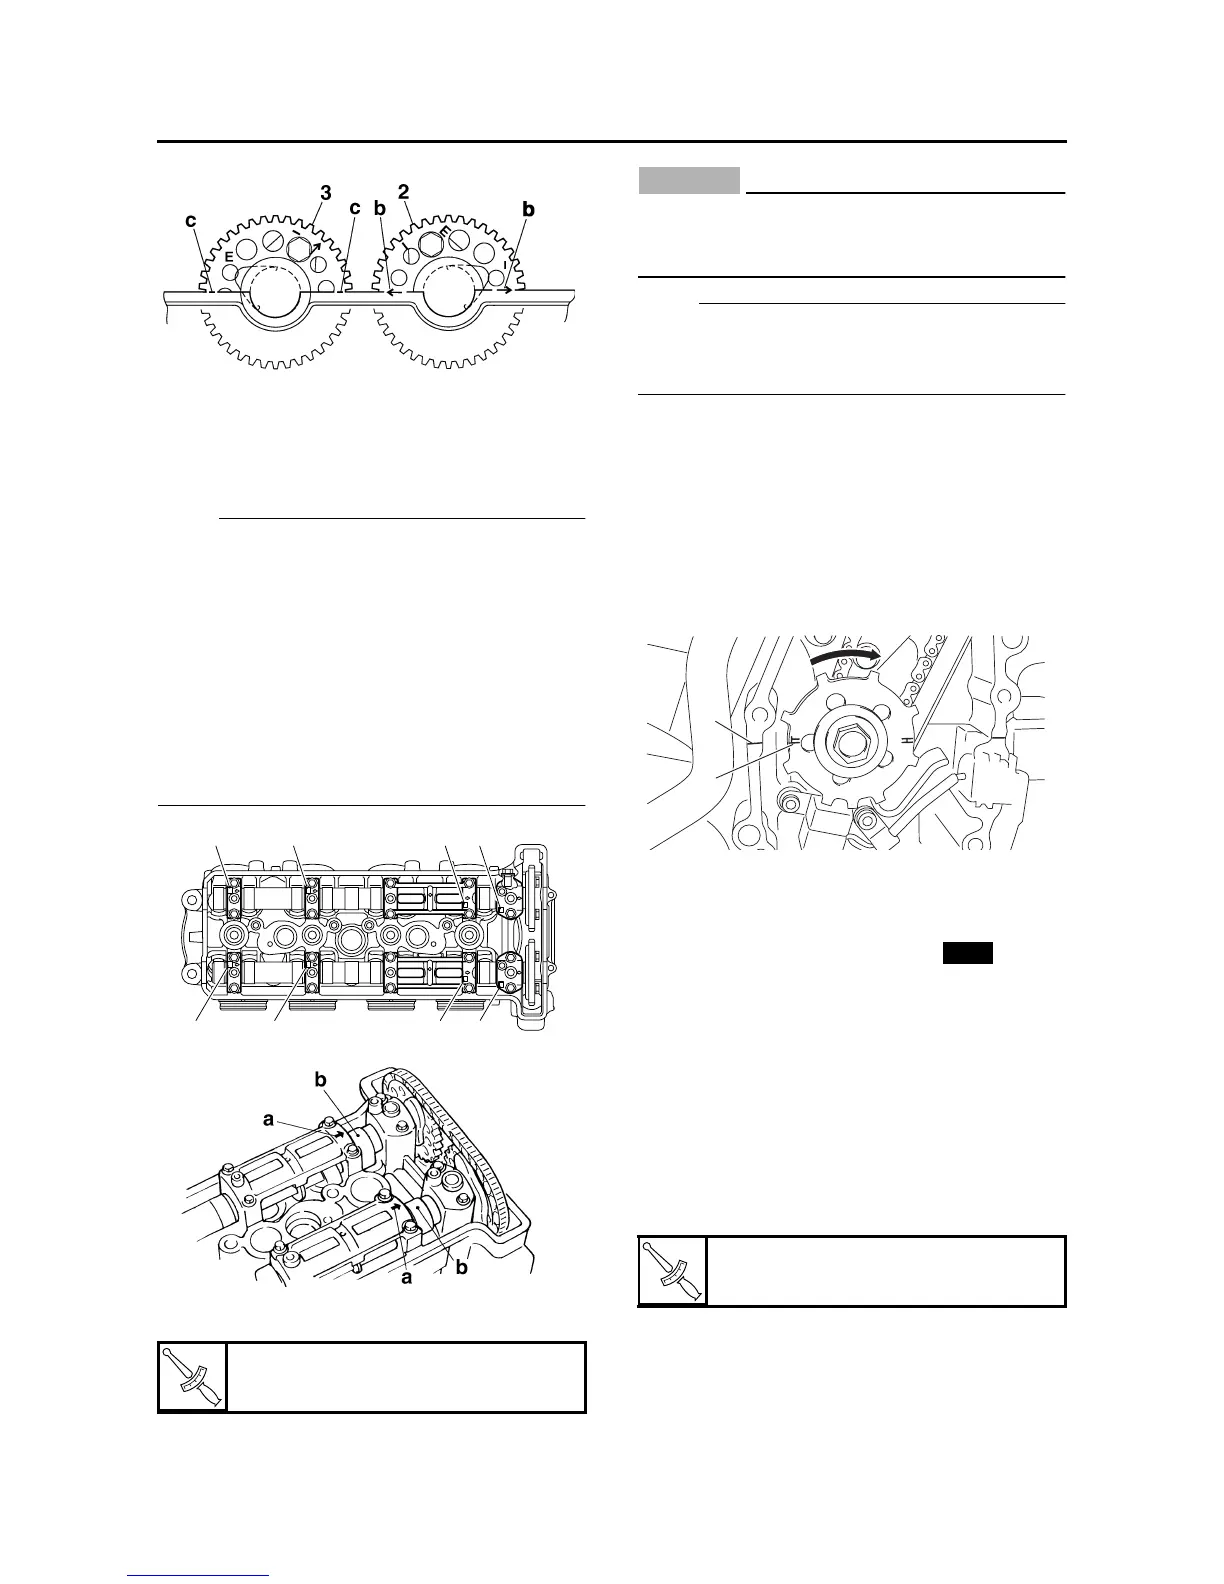
• Make sure each camshaft cap is installed in its
original place. Refer to the identification marks
as follows:
“E”, “E1”, “E2”, “E3”: Exhaust
“I”, “I1”, “I2”, “I3”: Intake
• Make sure the arrow mark “a” on each cam-
shaft points towards the right side of the en-
gine.
• Make sure the holes “b” in the camshafts are
aligned with arrow mark “a” on the camshaft
caps.
4. Install:
• Camshaft cap bolts
CAUTION:
ECA13730
The camshaft cap bolts must be tightened
evenly or damage to the cylinder head, cam-
shaft caps, and camshafts will result.
NOTE:
Tighten the camshaft cap bolts in stages and in
a crisscross pattern, working from the inner caps
out.
5. Align:
•“T” mark on the pickup rotor
(with the crankcase mating surface)
▼▼▼▼▼▼▼▼▼ ▼ ▼▼▼▼ ▼ ▼▼▼▼ ▼ ▼▼▼▼ ▼ ▼▼▼▼ ▼▼▼
a. Turn the crankshaft clockwise.
b. When piston #1 is at TDC on the compres-
sion stroke, align the “T” mark “a” on the pick-
up rotor with the crankcase mating surface
“b”.
▲▲▲▲▲▲▲▲▲ ▲ ▲▲▲▲ ▲ ▲▲▲▲ ▲ ▲▲▲▲ ▲ ▲▲▲▲ ▲▲▲
6. Install:
• Timing chain tensioner
• Timing chain tensioner gasket
▼▼▼▼▼▼▼▼▼ ▼ ▼▼▼▼ ▼ ▼▼▼▼ ▼ ▼▼▼▼ ▼ ▼▼▼▼ ▼▼▼
a. While lightly pressing the timing chain ten-
sioner rod by hand, turn the tensioner rod ful-
ly clockwise with a thin screwdriver “1”.
b. With the timing chain tensioner rod turned all
the way into the timing chain tensioner hous-
ing (with the thin screwdriver still installed), in-
stall the gasket and the timing chain tensioner
“2” onto the cylinder block.
c. Tighten the timing chain tensioner bolts “3” to
the specified torque.
T
R
.
.
Camshaft cap bolt
10 Nm (1.0 m·kg, 7.2 ft·lb)
E1
E2 E3
E
I1 I2 I3 I
T
R
.
.
Timing chain tensioner bolt
10 Nm (1.0 m·kg, 7.2 ft·lb)
b
a
New