Sample Order Options
AEROSET
®
Customer Training Guide 4-9
94858-103 — July 2003
3. Select <Order> in the right column of the DATABASE screen.
The Order Samples screen displays.
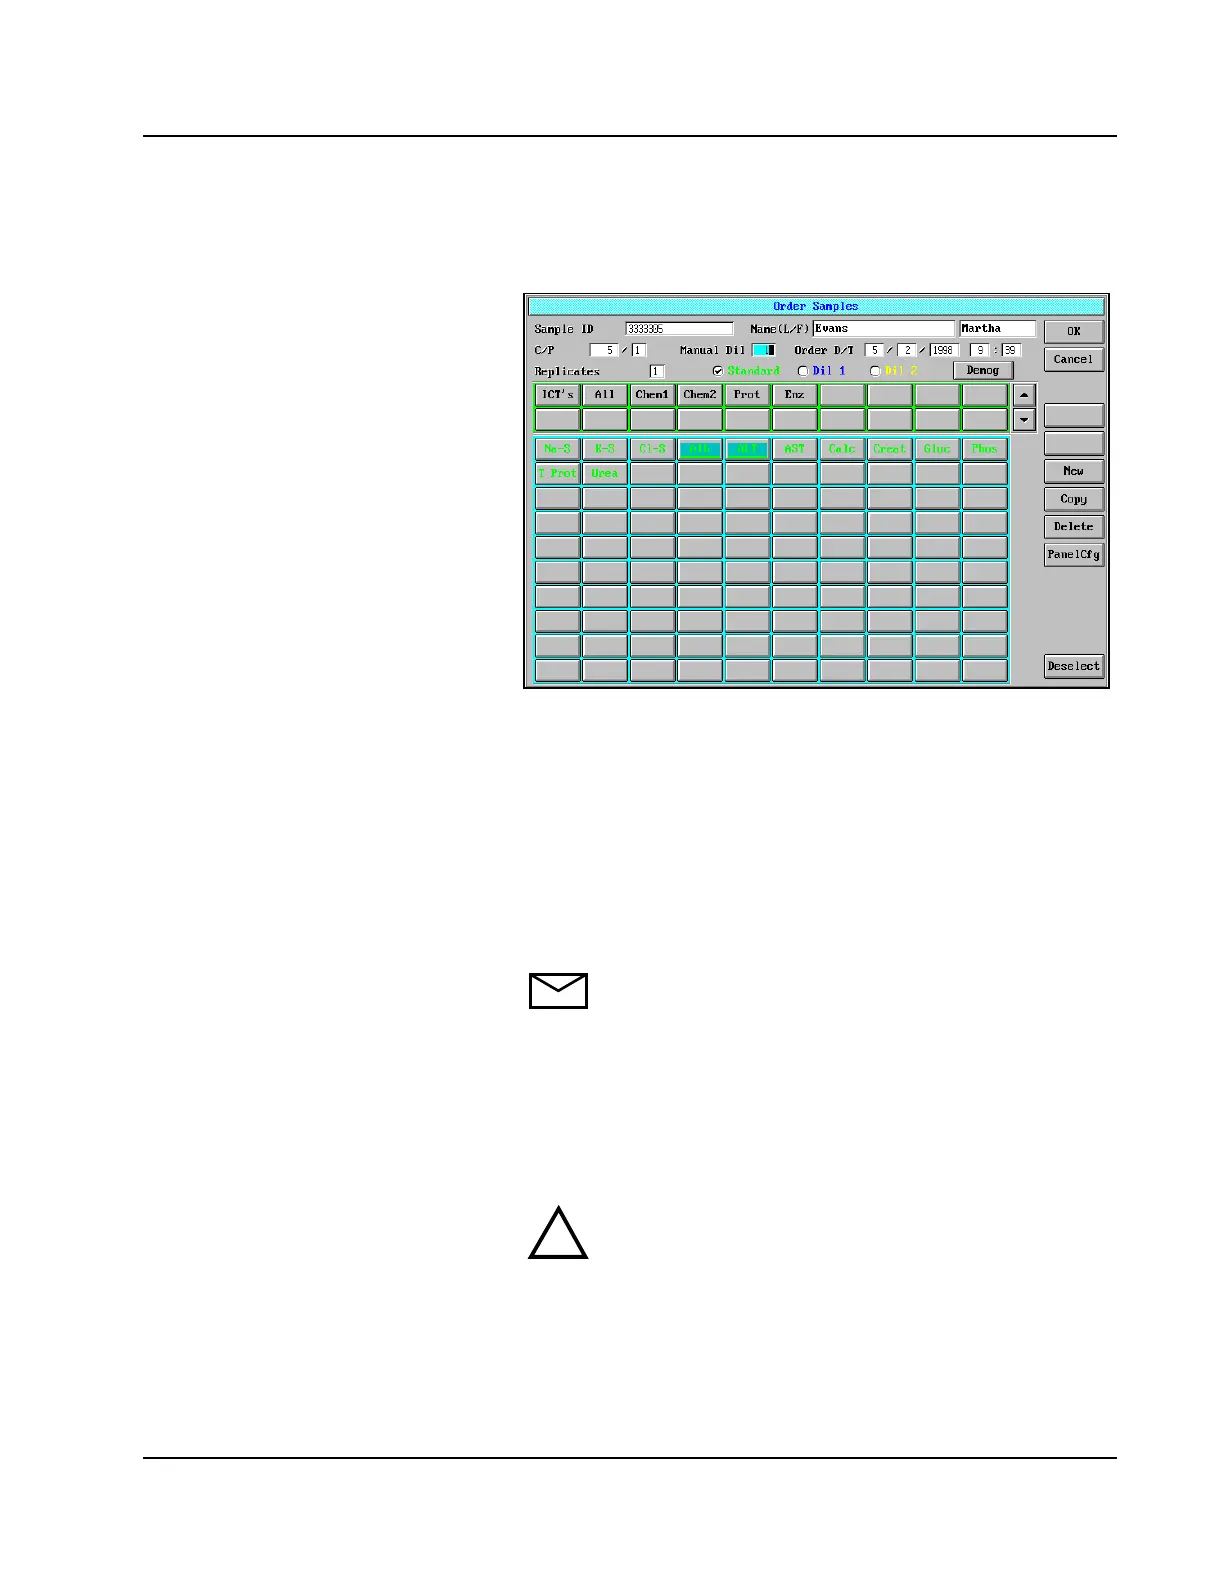
Figure 4.3: Order Samples Screen
4. Enter the sample ID (required) and name.
5. For the position where the sample will be placed, enter the carrier
number (required) and position number (required) in the C/P field.
Example: For a sample placed in section E/position 1 of
the Sample Carousel, the Operator should enter 5000 in
the C (Carrier) field and 1 in the P (Position) field.
6. Select the assay(s) and/or panel(s) be run on the sample.
NOTE: Assays with green button text meet all required
conditions. If button text is pink or yellow, further
investigation is necessary before performing the assay.
Refer to Confirmation of Assay Parameter Settings in
Section 2, Installation Procedures and Special
Requirements for additional information.
7. Select <New> to order more patient samples or <OK> when
ordering is complete.
CAUTION: New sample orders can only be placed in the
sample locations deleted in step 2. Failure to comply with
these instructions will result in a sample acquiring the
sample ID, and test request(s) from the sample previously
stored in the database for that carrier number and position.
8. Repeat steps 1 through 7 for each new sample loaded in the Sample
Carousel.
!