Home
Analog way
Switch
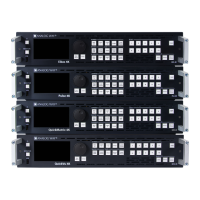
Midra 4K Series
Analog way Midra 4K Series User Manual
4
of 1
of 1 rating
101 pages
Give review
Manual
Specs
To Next Page
To Next Page
To Previous Page
To Previous Page
Loading...
www.
analogway.com
57
USER MANUAL
Impor
t an EDID from
computer
1.
In
EDID
,
hov
er ove
r
an EDID and click
in the top ri
ght corner
to sh
ow more
settings
.
2.
Click
and select the
ED
ID
file to upload
fro
m the co
mputer t
o the un
it.
Delete a cu
stom EDI
D
-
In
EDI
D
, hover over an EDID in
the EDID bank then click
.
The select
ed cust
om EDID i
s delet
ed from
the EDID b
ank.
56
58
Table of Contents
Default Chapter
3
Table of Contents
3
1 Disclaimer
10
Copyrights
10
Warranty
10
Liability
10
Force Majeure
10
2 Terms and Definition
11
3 Hardware Specifications
12
Safety Instructions
12
English
12
French
13
Italian
14
German
15
Spanish
16
Environmental Specifications for All Midra™ 4K Models
17
Package Contents
17
Rack Mount Information
17
4 Introducing Midra™ 4K
18
Midra™ 4K Product Range
18
Front and Rear Panel
19
Quickvu 4K Front Panel
20
Quickmatrix 4K Exclusive Front Panel Keys
20
Front Panel USB Port
20
Inputs and Outputs
20
Genlock and Loop
21
Optional Analog and Dante Audio Card
21
Power on and off
21
Start the Midra™ 4K
21
Power off
21
Forced Shutdown
22
Precautions When Mounting a Midra™ 4K Unit
22
5 Using the Web RCS
23
Run the Web RCS
23
Web RCS Requirements
23
Default Network Settings
24
Connection
24
Login Page
24
General Tips
25
Web Browser Features
25
Section Buttons (Copy, Paste and Reset)
25
Set a Number Value
25
Search Bar
25
Alarms and Notifications
25
Back Panel Shortcuts
26
Standby / Restart
26
Dashboard - System Settings
26
Dashboard - Device
26
Dashboard - Firmware / Hardware (Firmware Update)
27
Dashboard - Network
27
Dashboard - Cooling
28
Dashboard - Power
28
Dashboard - Security
28
Save / Load Configuration
29
Save the Current Configuration in a Slot
30
Load a Configuration from a Slot
30
Export a Configuration to the Computer
31
Import a Configuration
31
Reset Configuration
31
6 Midra™ 4K Concepts
32
Inputs Capacity
32
Outputs and Multiviewer Capacity
32
Operating Modes
32
Mixer Mode
32
Matrix Mode
32
Edge-Blending Mode
33
Images Management in Midra 4K
33
Image Library
33
Background and Foreground Image Slots
33
Images in Background Set
33
Image Management - Quick Recap
34
Screen and Aux. Screen Layers
35
Background Layer
35
Mixing Layers (Layer 1 & 2)
35
Foreground Layer
35
Aux Layer
35
Screen Sources
35
7 Preconfig Menu
36
Preconfig > System
36
Genlock Input Settings
36
Genlock Output Settings
36
Color Processing
36
Quick HDCP
37
Preconfig > Screens / Aux Screens
37
Set Operating Mode
37
Preconfig > Canvas
38
Rename a Screen
38
Tree View
38
Set an Output Format
38
Patterns
39
And y Areas (Edge-Blending Mode)
40
Advanced Output Settings (in Preconfig > Canvas)
41
Preconfig > Backgrounds
41
Background Sets
41
Background Set for a Single Output Screen
42
Background Set for an Eikos 4K in Edge-Blending Mode
42
Reset a Background Set
42
8 Multiviewer
43
Multiviewer Settings
43
Multiviewer Signal
43
Multiviewer Pattern
44
Multiviewer Adjustment (Image Correction)
44
9 Outputs
45
Outputs Main Screen
45
Output Settings
45
Output Signal
45
Output Pattern
46
Output Adjustment (Image Correction)
46
10 Inputs
47
Inputs Main Screen
47
Input Settings
47
Input Signal
48
Input Adjustment (Image Correction)
48
Input Aspect
48
Input Keying
49
1 Images and Library
50
Library
50
Image Formats
50
Image Specifications
50
Transfer Images from the Computer to the Unit
51
Download an Image File from the Unit
51
Delete an Image File from the Unit
51
Manage Library from the Front Panel
51
Images
52
Images Main Screen
52
Image Slots Settings
52
Assign an Imported Image to a Foreground Image Slot
53
Assign an Imported Image to a Background Image Slot
53
Image Aspect
54
2 Formats and EDID
55
Formats
55
Create a Custom Format
55
Edit a Custom Format
55
Delete a Custom Format
55
Edid
56
EDID Bank
56
Save an EDID from Inputs and Outputs
56
Replace an Input EDID with an EDID from the Bank
56
Export an EDID to Computer
56
Import an EDID from Computer
57
Delete a Custom EDID
57
3 Timers
58
Create a Timer
58
Control Counter Timers in the Multiviewer Page
58
14 Screens / Aux
59
Screens Menu Interface
59
Program and Preview
59
Views
60
Sources - Left Panel
60
Layer Selection
61
Bottom Bar Buttons
61
Transitions - Right Panel
62
Layer Properties
62
Set Layer Position and Size
63
Layer Source
63
Set Layer Opacity
64
Set Layer Crop and Aspect
64
Set Layer Mask
64
Set Layer Color Filter
64
Set Layer Horizontal and Vertical Flip
65
Layer Transition
65
Set Layer Transition Effect
65
Set Layer Transition Timing
65
Set Layer Transition Speed
65
Aux Screen Layer
65
5 Memories
66
Memories Tab
66
Master Memories
67
Save a Master Memory from Current Screens
67
Save a Master Memory from Existing Screen Memories
68
Load a Master Memory
68
Edit a Master Memory
68
Screen Memories
69
Save a Screen Memory
69
Load a Screen Memory
69
Edit a Screen Memory
70
Quick Overwrite or Revert
70
Aux Screen Memories
70
Rename a Memory
70
Change the Color of a Memory Slot
70
Reorder Memories
71
Delete a Memory
71
6 Multiviewer
72
Tips and Recommendations
72
Multiviewer Menu Interface
72
Sources - Left Panel
72
Widget Selection
73
Multiviewer Layout Editor
74
Bottom Bar Buttons
74
Widget Properties
75
Widget Position and Size
75
Widget Source - Assign Content to a Widget
76
Multiviewer Memories
76
Save a Multiviewer Memory
76
Load a Multiviewer Memory
76
Edit a Multiviewer Memory
76
Rename a Memory
76
Change the Color of a Memory Slot
77
Reorder Memories
77
7 User Maintenance and Troubleshooting
78
User Maintenance
78
Troubleshooting
78
18 Control from the Front Panel
79
Monitor an Input or Output on the Front Panel LCD Screen
79
Status
79
Quick Access
80
Assign Content to Layers in Mixer Mode
80
Assign Content to Layers in Matrix Mode
80
Assign Content to Layers in Edge Blending Mode
80
Button Color Guide
81
Preconfig
81
Set the Operating Mode
81
Set a Screen Label
81
Set a Screen Pattern
81
Set a Covering (Edge-Blending Mode)
82
Set a Gap (Edge-Blending Mode)
82
Set a Background Set
82
Outputs
82
Output Signal Status
82
Output Plug Status
82
Set an Output Label
82
Output LED Blink
83
Set an Output Format
83
Set a Framelock Output Format
83
Set an Output Area of Interest (AOI)
83
Output HDMI Plug Settings
83
Output SDI Plug Settings
83
Output Image Correction
84
Output Pattern
84
Monitor Output on the Front Panel LCD Screen
84
Inputs
84
Inputs Signal Status
84
Autoset All Inputs
84
Select the Active Plug (Input 1 & 2)
84
Input LED Blink
85
Force Black on an Input
85
Input HDMI, SDI or Displayport Settings
85
Input Image Settings
85
Monitor Input on the Front Panel LCD Screen
86
Images
86
Transfer an Image to the Unit
86
Capture an Image from an Input to the Image Library
86
Capture an Image from an Input to a USB Drive
87
Images in the Library
87
Assign an Image to a Background Image Slot
87
Assign an Image to a Foreground Image Slot
87
Extra
87
Create a Custom Format
87
Edit a Custom Format
88
Delete a Custom Format
88
Import EDID Form USB Drive
88
Manage Input EDID
88
Manage Output EDID
88
Export an EDID
88
Set Quick Preset Key to Fade to Black
89
Set Quick Preset Key to Call Preset Images
89
Set Quick Preset Key to Call a Master Memory
89
Services
89
Export Device Configuration to a USB Drive
89
Import Device Configuration
89
Save a Configuration to the Unit Memory
90
Load a Configuration from the Unit Memory
90
Export a Saved Configuration
90
Delete a Saved Configuration
90
Control
90
Network Connection
90
Firmware Update
90
Set after Power Failure Behavior
90
Set Device Date and Time
91
Front Panel Settings
91
Reset to Default Values
91
Factory Reset
91
Reset Erase Specific Settings
91
Live - Screen Settings
91
Global Settings
91
Screen Transitions
91
Screen Step Back
92
Copy Program to Preview
92
Set the Background Layer
92
Set the Mixing Layer
92
Set the Foreground Layer
92
Set Layer Transition
93
Set Aux Screen Background Color
93
Set Aux Screen Layer
93
Multiviewer
93
Set Multiviewer Template
93
Set Multiviewer Widget Manually
93
Set a Current Time Timer
93
Set a Countdown Timer
94
Set a Stopwatch Timer
94
Save a Multiviewer Memory
94
Load a Multiviewer Memory
94
Delete a Multiviewer Memory
94
Memories
94
Save a Master Memory from Current Screens (Self-Contained)
94
Save a Master Memory from Current Screens (to Screen Memories)
95
Save a Master Memory from Screens Memories
95
Save a Screen Memory
95
Save a Aux. Screen Memory
95
Load a Master Memory
96
Load a Screen Memory
96
Load an Aux Screen Memory
96
Delete a Memory
96
9 Audio Settings
97
Audio Internal Processing Rate
97
Set a Custom Internal Reference
97
Set the Internal Reference to Follow Dante Reference
97
Audio in Inputs
97
Set an Input Audio (Basic Mode)
97
Set an Input Audio (Advanced Mode)
98
Custom Audio Sources
98
Audio in Outputs
98
Set an Output Audio (Basic Mode)
98
Appendices
99
Contact Information
100
4
Based on 1 rating
Ask a question
Give review
Questions and Answers:
Need help?
Do you have a question about the Analog way Midra 4K Series and is the answer not in the manual?
Ask a question
Analog way Midra 4K Series Specifications
General
Brand
Analog way
Model
Midra 4K Series
Category
Switch
Language
English
Related product manuals
Analog way Pulse
4 pages
Analog way QuickVu QVU150-3G
4 pages