18.3 Quick access
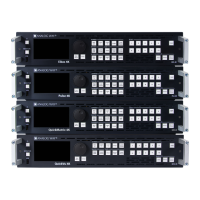
This section describes how to get the show ready within a few minutes using the keys of the front panel.
Assign content to layers in Mixer mode
1. In the MASTER area, press the PGM/PRW key to select to work on Program Screens or Preview
Screens.
2. In the SCREEN 1 area, press BKG Set to select the Background layer, then press a number key in the
SELECT area to assign the corresponding background set.
3. In the SCREEN 1 area, press Layer 1 or Layer 2 then press a number key in the SELECT area to assign
the corresponding live input.
4. In the SCREEN 1 area, press Image to select the Foreground layer, then press a number key in the
SELECT area to assign the corresponding foreground image.
5. In the AUX area, press Input or Screen PGM to select the source type, then press a number key in
the SELECT area to assign the corresponding content to the Aux layer.
6. Go to Live > Screen 1 > Layer 1 (or Layer 2) for more layer settings (position, size, transition, etc.).
7. To clear a layer, select the layer, then press CLEAR in the SHORTCUTS area.
Note: In Mixer mode, the Screen 2 area is disabled.
Assign content to layers in Matrix mode
1. In the MASTER area, press the PGM/PRW key to select to work on Program Screens or Preview
Screens.
2. In each SCREEN area, press BKG Set to select the Background layer, then press a number key in the
SELECT area to assign the corresponding background set.
3. In each SCREEN area, press Layer 1, then press a number key in the SELECT area to assign the
corresponding live input.
4. In each SCREEN area, press Image to select the Foreground layer, then press a number key in the
SELECT area to assign the corresponding foreground image.
5. Go to Live > Screen 1 (or Screen 2) > Layer 1 for more layer settings (position, size, transition, etc.).
6. To clear a layer, select the layer, then press CLEAR in the SHORTCUTS area.
Note: In Matrix mode, the AUX area is disabled.
Assign content to layers in Edge Blending mode
1. In the MASTER area, press the PGM/PRW key to select to work on Program Screens or Preview
Screens.
2. In the SCREEN 1 area, press BKG Set to select the Background layer, then press a number key in the
SELECT area to assign the corresponding background set.
3. In the SCREEN 1 area, press Layer 1 or Layer 2, then press a number key in the SELECT area to assign
the corresponding live input.
4. In the SCREEN 1 area, press Image to select the Foreground layer, then press a number key in the
SELECT area to assign the corresponding foreground image.
5. Go to Live > Screen 1 > Layer 1 (or Layer 2) for more layer settings (position, size, transition, etc.).
6. To clear a layer, select the layer, then press CLEAR in the SHORTCUTS area.
Note: In Edge Blending mode, the Aux and Screen 2 areas are disabled.

 Loading...