Disabling DES
During the first boot-up, the administrator can disable the DES discovery in either of the following
ways:
• by setting DES_STAT as 0 or 1 in DHCP option 242
• by setting DES_STAT as 0 or 1 in the 46xxsettings.txt file
• by disabling DES Discovery in the phone web interface (Management > Device Enrollment
Service > DES Discovery)
Phone installation without DES
This section describes the procedure to install the phone without invoking the DES discovery
process.
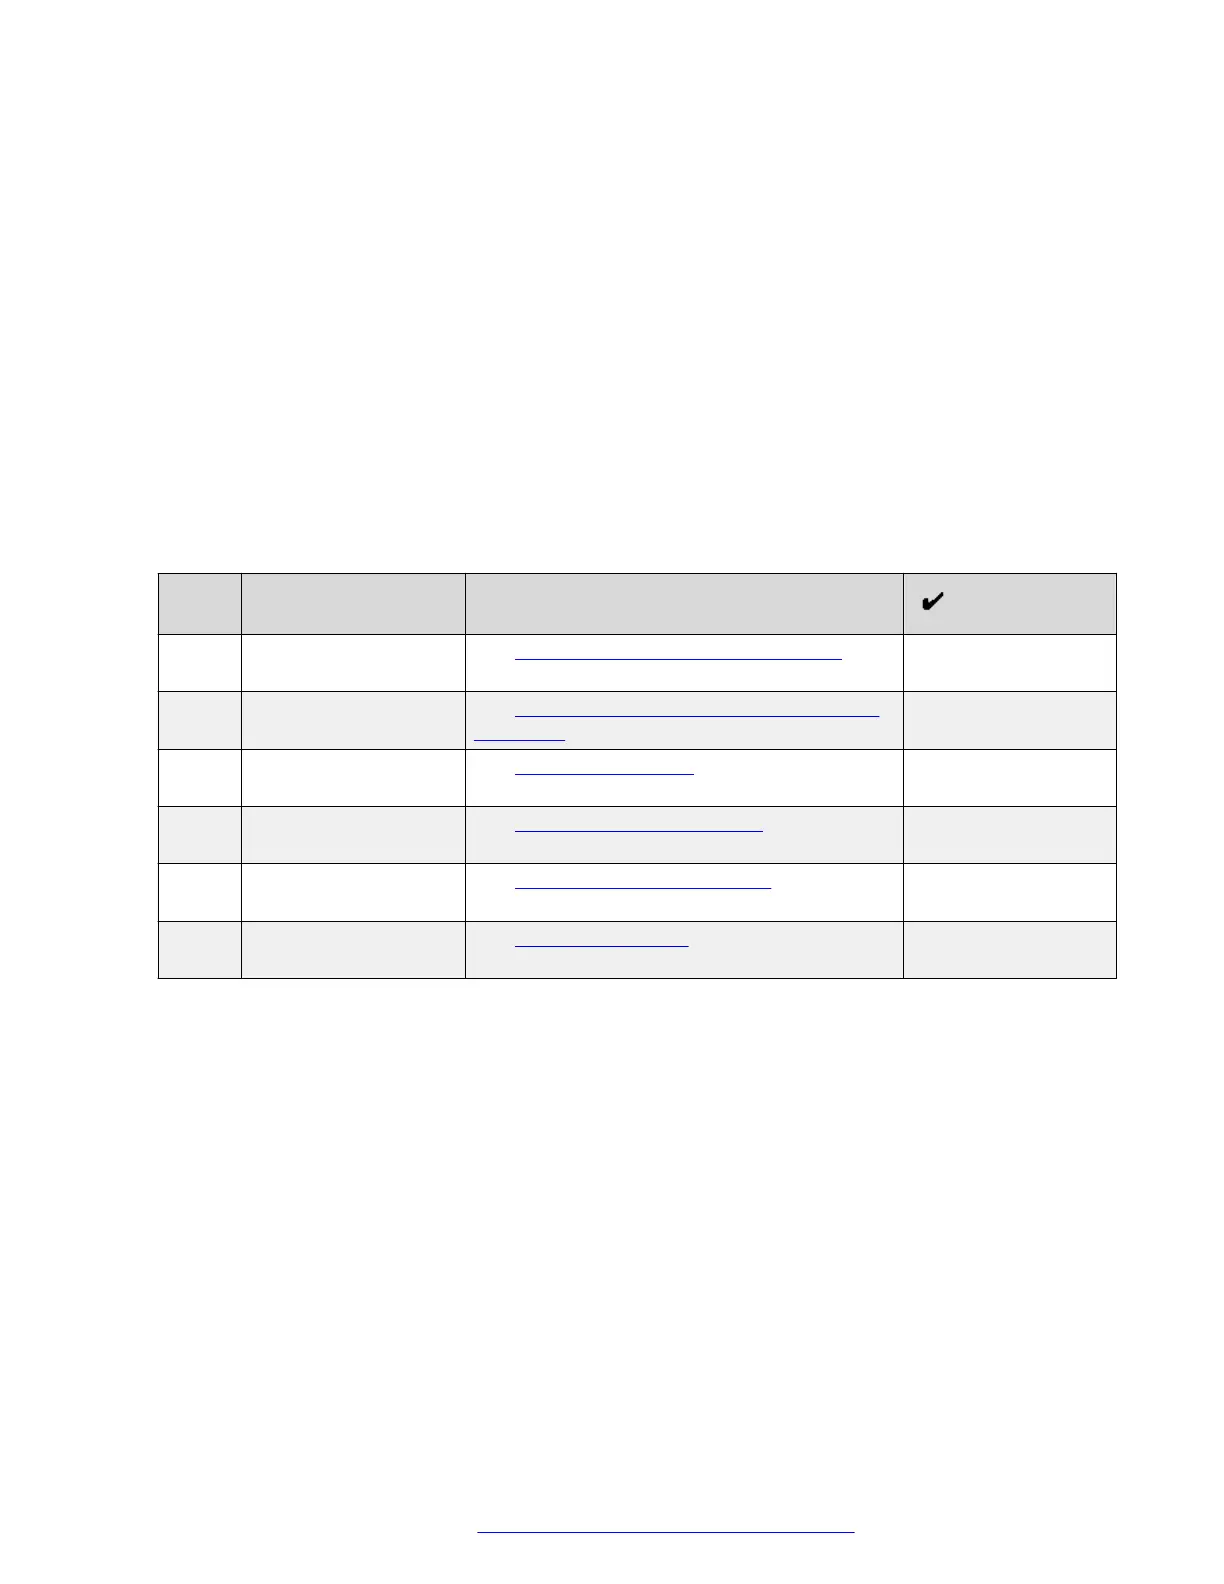
Initial setup checklist
Use this checklist to gather, record, and verify the information during the installation.
No. Task Reference
1 Check the
prerequisites.
See Hardware and software prerequisites on
page 34 for more information.
2 Configure system
manager user profile.
See Avaya Aura System Manager user profile
worksheet on page 37 for more information.
3 Configure the servers. See Server configuration on page 97 for more
information.
5 Configure LLDP. See Configuration through LLDP on page 105
for more information.
6 Configure VLAN. See Virtual LAN (VLAN) overview on page 114
for more information.
9 Install the phone. See Installing the phone on page 39 for more
information.
Hardware and software prerequisites
Check the prerequisites to ensure that you have the required software and hardware before you
install the Avaya J100 Series IP Phones .
Hardware prerequisites
Ensure that the LAN:
• Uses Ethernet Category 5e or Ethernet Category 6 cabling
• Has one of the following specifications:
- 802.3af PoE
- 802.3af PoE injector
You can also power the phone using the Avaya DC 5 volt AC power adapter which you can order
with the device.
Phone installation
December 2018 Installing and Administering Avaya J100 Series IP Phones 34
Comments on this document? infodev@avaya.com
 Loading...


