Once the console has been set up as
required, its settings can be saved in the
memory system. Up to 99 memories can
be held in the Flash ROM for different
console arrangements. In addition to this,
an unlimited number of memories can
be backed up to the PC’s hard disk and
recalled into the Flash ROM at a later
date quickly and easily. Memories can be
stored to removable media.
The Live Memory
The Live Memory is the last memory
loaded onto the console. Changes made
since the live memory was loaded will
not be stored in this memory number
unless it is re-saved. They will be stored
in the “Hidden” memory so that they are
restored after a power down.
The Selected Memory
The Selected Memory can be thought of
as the “Ready” position, where the next
required memory can be placed until it is
needed.
SEL MEM + two digit memory number +
EXEC on the keypad calls that memory
number into the Selected Memory
position. The Selected Memory can also
be selected from the list on the MEM-
SETUP screen.
Loading A Memory
Pressing LOAD launches the Selected
Memory into the Live Memory position,
overriding the previous console settings.
When the memory has loaded, the display
will show “LOAD OK”. The contents of
the Selected Memory can be cleared by
pressing SEL MEM + CLR + EXEC on
the keypad or selecting CLR MEM on the
MEM-SETUP screen.
Saving Memories
SAVE + EXEC saves console settings
to the Selected Memory. Therefore, the
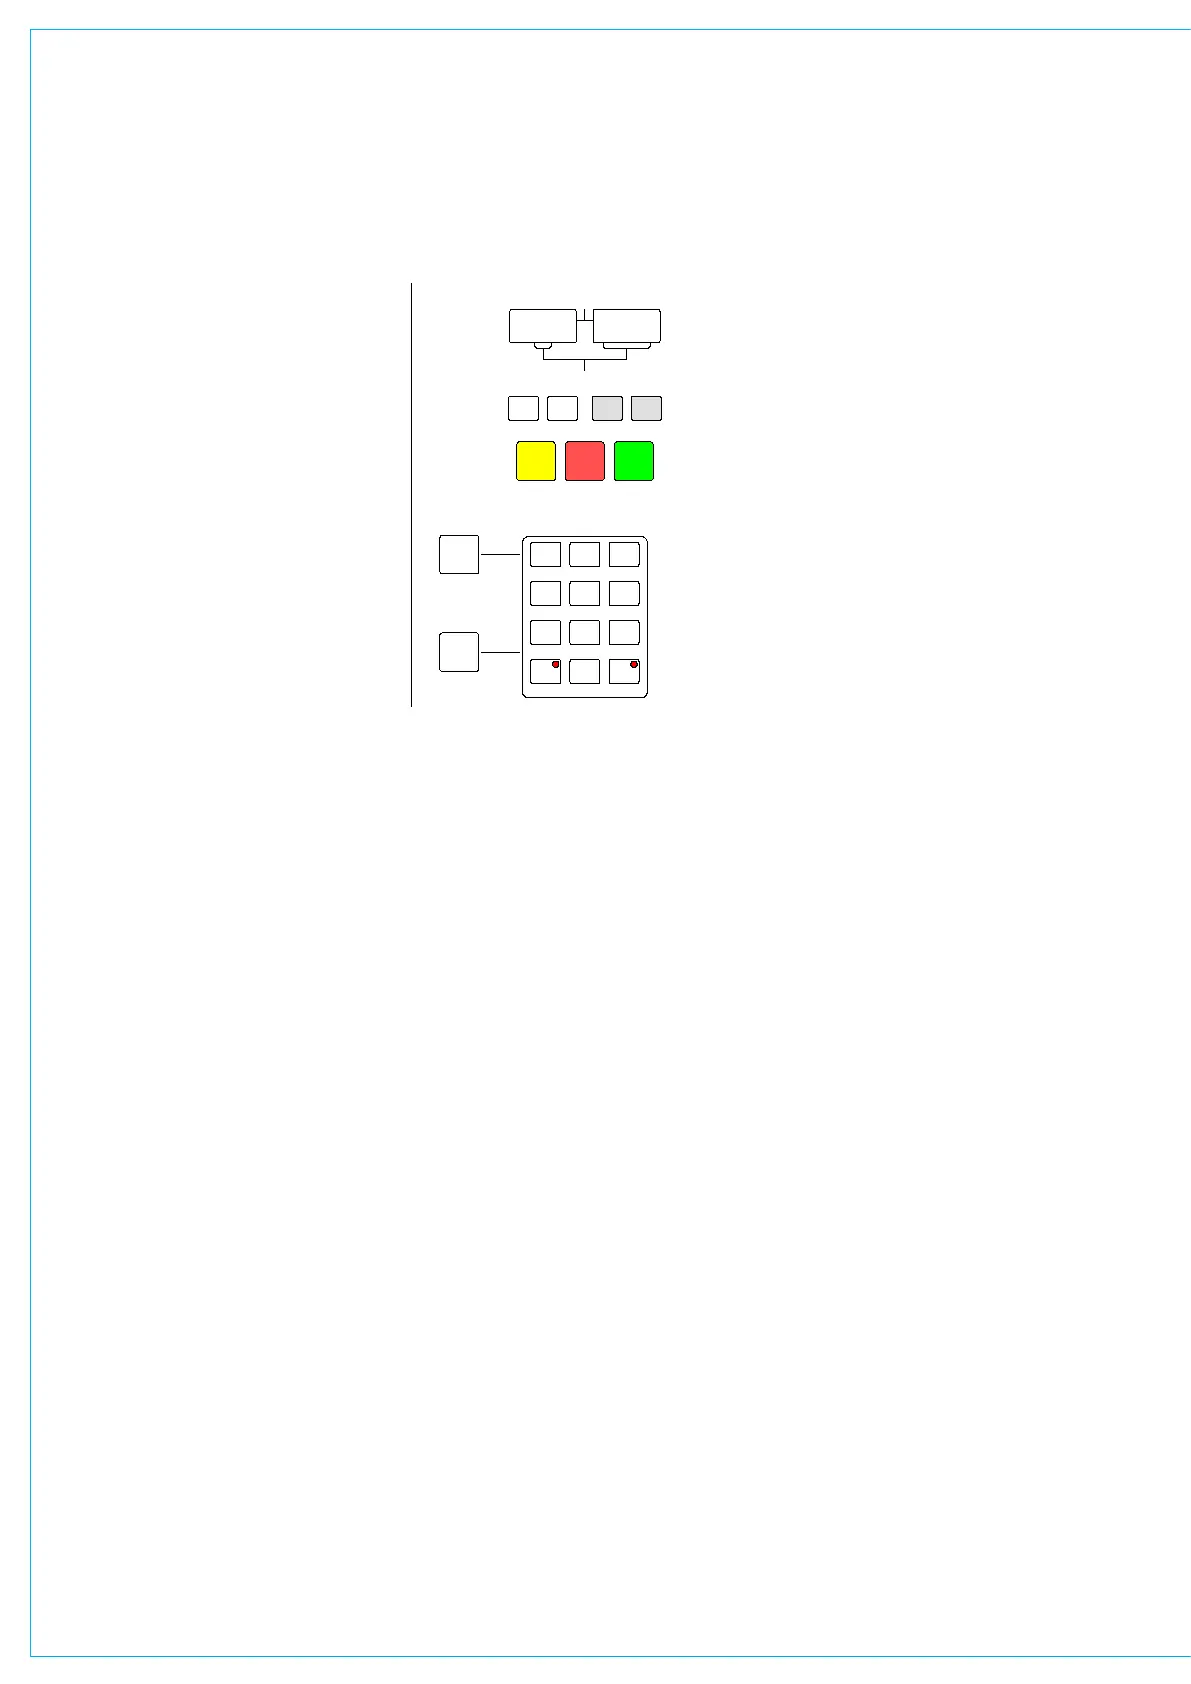
LIVE MEMORY
1 2 3
4 5 6
7 98
0
CLR EXEC
> <
LOAD
PRE
VIEW
SAVE
MY4883
1 2
I/O MATRIX
A
<
B
>
>>
< >
INPUT
MEMORY
INSERT
KEY
DIRECT O/P
PORT/No.
GROUP
SURR
STEREO
CHANNEL
MONO
ON
I/P LABEL
FADER
EXEC
SEL
MEM
SEL
FADER
SELECTED MEMORY
INSERT
INTO
REMOVE
STACK
MOVE PATH
PORT
1
PORT
2
TO
FADER
FDR19A
Drums M 23LR
04 08 76
04
Scene8
Scene3
SEL PORT/No.PATH TYPE
MEMORy CONTROLS
memory to which you want to save must
be in the Selected Memory position when
EXEC is pressed. Alternatively, SAVE +
Memory Number + EXEC will save into a
specified memory number.
Creating a New Memory
To create a new memory, choose an empty
memory by pressing SEL MEM and typing
its number on the keypad, or by selecting
it from the list on the MEM-SETUP screen.
The memory being saved can be given a
suitable title. If however, you wish to simply
update changes you have made to the Live
Memory, it must be occupying the Selected
Memory position aswell.
Preview Memory
When the Preview button is held down, the
Selected Memory settings will be displayed
on the control surface (The settings will
not actually change - only the displays).
The Assign panel displays will be blanked
out. Upon release of the Preview button,
the control surface will display the live
settings again.
Stacked Memories
The memories can be arranged into a
pre-set list, known as a stack. This can
be useful for setting up an easy-to-access
shortlist of specific memories for use
during a show. Stacks can be saved to the
hard disk or removable media as sessions.
To add a memory to the stack, ensure it
is in the Selected Memory position, and
press INSERT INTO STACK.
The > and < buttons scroll through the
stack. Pressing both > and < together,
will reset the last number loaded back into
the central position. To allow the stack
to use the Selected Memory position,
any memory which has been selected
manually, and is not part of the stack
(shown in inverse text in the display),
must first be removed from the Selected
Memory position, by pressing REMOVE.
If REMOVE is pressed while a stack
memory occupies the Selected Memory
position, it will be removed from the stack.
A second press will remove it from the
Selected Memory position.