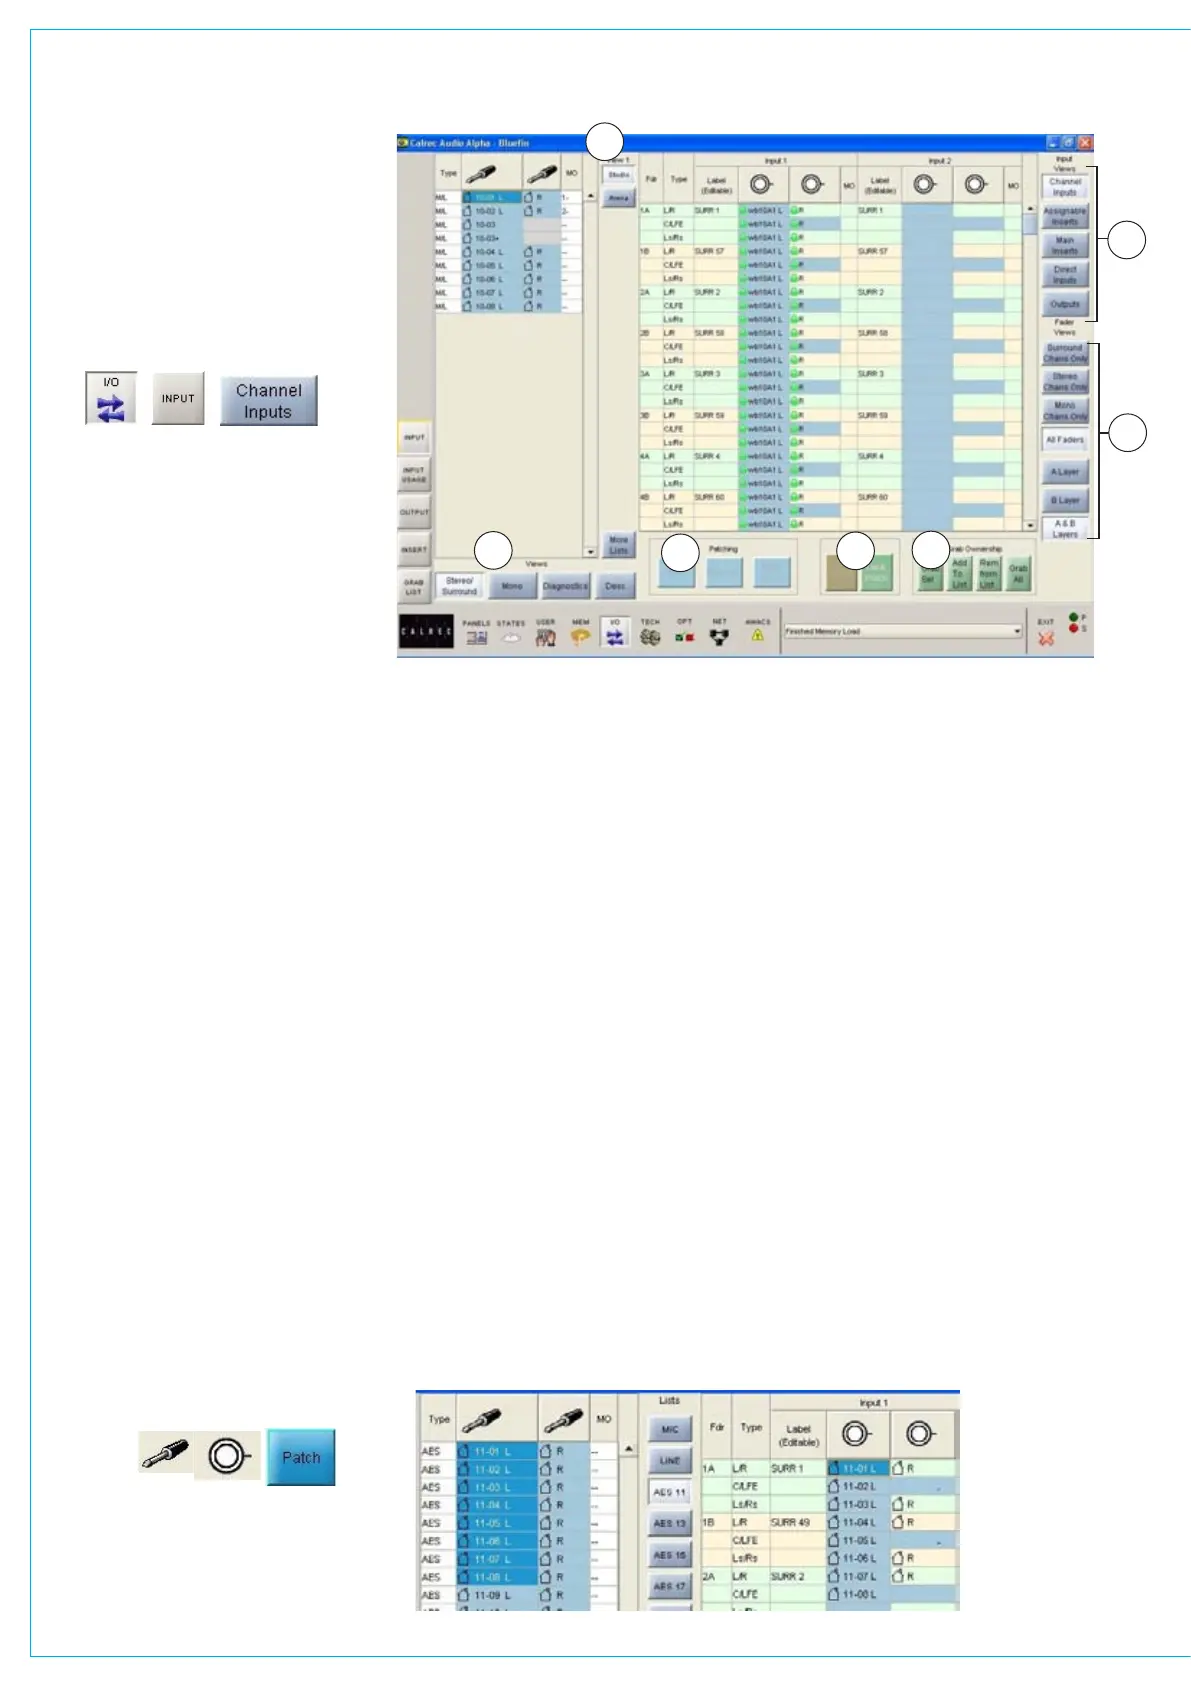
(1) Source Lists
All of the available ports can be grouped
into suitable lists using the Options - Port
Lists screens. These lists can then be
displayed on the left of this screen, ready
to be patched to channels on the right.
Different lists are accessed using the
selection buttons.
(2) Viewing Options
The sources can be viewed as pairs (for
patching to stereo or surround paths),
individual (for patching to mono paths),
or individual with the actual rack number,
card slot and input shown (for diagnostic
purposes). When viewed as diagnostics,
the list can be sorted alphanumerically, by
selecting the column header. The ‘Desc’
button opens a window containing port
descriptions. Selectiong a port in this
window and clicking ‘Jump to port’ will take
you to that port back on the main screen.
(3) Input Views
These buttons select the console path
types which can have input ports attached
(channel inputs, insert returns, direct inputs
or outputs). They are displayed in the main
section of the screen.
(4) Fader Views
It is possible to choose which set of faders
are to be available on and altered by this
screen. When a fader assign button
is selected, the screen will jump to the
selected fader in the list. This behaviour is
enabled using the States screen.
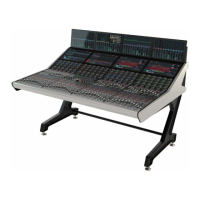
(5) Patching
Assignment is made by selecting a source,
and an input or output, and selecting
Patch.
The input source label will appear in the
channel input label field and on the fader
on the console (if that input, 1 or 2 is
currently selected on the Input/Output
panel). By selecting the label cell on the
screen, the input name can be edited using
the keyboard. The new name is stored
with the channel input and replaces the
source label on the fader display.
Patches can be removed when selected
using REMOVE.
Connections can be moved between
channel inputs when selected using MOVE
FROM. The Input 1 or 2 field will be
highlighted and the PATCH, REMOVE and
MOVE FROM buttons will be replaced with
MOVE TO, and CANCEL. Upon selection
of a new patch point, pressing MOVE TO
will move the connection. CANCEL will
cancel the operation.
Multiple Patching - It is possible to patch
regions of sources to a region of inputs.
Select a list of input ports using the •
trackball by dragging down the column
Select the fader to start patching to
•
Select Patch•
•
(6) Port Isolation
Port connections can be isolated from
memory recall, so that their settings will
not be over-written when a different
memory is loaded. Selecting Isolate a
second time will de-isolate the connection.
A brown cell in the Label column indicates
that a port is isolated.
(7) Grab Ownership
When a Hydra source or destination is
patched, ownership of it assigned to
the console. When several consoles
share sources/destinations on the same
network, the first console that connects
to a port will be given control (ownership)
over it. Other consoles that subsequently
connect that port will not be able to control
it.
The grab buttons allow the console to
override ownership of the network ports,
either altogether, individually, or by adding
them to a “Grab List”. When one or more
Hydra ports are added to the grab list, the
“Grab All” button changes to “Grab List”.
The grab list can be viewed on the Grab
List screen, accessed on the left side of
the screen.
1
2
3
4
5
6
7
INPUT PORTS