Chery Automobile Co., Ltd.
49 - INTERIOR
49–17
49
A-pillar Upper Protector Assembly
Removal
HINT:
Use the same procedures for the right side and left side.
Procedures listed below are for the left side.
1. Remove the front left door opening weatherstrip (See page 49-14).
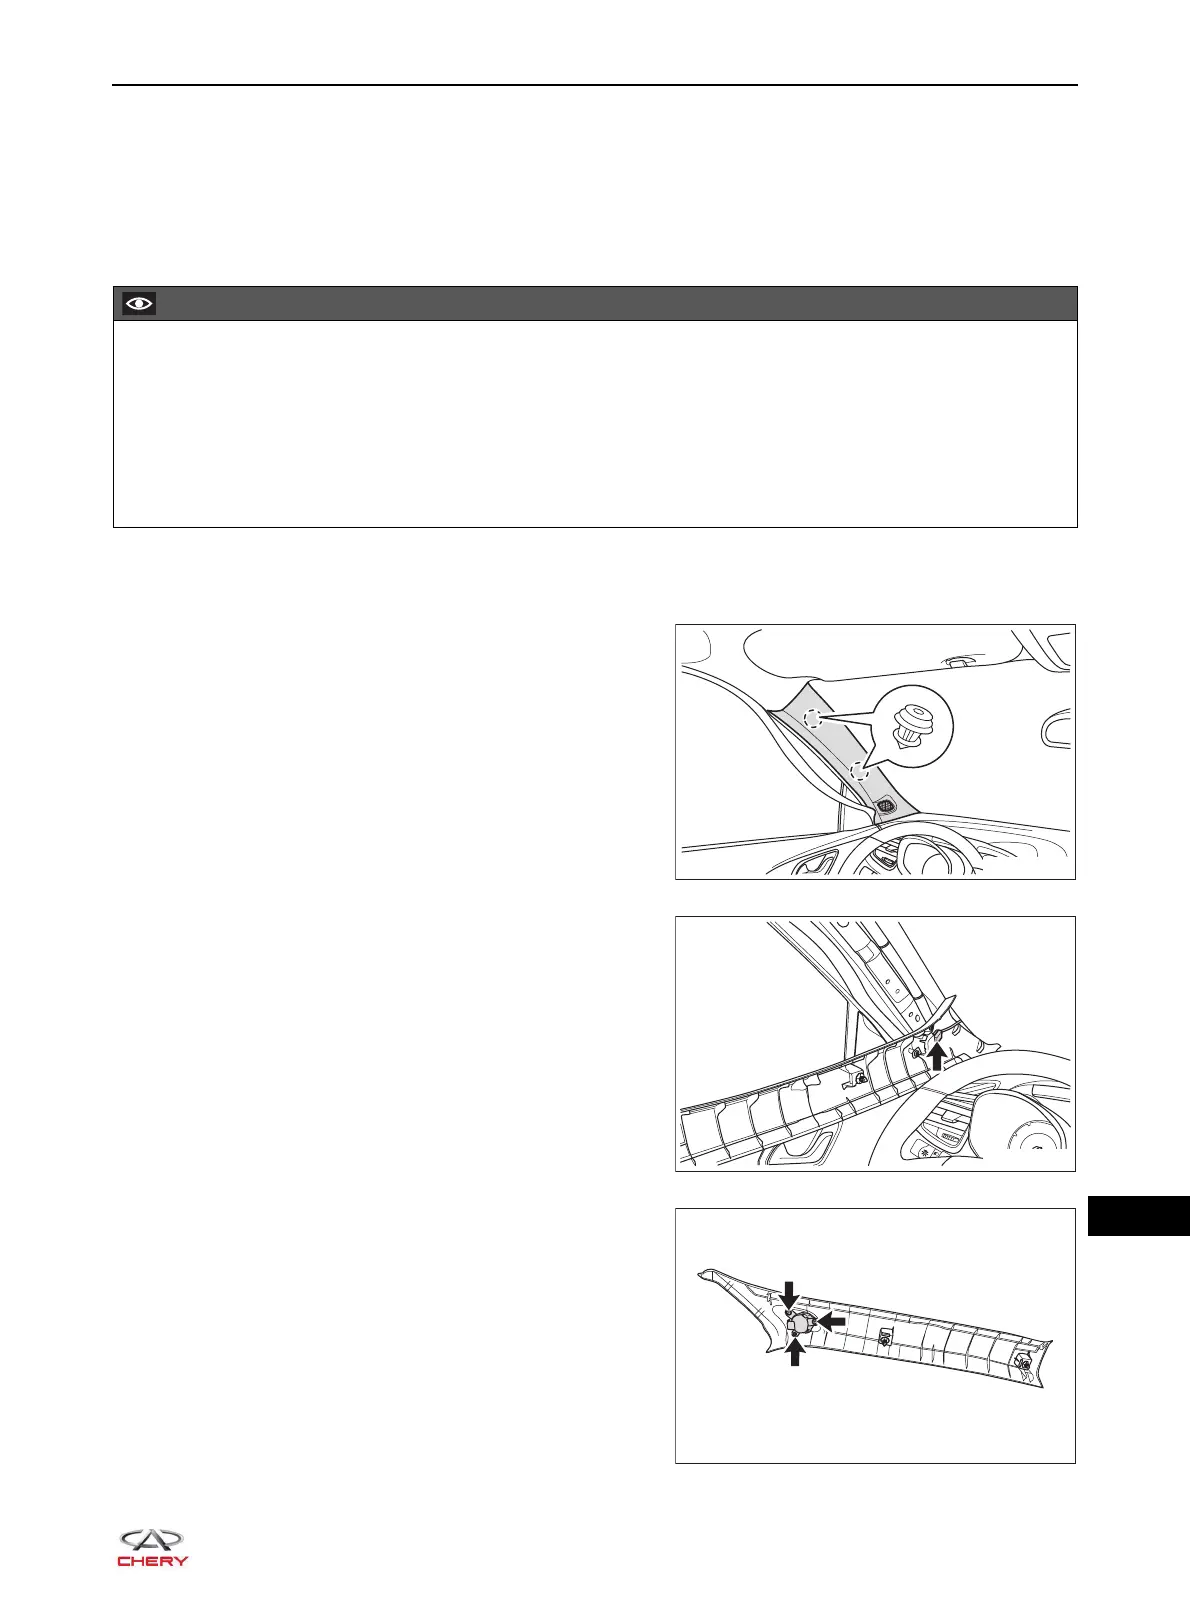
2. Remove the left A-pillar upper protector assembly.
a. Using an interior crow plate, pry off the clips from the
A-pillar upper protector assembly.
b. Disconnect the high pitched speaker connector
(arrow), and remove the left A-pillar protector
assembly.
c. Remove 3 fixing screws (arrow) from the high pitched
speaker assembly.
(Tightening torque: 3 ± 0.5 N·m)
d. Remove the high pitched speaker assembly from the
A-pillar protector assembly.
Make sure to wear safety equipment to prevent accidents when removing the A-pillar upper protector
assembly.
Appropriate force should be applied when removing the A-pillar upper protector assembly. Be careful not
to operate roughly.
Prevent interior and body paint from being scratched when removing the A-pillar upper protector
assembly.
 Loading...


