Product Manual — Doc. 9045M DM NAX® • 133
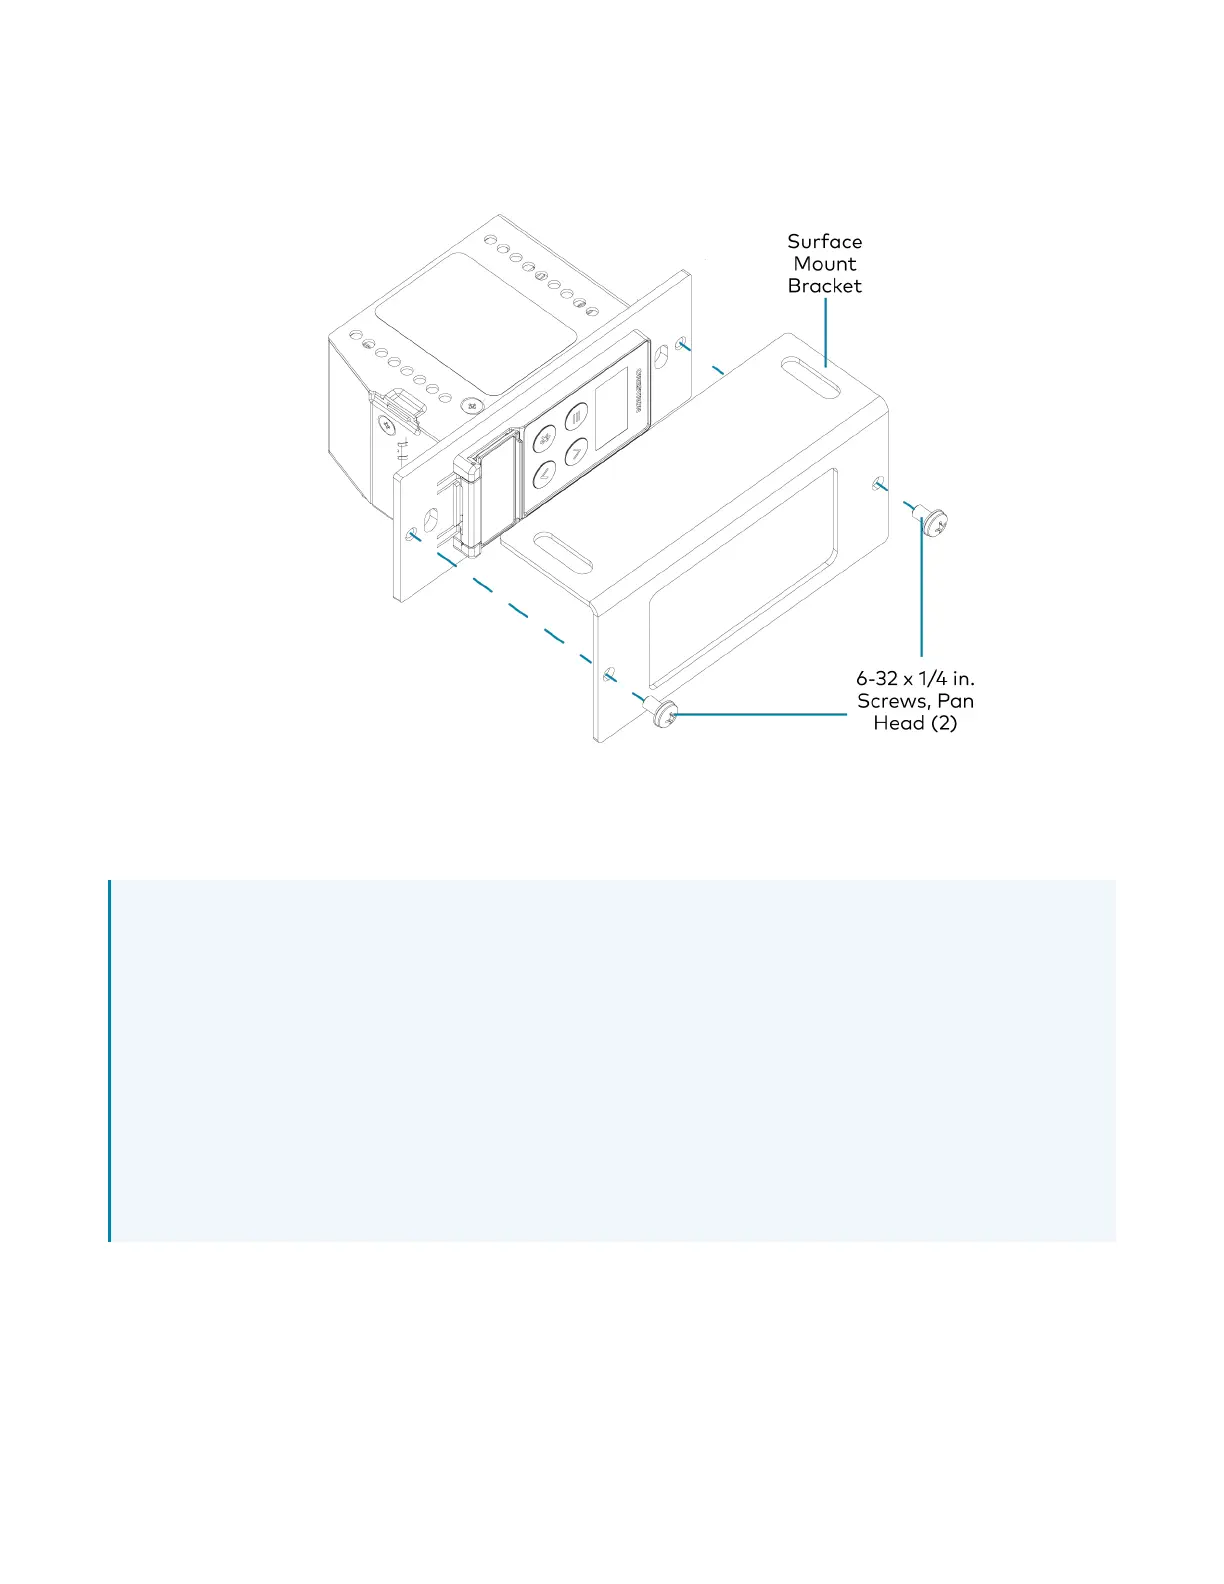
1. Align the included right angle surface mount bracket with the front panel of the device.
2. Using a Phillips screwdriver and the two included 6-32 x 1/4in. pan head screws, attach the
mounting bracket to the device.
3. Secure the device to the underside of a table using the appropriate mounting screws (not
included).
Mounting into a 1-Gang Electrical Box
NOTES:
l
The DM-NAX-BTIO-1G should only be mounted with a RACO® 3in. x 2in. x 2in. gangable metal
switch box with eight 0.5in. knockouts and plaster ears (catalog ID #420), as it was designed
to fit the box dimensions and knockout placements. Alternative metal switch boxes should not
be used as they may have different knockout placements, which can lead to issues running the
PoE connection to the unit due to cable bend radius restrictions.
l
For thermal performance reasons, fully enclosed plastic back boxes should not be used with
the DM-NAX-BTIO-1G. In installations where an enclosed back box is not required, the
DM-NAX-BTIO-1G can be installed into most single gang metal or plastic mud rings.
l
Connector boots should not be used on CAT5e (or greater) cables being connected to the
DM-NAX-BTIO-1G to avoid cable bend radius issues.
To mount the wall plate into a 1-gang electrical box:
1. Using a Phillips screwdriver and two 6-32 x 3/4 in., truss head screws, attach the wall plate to the
electrical box.

 Loading...