539 • DM NAX® Product Manual — Doc. 9045M
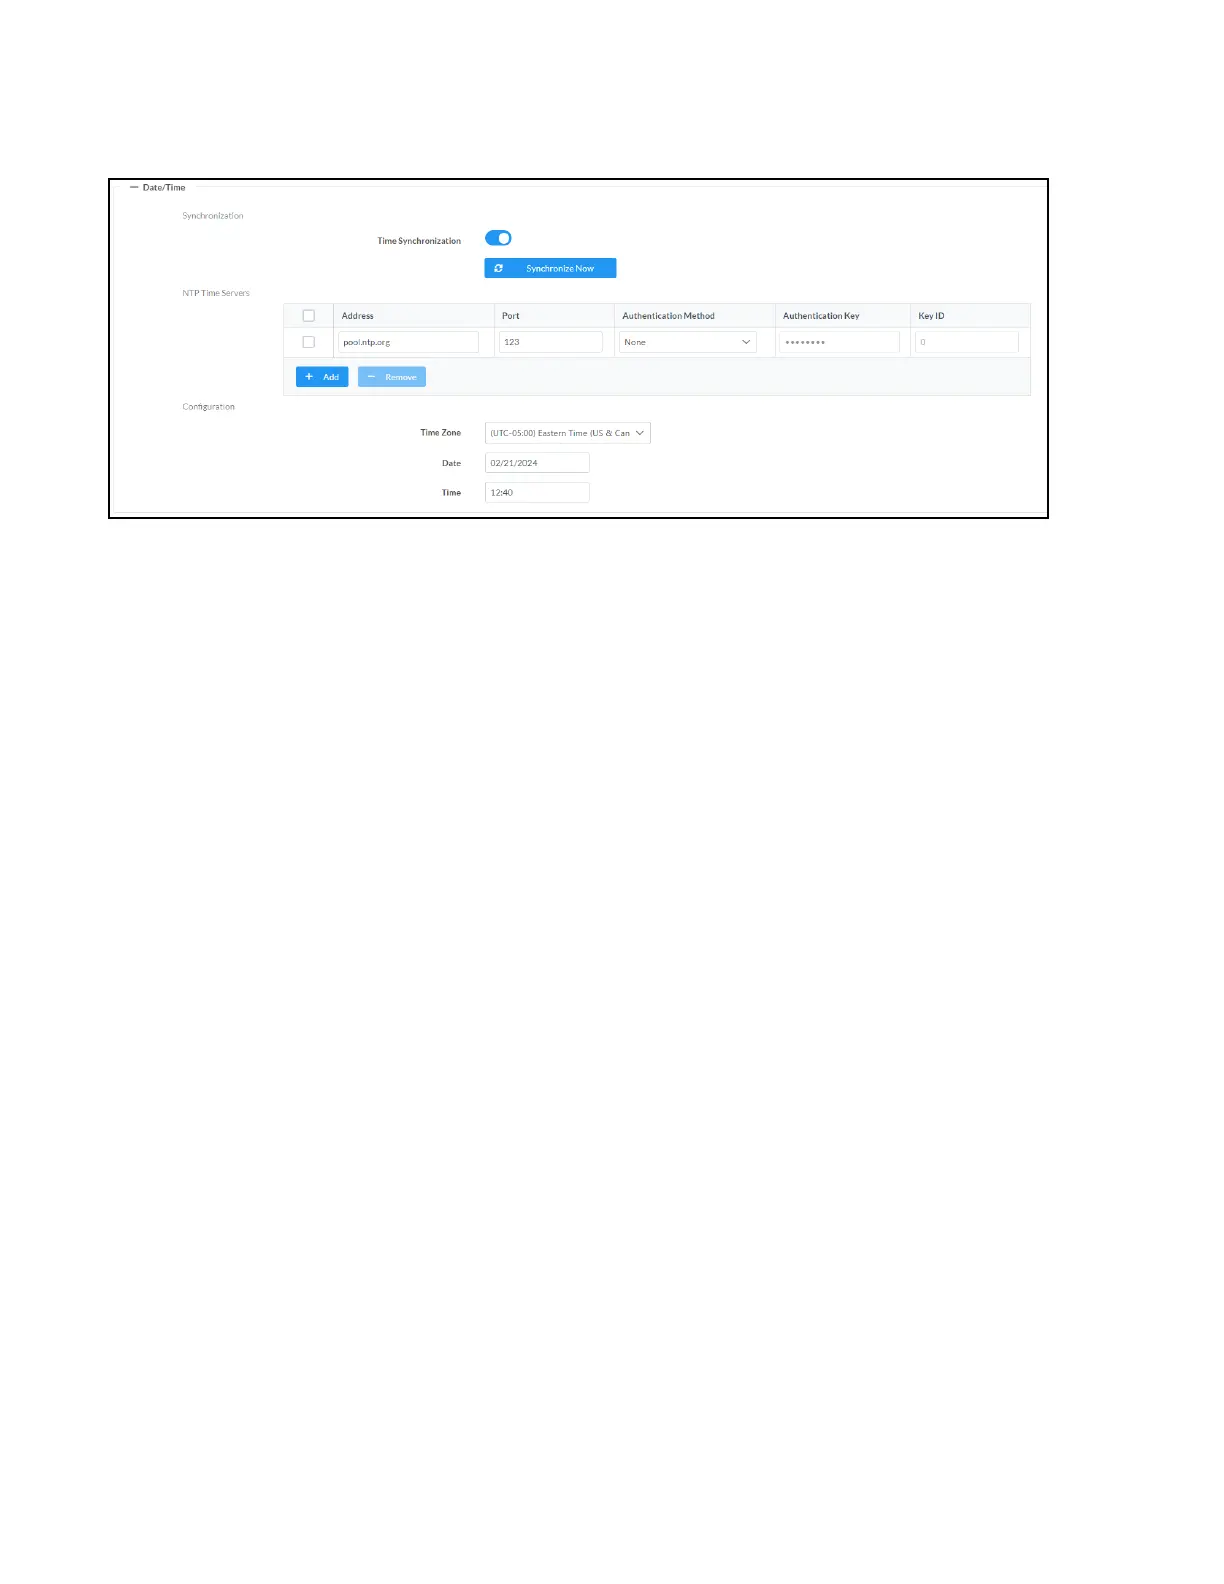
Date/Time
Use the Date/Time tab to configure the date and time settings of the DM-NAX-AUD-USB.
Time Synchronization
1. Set the Time Synchronization toggle to the right position to enable or left position to disable time
synchronization. By default, time synchronization is enabled.
2. In the NTP Time Servers table, enter the URL of a NTP (Network Time Protocol) or SNTP (Simple
Network Time Protocol) server. Up to three time servers can be added on a device.
3. Click Synchronize Now to perform time synchronization between the device's internal clock and
the time server.
Time Configuration
1. Click on the Time Zone drop-down menu to select the applicable time zone.
2. In the Date field, enter the current date.
3. In the Time (24hr Format) field, enter the current time in 24-hour format.
Click the Save Changes button to save the settings.
Click Revert from the Actions drop-down menu to revert to the previous settings without saving.
Auto Update
The DM-NAX-AUD-USB can automatically check for and install firmware updates at scheduled intervals
via the Auto Update feature.

 Loading...