User's Manual
200
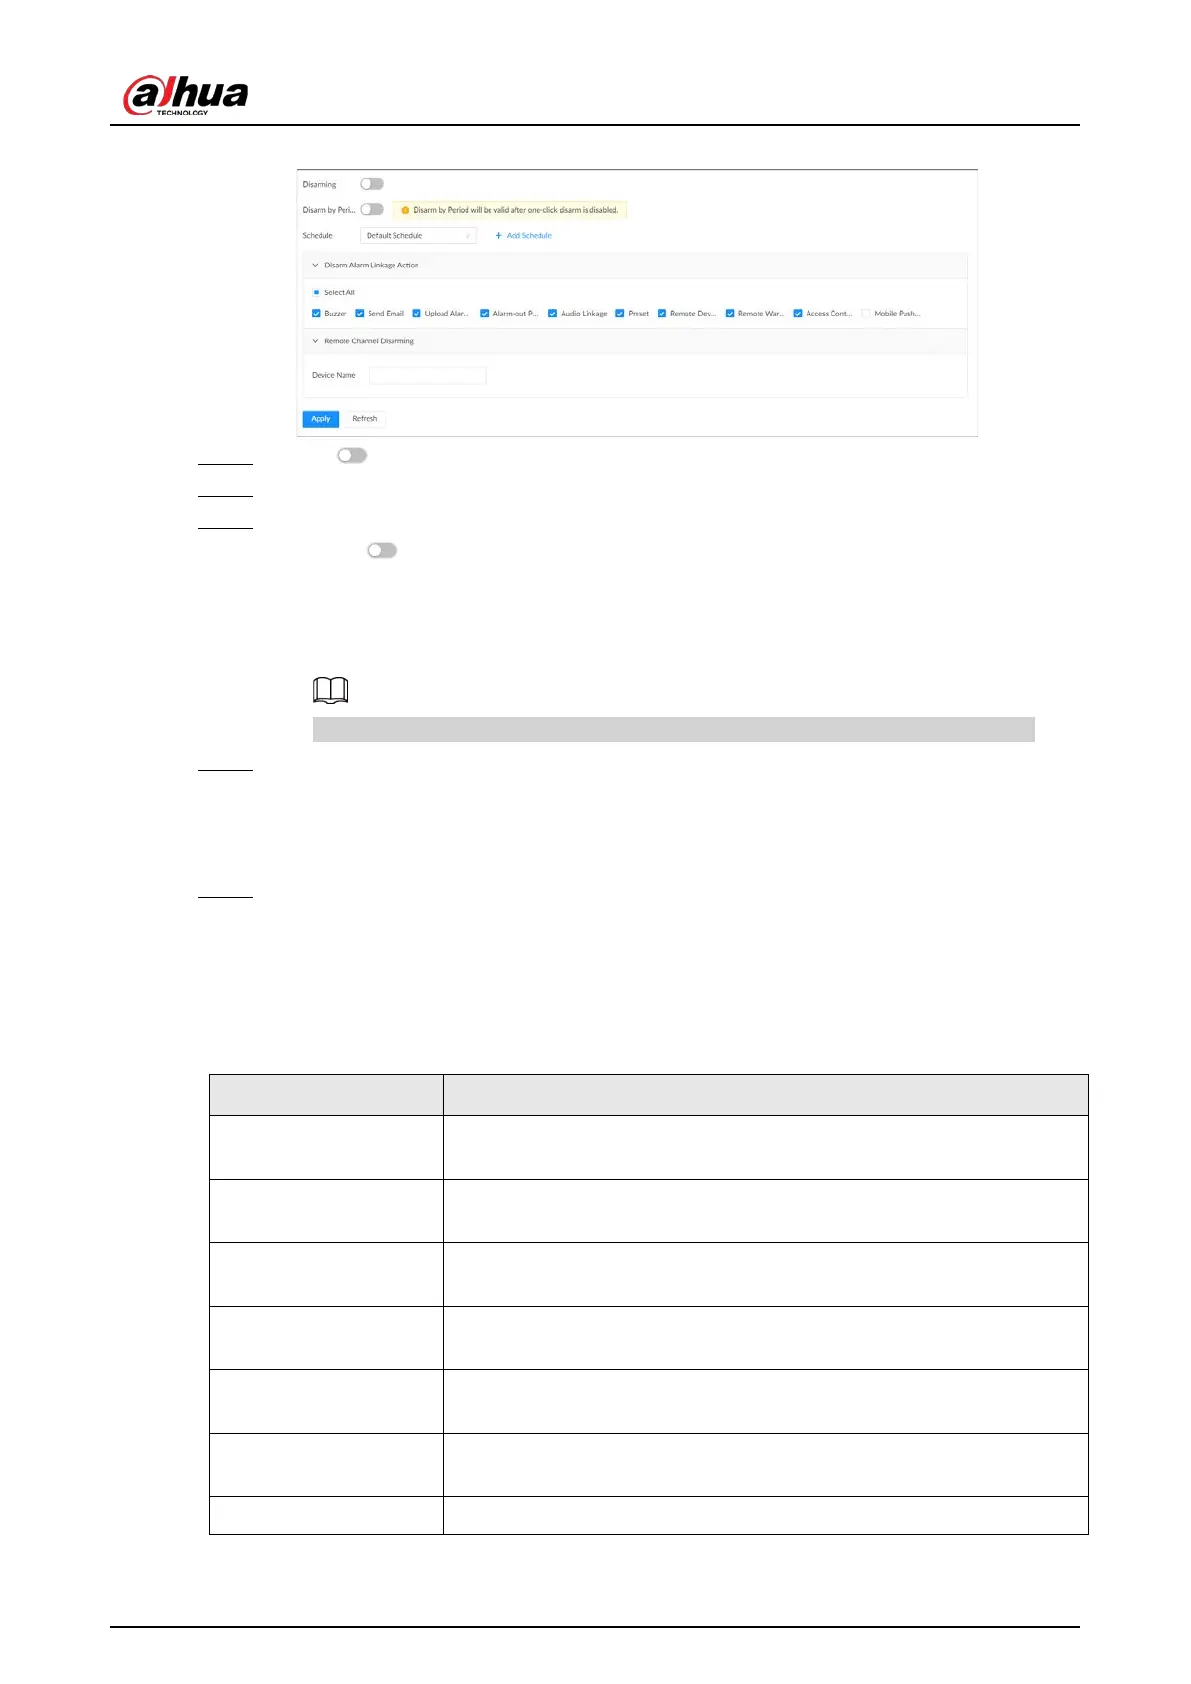
Figure 8-34 Disarming
Step 5 Click to enable disarming.
Step 6 Cancel the selection of alarm linkage actions as needed.
Step 7 (Optional) Configure disarming by period.
1) Click to enable disarming by period.
2) Click
Add Schedule
to add a disarming schedule. The alarm linkage actions remain
armed during periods beyond the disarming schedule.
3) Click
Apply
.
After disarming by period is enabled, one-click disarming is disabled automatically.
Step 8 Configure remote channel disarming.
1) Click the
Device Name
list in the
Remote Channel Disarming
section. The remote
devices that support one-click disarming are displayed.
2) Select the device that you want to synchronize the disarming configuration with.
Step 9 Click
Apply
.
8.3.2.2 Abnormal Events
Set the alarms for abnormal events such as no disk, storage errors, and IP conflict.
Table 8-16 Abnormal events
Name Description
No Disk
The system triggers an alarm when there is no disk. It is enabled by
default.
Storage error
The system triggers an alarm when disk error occurs. It is enabled by
default.
Low disk space
warning
The system triggers an alarm when the used storage space reaches the
predefined threshold. It is disabled by default.
RAID exception
The system triggers an alarm in case of RAID degrade, RAID broken or
other RAID exceptions.
IP conflict
The system triggers an alarm when its IP address conflicts with IP
addresses of other devices on the same LAN. It is enabled by default.
MAC conflict
The system triggers an alarm when its MAC address conflicts with MAC
addresses of other devices on the same LAN. It is enabled by default.
SSD health exception The system triggers an alarm when SSD health exception occurs.
 Loading...