D-Show Profile Guide214
Removing the Standalone Software
To remove the D-Show Standalone software:
1 Launch the Add/Remove Programs Control Panel.
2 Choose Digidesign D-Show, then follow the instructions
on-screen.
Simulating a D-Show Configuration
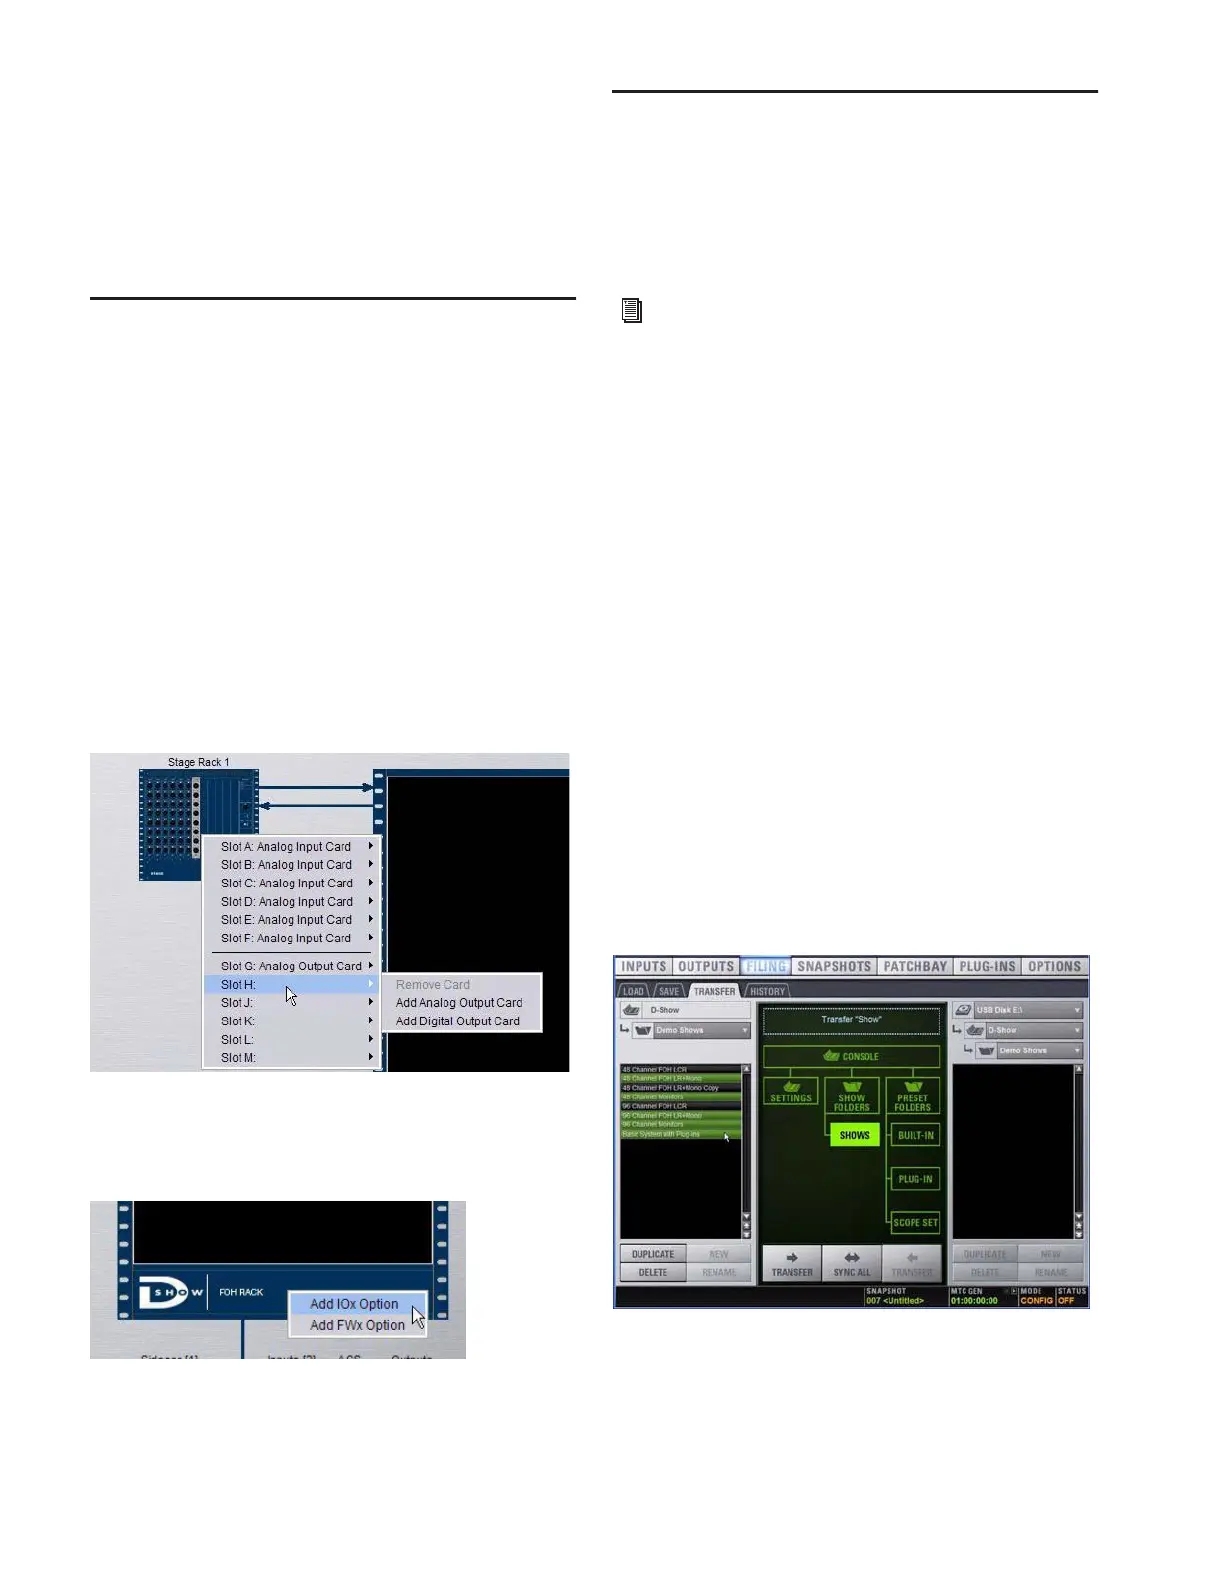
You can use the Standalone software to simulate a D-Show
system with any number of input and outputs. The corre-
sponding inputs and outputs become available in the Patch-
bay, allowing you to prepare a show that can transfer directly
to the destination system.
To simulate a D-Show system:
1 Launch the Standalone software.
2 Go to the Options page and click the Devices tab.
3 Right-click the console graphic and choose Use D-Show, or
Use D-Show Profile, depending on which console you will be
working with.
4 Right-click the Stage Rack graphic and choose the number
of Input and Output cards on the destination system.
5 Right-click the FOH Rack graphic and add an IOx Option or
Pro Tools recording/playback option if they are present on the
destination system.
Transfer and Filing Quick Start
The basic steps for using the Standalone software and data
transfer are as follows:
• Save data to disk, then transfer it to an external USB storage
device.
• Transfer data from the USB device, then load the data.
Save and Transfer Data from a
D-Show System
To save and transfer data from the complete system:
1 Connect a USB storage device to a D-Show USB port.
2 Use the Save tab of the Filing page to save D-Show data to
disk.
3 Go to the Filing page and click the Transfer tab.
4 Do one of the following to select the type of data to transfer:
• To transfer all data, click the Console icon.
• To transfer Console Settings, click the Settings icon.
• To transfer Show Folders, click the Show Folders icon.
• To transfer individual Shows, click the Shows icon.
• To transfer Preset Folders, click the Preset Folders icon.
• To transfer Presets for individual items, click the Built-In
icon or the Plug-In icon and choose a processor, plug-in
or Input Channel Presets item from the pop-up menu, or
click the Scope Sets icon.
5 In the left column, select the items you want to transfer
from D-Show to the portable storage device.
6 Click the Transfer button.
Adding Stage Rack inputs and outputs
Adding FOH Rack inputs and outputs
For complete instructions on transferring data, see
Chapter 20, “Shows and File Management.”
Transferring Show files from D-Show