Chapter 2: Configuring and Connecting D-Show 7
Chapter 2: Configuring and Connecting D-Show
The chapter shows how to connect the components of your
D-Show system.
Unpacking and Assembling
D-Show Profile
◆ Remove all components from the shipping packaging.
◆ Place the D-Show Profile control surface on a table or other
stable surface that leaves full access to the front and back
panel connectors and mounts.
◆ Make sure all components are free of any bags, padding or
other materials.
◆ Keep cables and other included items organized, making
sure to keep them with their associated component after un-
packing.
Assembling and Attaching the Video
Monitor Mount to D-Show Profile
D-Show Profile includes a Video Monitor Mount for your VGA
monitor. Follow the instructions in this section to attach your
video monitor to the mounting hardware.
Assembling the Video Monitor Mount requires the following
items:
• A VGA flat panel display with 100mm or 75mm mount-
ing compatibility
• A medium sized Phillips screwdriver
• A table or similar clear, flat area with a towel or other pad-
ded surface (big enough to safely lay your video monitor
face down)
Assembling the Video Monitor Mount
The Video Monitor Mount is assembled by attaching a flat
panel VGA monitor to the mounting arm. Both the 100mm
and 75mm VESA (FDMI) video mounting standards are sup-
ported.
To assemble the Video Monitor Mount:
1 Remove the Video Monitor Mount components from their
packaging. Components include two T-bolts, two knurled
locking nuts, the mounting arm, a U bracket, an additional
mounting plate (for 100mm monitors only), and screws.
2 Make sure your video monitor is powered off and discon-
nected, and lay it face down on a padded table.
3 Attach your monitor to the Video Monitor Mount by doing
either of the following, as appropriate for your video monitor:
100mm (MIS-D100) Attach the U bracket to the included
mounting plate using the provided hardware. To complete the
assembly, remove the 4 mounting screws from the back of the
video monitor, line up the holes of the mounting plate, and
use the screws you removed to secure the plate to the back of
your monitor.
75mm (MIS-D 75) Use the included U bracket. Remove the ap-
propriate screws from the back of your monitor and use them
to secure the U bracket to the back of the monitor.
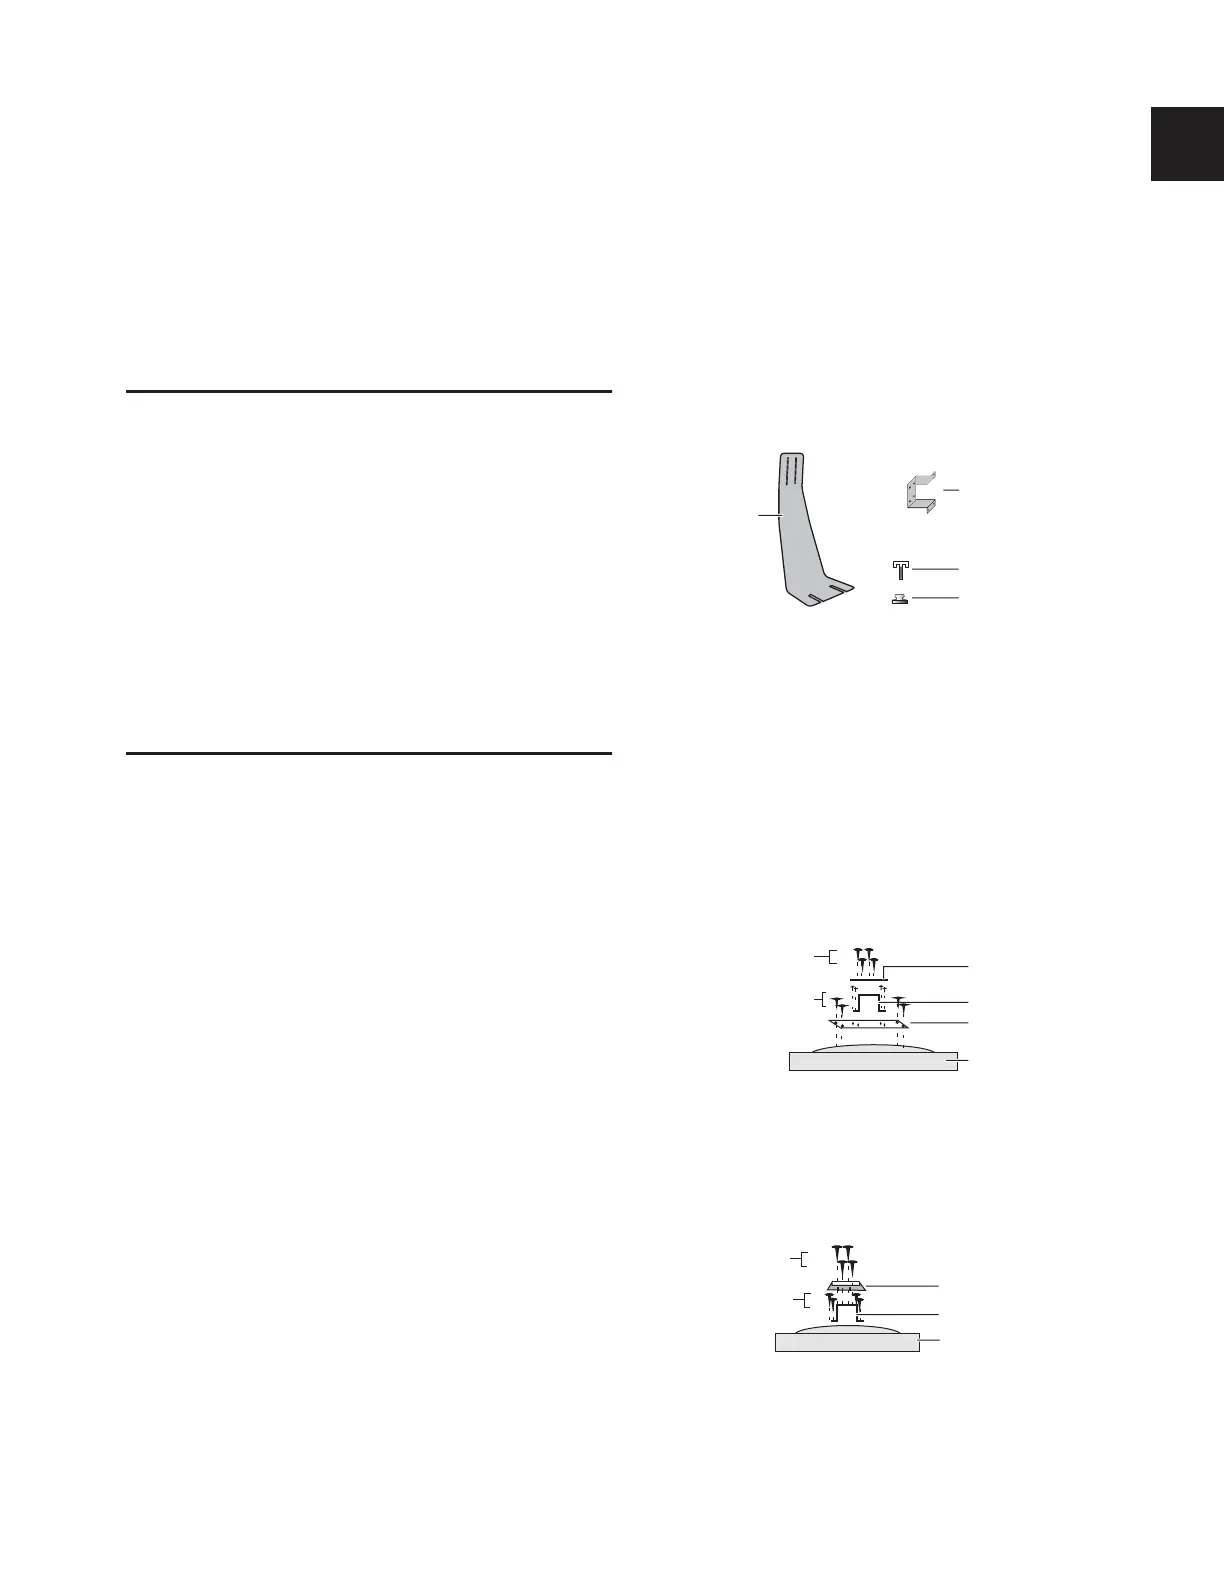
Components of the Video Monitor Mount
Attaching a 100mm VGA monitor to the mounting plate, U bracket and
mounting arm, viewed from the top edge of the monitor
Attaching a 75 VGA monitor to the U bracket and mounting arm, viewed
from the top edge of the monitor
Mounting Arm
T-bolt (2)
Locking Nut (2)
U bracket
(top)
back
front
U bracket
Mounting arm (top)
screws
Mounting plate
screws
Video monitor
U bracket
Video monitor
Mounting arm
back
front
screws
screws