Chapter 6: Options 55
To show time of day in the Status area:
1 Go to the Options > Misc page.
2 In the System Clock section, enable the Show Time in Status
Area option.
3 Select a format for the displayed time: 12 hour (AM/PM) or
24 hour.
Time of day is shown whenever the status of the plug-in racks
is OK; plug-in rack status messages (if any) temporarily replace
time of day display to alert you to plug-in rack status.
Talkback
Talkback Level Lets you activate Talkback and set Talkback in-
put level.
Talkback Dim Level Sets the dim level, or amount of attenua-
tion applied to the mix on the output bus when Talkback is
activated.
2-Track
2-Track Level Lets you activate 2-Track input and set 2-Track
input level.
2-Track Input Selects which 2-Track input (analog, or digital) is
fed to the monitors and output busses.
Delay Units
Lets you set the display units on all applicable input and out-
put delay controls. This makes it possible to set the delay
based on any of the following:
• delay time (in milliseconds)
• distance to the source (in feet or meters)
• number of samples of delay
Pointer Speed and Mouse L/R Settings
You can customize the response speed for the trackball (or
mouse) and on-screen cursor, and reverse the left/right assign-
ment of the Trackball buttons, from the Options > Misc page.
To customize Pointer Speed:
1 Go to the Options > Misc page.
2 Do any of the following:
• To adjust cursor speed, click the Pointer Speed pop-up
menu and choose a higher value for faster response, or a
lower value for a slower response.
• To reverse the left/right assignment of the two Trackball
buttons, click to enable “Switch Buttons.”
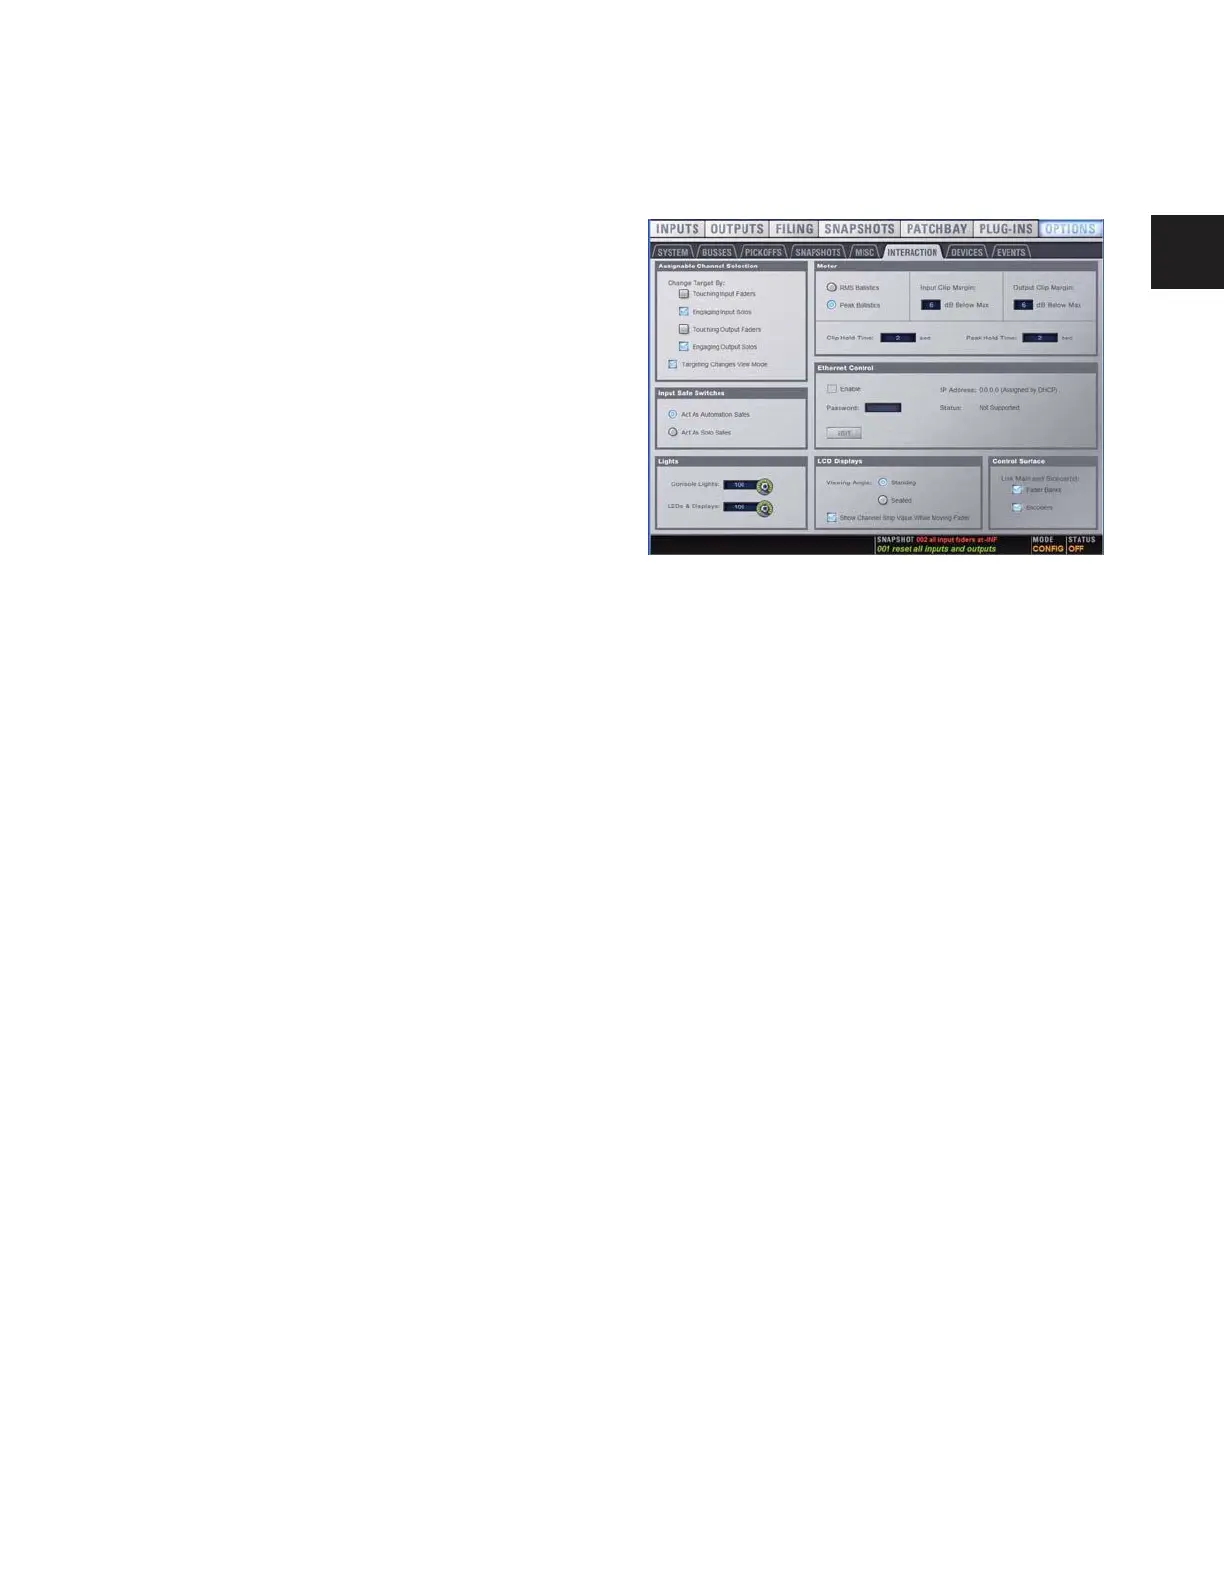
Interaction
The Interaction page lets you configure the Assignable Chan-
nel Selection, Input Safe Switches, Lights, Meter, and LCD Dis-
play options.
Assignable Channel Selection
Options in this section set the mechanism by which channels
are targeted on the ACS.
To customize D-Show control surface and screen interaction:
1 Go to the Options page and click the Interaction tab.
2 Set the following Assignable Channel Selection options:
Change Target By
The Change Target By options let you specify whether the fol-
lowing actions target the affected channel on the ACS. More
than one option can be selected simultaneously.
• Touching Input Faders
• Engaging Input Solos
• Touching Output Faders
• Engaging Output Solos
Targeting Changes View Mode
The Targeting Changes View Mode option updates the
on-screen display to show the page for the channel targeted in
the ACS. When this option is deselected, the on-screen display
does not update when a channel is targeted on the ACS.
Meter
Metering settings provide the following options for meter bal-
listics, peak, and clip indication.
Ballistics This option lets you choose RMS or Peak ballistics
for the control surface and on-screen meters.
Interaction tab of the Options page