6
Data preparation
6.6
Training manual • Basic training • Status 03.14
EOS P 396
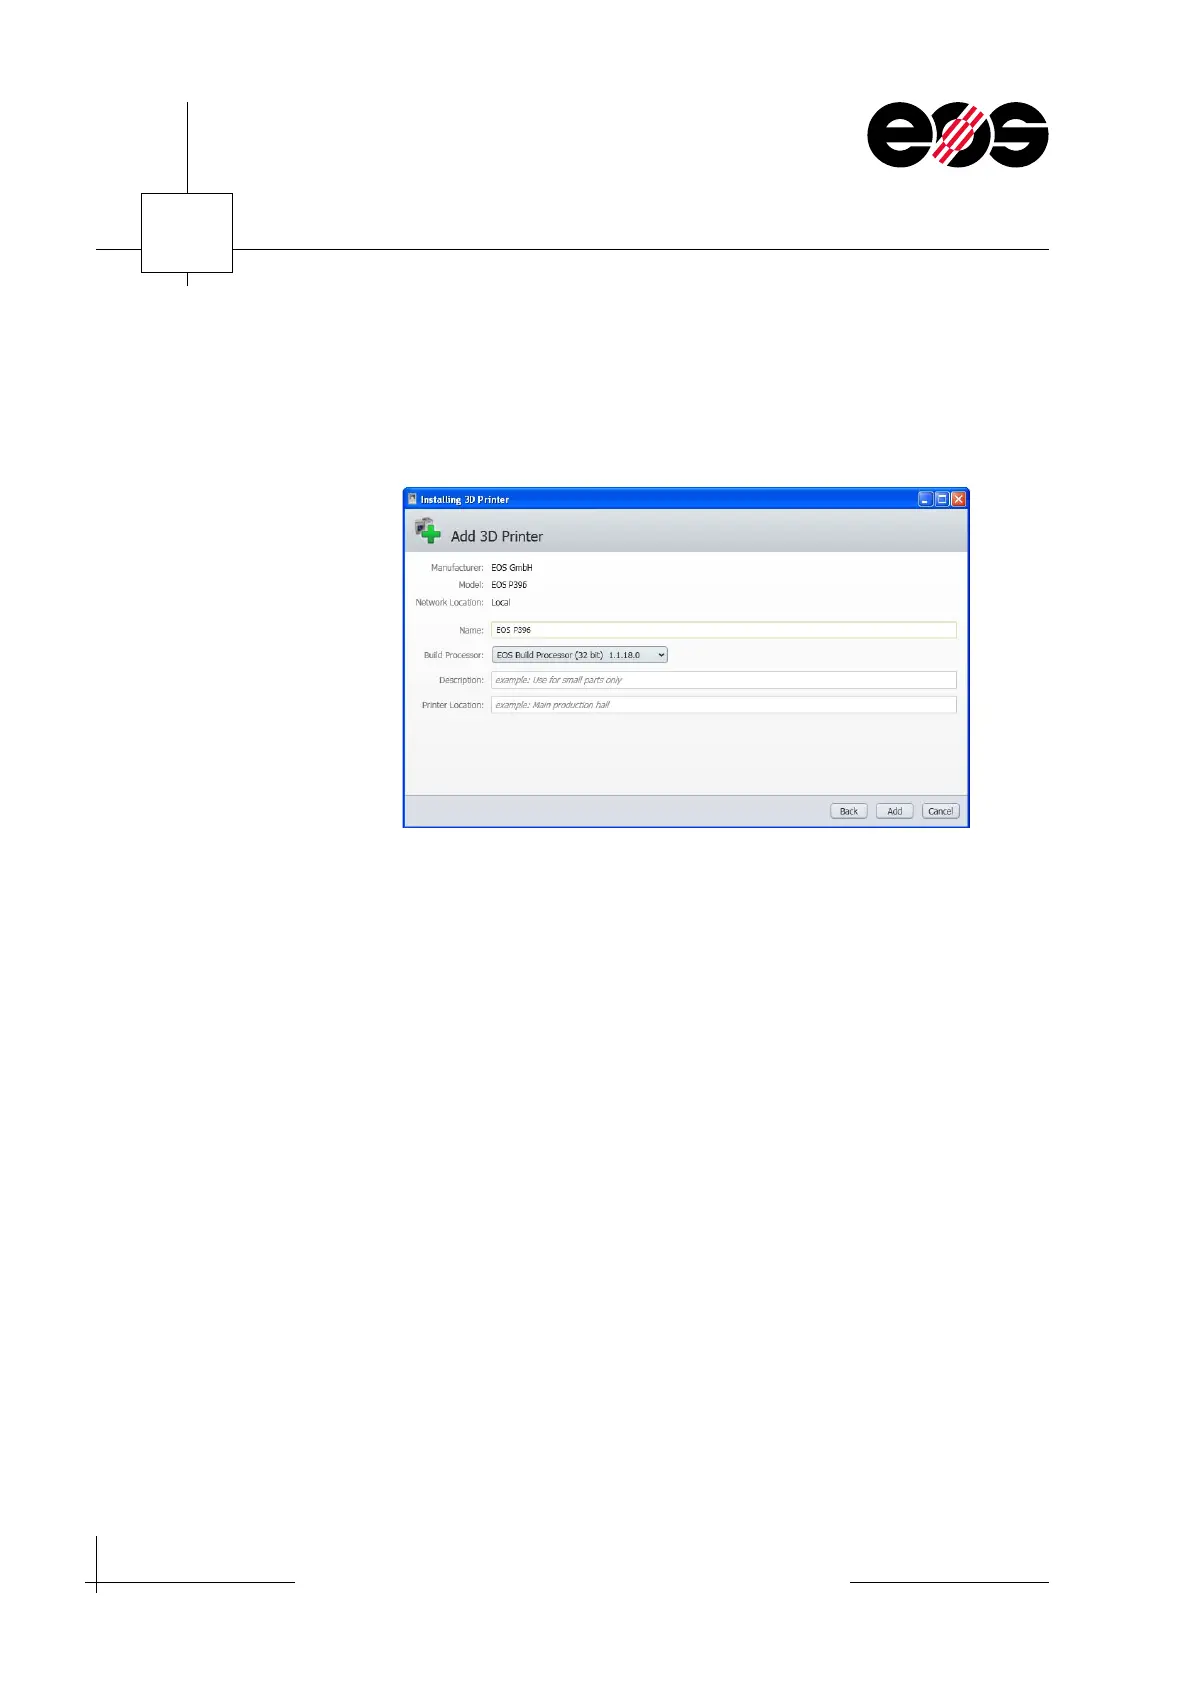
4. If necessary, add name, description and location of the machine in the Installing
3D Printers window and continue using Add.
The software installs the related machine type and displays a message on
successful installation.
5. In the Installing 3D Printers window, click the Close button to close the window.
The Configure EOS Printer window opens.
6. In the Upload Folder group box enter the folder where the part data are to be
exported and accept using OK.
7. Close 3D Printers window.