EPSON Stylus COLOR 3000
EPSON Stylus Color 3000 Service Manual
-1
4.1 Overview
This chapter describes adjustments required after disassembling and assembling the printer.
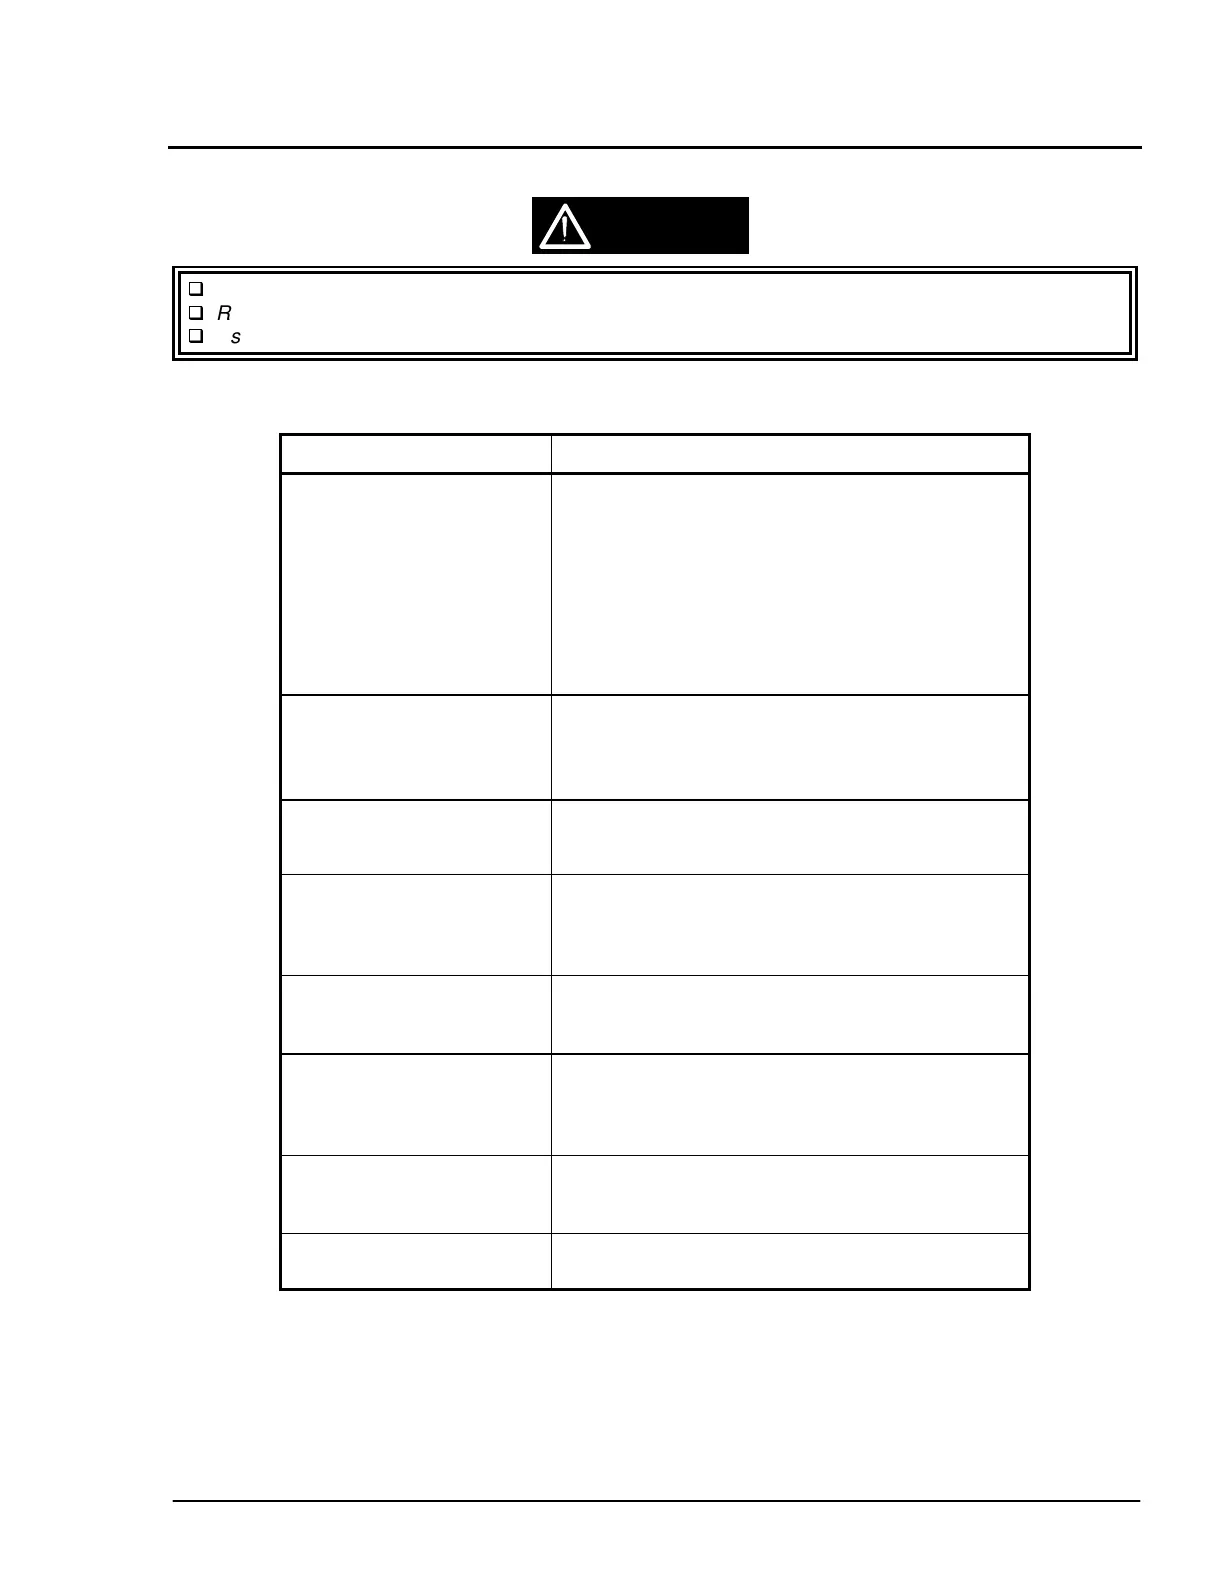
Adjustments must be made in the order shown in Table 4-1.
Remove all ink cartridges from the printer when returning the printer to the customer.
Use 720 dpi photo quality (PQ) paper when printing the adjustment pattern.
Action Required Adjustments
Replace printer mechanism.
Replace main control board.
1. Clear EEPROM (Refer to page 1-25)
2. Write printhead voltage
3. Printhead vertical adjustment
4. Printhead gap adjustment
5. Uni-D adjustment
6. Bi-D adjustment
7. PQ (Paper Quantity) sensor adjustment
8. PW (Paper Width) sensor adjustment
Replace black printhead. 1. Write printhead voltage
2. Black printhead angular adjustment
3. Printhead vertical adjustment
4. Printhead gap adjustment
Remove black printhead. 1. Black printhead angular adjustment
2. Printhead vertical adjustment
3. Printhead gap adjustment
Replace color printhead. 1. Write printhead voltage
2. Color printhead angular adjustment
3. Printhead vertical adjustment
4. Printhead gap adjustment
Remove color printhead. 1. Color printhead angular adjustment
2. Printhead vertical adjustment
3. Printhead gap adjustment
Replace CR unit. 1. Platen gap adjustment
2. Write printhead voltage
3. Uni-D adjustment
4. Bi-D adjustment
Remove or disassemble CR
unit.
1. Platen gap adjustment
2. Uni-D adjustment
3. Bi-D adjustment
Remove or replace CR
motor.
1. Uni-D adjustment
2. Bi-D adjustment
Note: You can not run the adjustment program without inputting the market setting first (Refer to “Market
Setting Input” on page 4-4).
CAUTION
Table 4-1. Required Adjustments

 Loading...


