EPSON Stylus COLOR 3000
EPSON Stylus Color 3000 Service Manual
-7
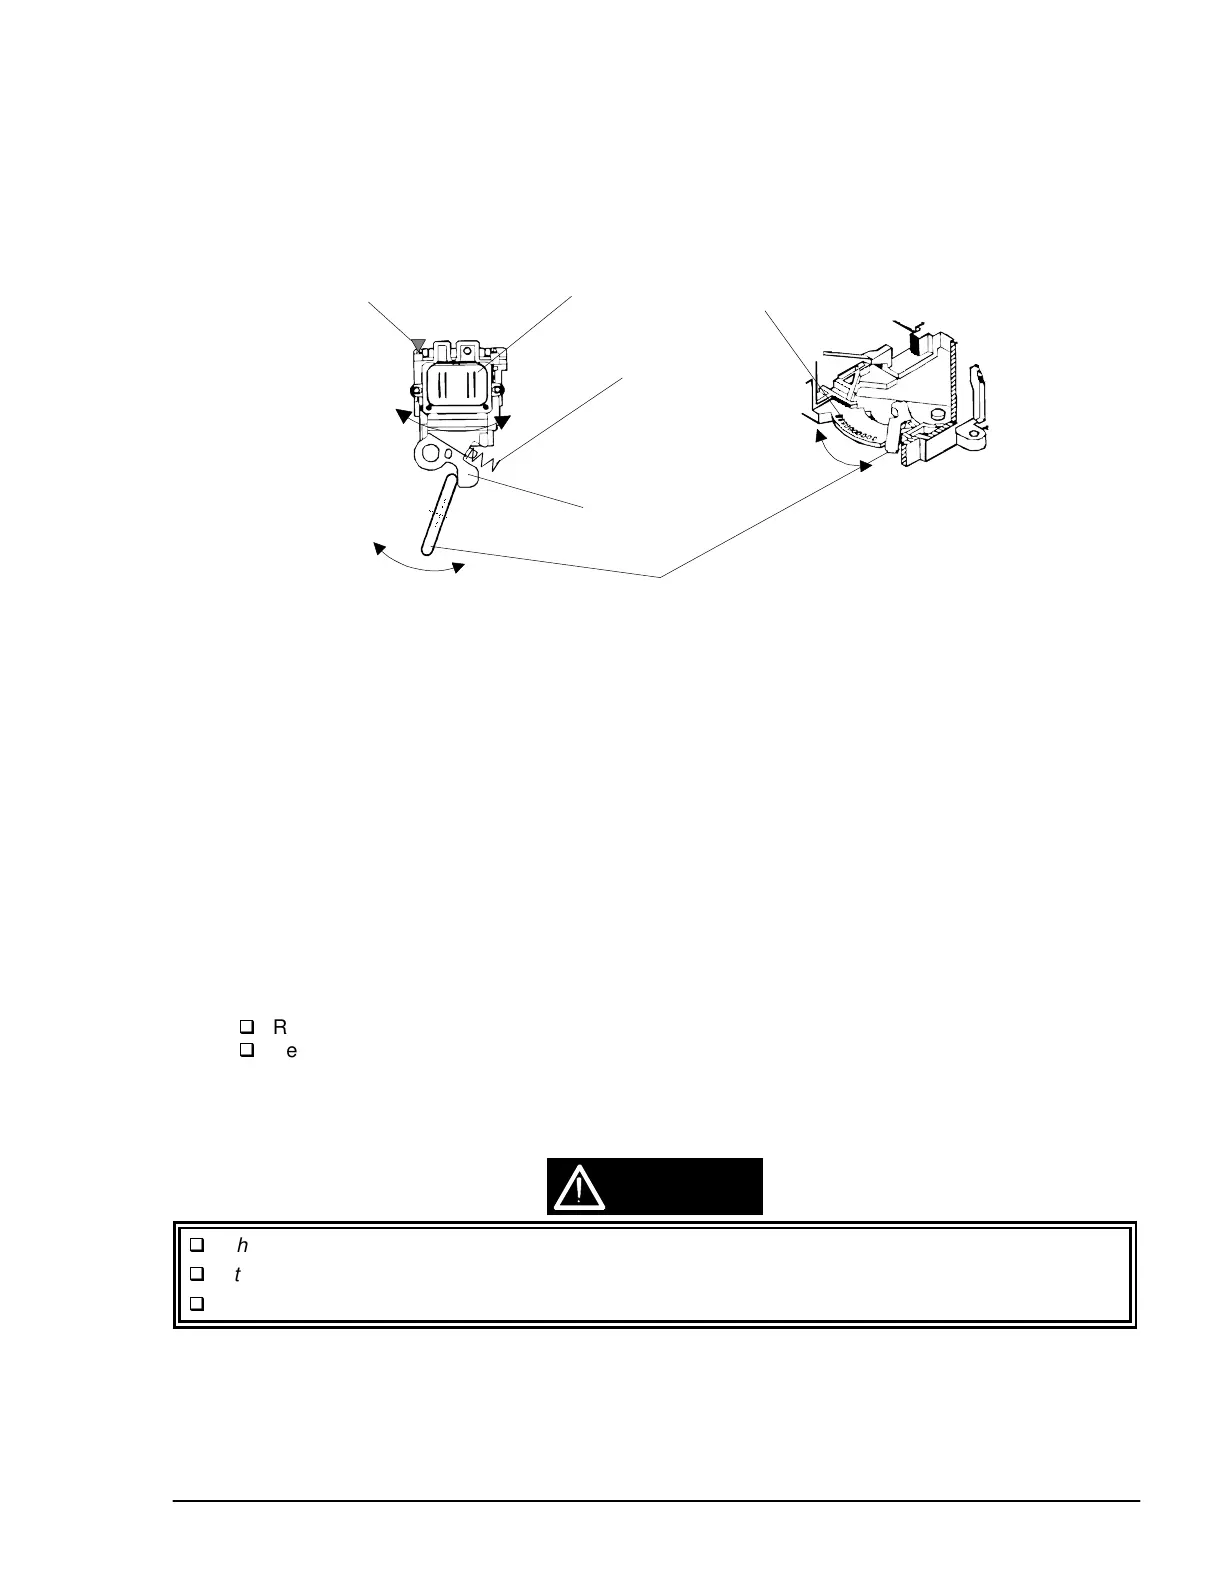
Black Printhead Angular Adjustment
This adjustment must be made when replacing or disassembling the black printhead. The compression
spring holds each printhead to a supporting point of the CR unit and the angle adjustment lever located
under the printhead. The adjustment lever is used to bring the black printhead parallel to the printing surface.
With this operation, the nozzles on the printhead are aligned parallel to the paper feed direction.
1. Connect the printer to the host computer with a parallel interface cable.
2. Run the adjustment program on the host computer.
3. Enter the market setting (See page 4-4).
4. Select Adjustment & Check
from the main menu and press Enter; the Adjustment & Check menu
appears.
5. Select Angle Adjustment and press Enter; the printer prints the angle adjustment pattern.
6. Look at the pattern and follow the flowchart on page 4-8 to align the vertical lines and make the gap width
less than 1/4 of the line width.
7. The following options are available in the Angle Adjustment screen:
[SPACE] Retry the adjustment.
[0] Enter a cleaning sequence.
[ENTER] Quit the operation and return to the Adjustment and Check menu.
[ESC] Return to the Adjustment and Check menu without changing the current settings.
8. After returning to the Adjustment and Check menu, you may:
Return to the main menu: select Return and press Enter.
Perform other adjustments: select the desired adjustment and press Enter.
9. To exit the adjustment program, return to the main menu, select END
and press Enter.
When moving the printhead angle adjustment lever, lift up the tip.
Fit the notch on the lever to the one of the adjusting holes to secure the set position.
The printhead angle adjustment lever is delicate; be careful not to apply too much force.
Supporting Point
Printhead
Compression Spring (9.9)
Arm
Printhead Angle Adjustment Lever
Adjustment Holes
Figure 4-4. Printhead Angular Adjustment
CAUTION

 Loading...


