EPSON Stylus COLOR 3000
EPSON Stylus Color 3000 Service Manual
-5
Writing the Printhead IDs
This operation writes the printhead IDs to the EEPROM. You need to perform this operation whenever you
replace a printhead.
1. Connect the printer to the host computer with a parallel interface cable.
2. Run the adjustment program on the host computer.
3. Enter the market setting (Refer to page 4-4).
4. Select Adjustment & Check from the main menu. Press Enter; the Adjustment & Check menu appears.
5. Select
VH, EEPROM and press Enter to open the menu.
*: To print an A4 check pattern, set the paper portrait.
†: To print an A3 check pattern, set the paper landscape.
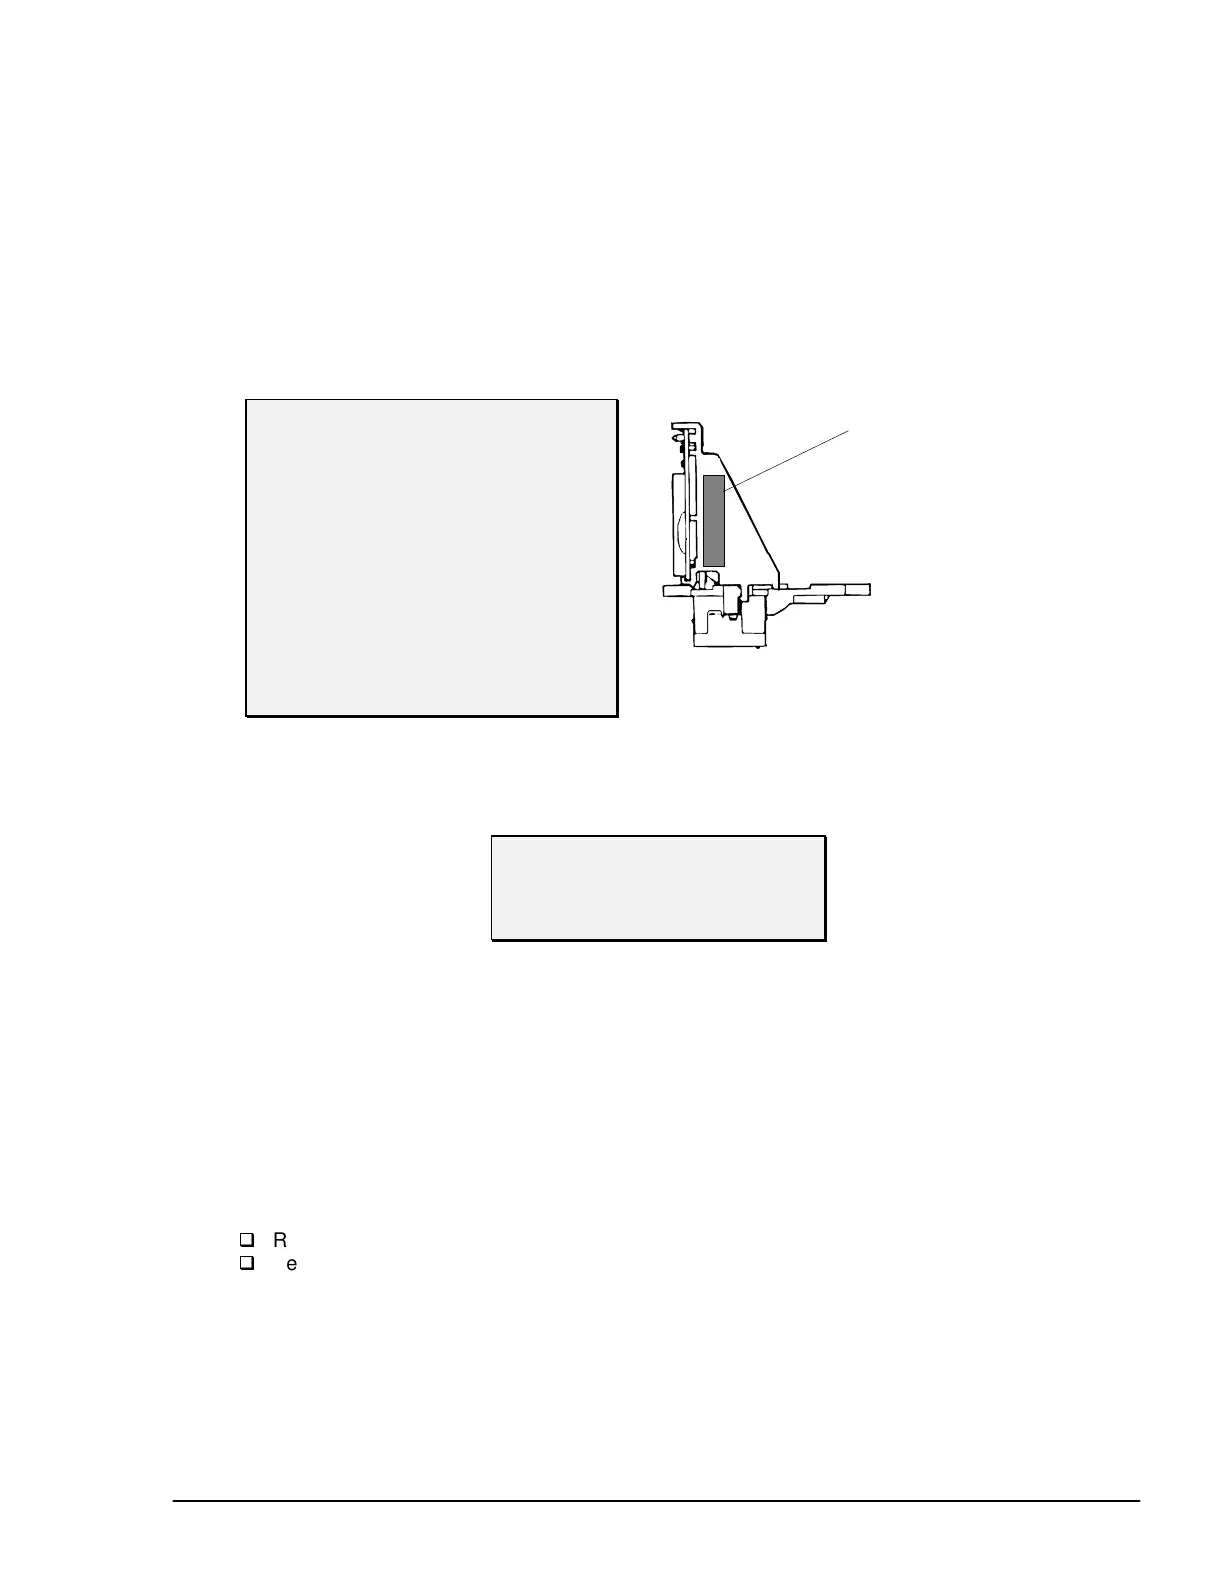
6. Enter the 5-digit black and color printhead IDs. See Figure 4-3 for the location of the printhead ID.
7. The following options are available in the VH, EEPROM screen:
[SPACE] Retry the adjustment.
[0] Quit the menu and return to the Adjustment and Check menu.
[ENTER] Enter the initial ink charge mode and return to the Adjustment and Check menu.
[ESC] Return to the Adjustment Check menu without changing the current values.
8. After returning to the Adjustment and Check menu, you may:
Return to the main menu: select Return and press Enter.
Perform other adjustments: select the desired adjustment and press Enter.
9. To exit the adjustment program, return to the main menu, select END and press Enter.
Printhead Voltage Marked Here.
Figure 4-3. Printhead ID Marking
<<<Adjustment and Check>>>
0. Market (001)
1. VH, EEPROM
2. Angle Adjustment
3. Vertical Adjustment
4. Gap
5. Uni-d
6. Bi-d
7. A4 *
8. A3
†
R.Return
Select
<1. VH, EEPROM>
BK VH
18216
YMC VH
16215

 Loading...


