EPSON Stylus COLOR 3000
EPSON Stylus Color 3000 Service Manual
-29
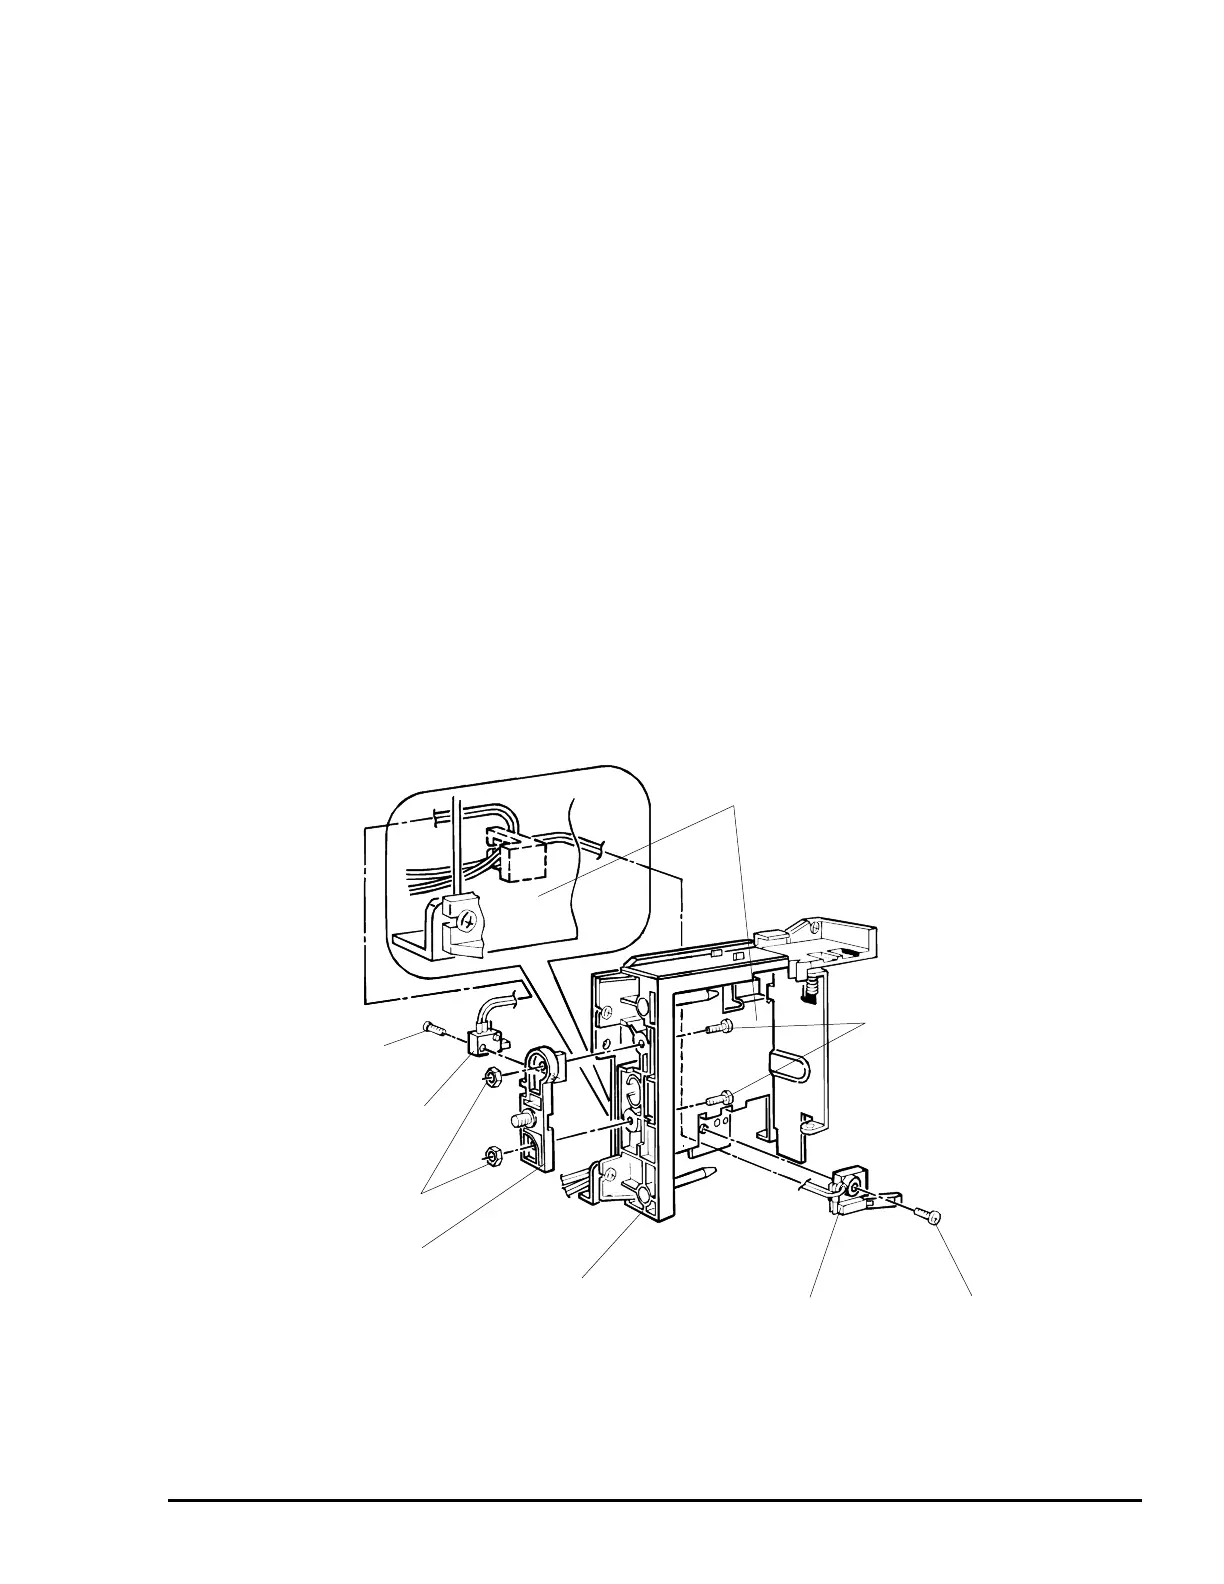
Ink Low Sensor Removal
1. Remove the upper housing (See page 3-4).
2. Remove the printer mechanism (See page 3-10).
3. Remove the paper eject frame (See page 3-21).
4. Remove the pump (See page 3-23).
5. Remove the ink cartridge holders (See page 3-27).
6. Remove the ink low sensor connector cables from the clamp on the ink cartridge holder mounting plate.
7. Remove one screw (CBS, 3×10) securing the ink low sensor to the ink cartridge holder mounting plate.
Then remove the ink low sensor.
Ink Cartridge Sensor Removal
1. Remove the upper housing (See page 3-4).
2. Remove the printer mechanism (See page 3-10).
3. Remove the paper eject frame (See page 3-21).
4. Remove the pump (See page 3-23).
5. Remove the ink cartridge sensor connector cables from the clamp on the ink cartridge holder.
6. Remove the ink cartridge holder (See page 3-27).
7. Remove two screws (CBS, 3×10) securing the pin holder to the pin holder assembly and two hexagon
nuts (M3). Then remove the pin holder.
8. Remove one pan camera B tightening screw (2×10) securing the ink cartridge sensor to the pin holder.
Then remove the ink cartridge sensor.
Ink Cartridge Sensor
Hexagon Nuts (M3)
Ink Cartridge Holder Mounting Plate
CB Screws (3×10)
CBS Screw (3×10)
Ink Low Sensor
Pin Holder
Pin Holder Assembly
Pan Camera B
Tightening Screw (2×10)
Figure 3-26. Ink Low Sensor/Ink Cartridge Sensor Removal

 Loading...


