79
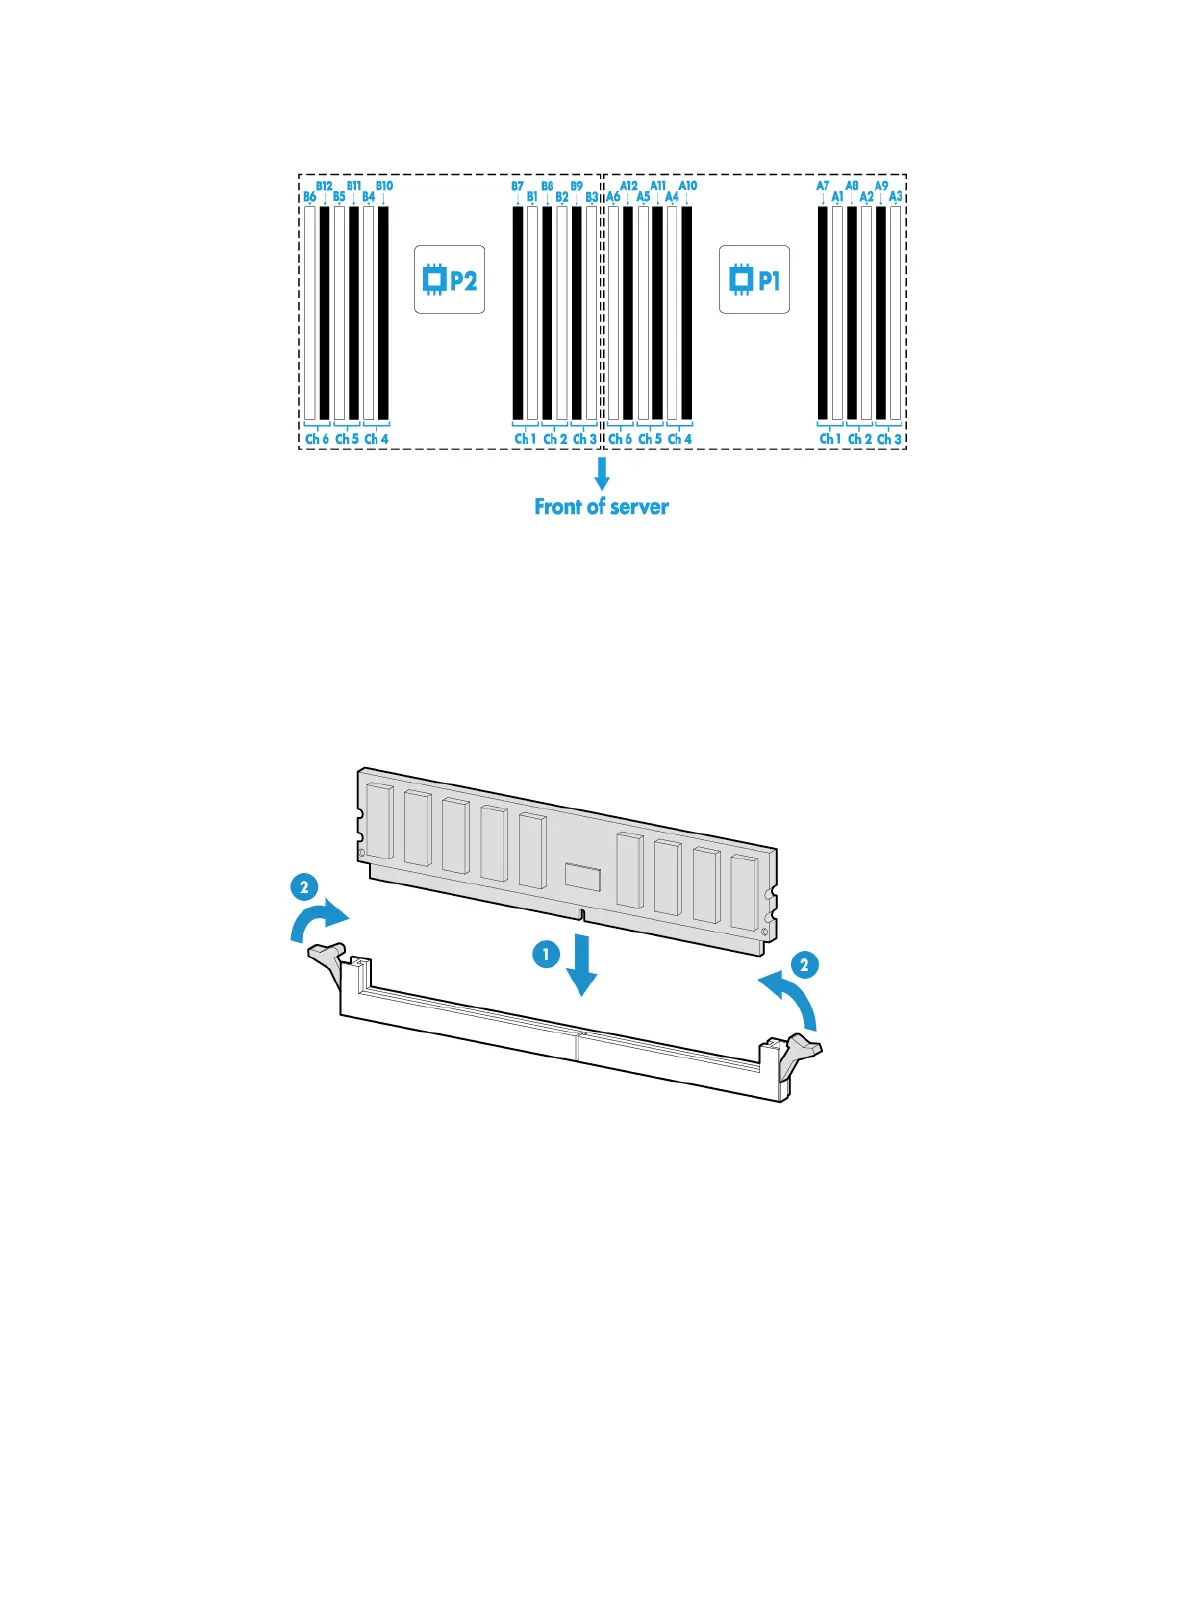
Figure 108 DIMM slots numbering
b. Open the DIMM slot latches.
c. Align the notch on the DIMM with the connector key in the DIMM slot and press the DIMM
into the socket until the latches lock the DIMM in place, as shown in Figure 109.
To avoid dam
age to the DIMM, do not use force to press the DIMM into the socket when you
encounter resistance. Instead, re-align the notch with the connector key, and then reinsert
the DIMM again.
Figure 109 Installing a DIMM
6. Install the chassis air baffle. For more information, see "Installing air baffles."
7. Install the access panel. For more information, see "Installing the access panel."
8. Rack-mount the server. For more information, see "Installing the server."
9. Connect the power cord. For more information, see "Connecting the power cord."
10. Powe
r on the server. For more information, see "Powering on the server."
Verifying the installation
Use one of the following methods to verify that the memory size is correct:
• In the CLI of a Linux OS, execute the
cat /proc/meminfo command.
• Log in to HDM. For more information, see HDM online help.
• Access UIS manager. On the top navigation bar, click Hosts. Select the host and then click the
Hardware Monitoring tab.

 Loading...


