32
────────────────────────────────────────────────────
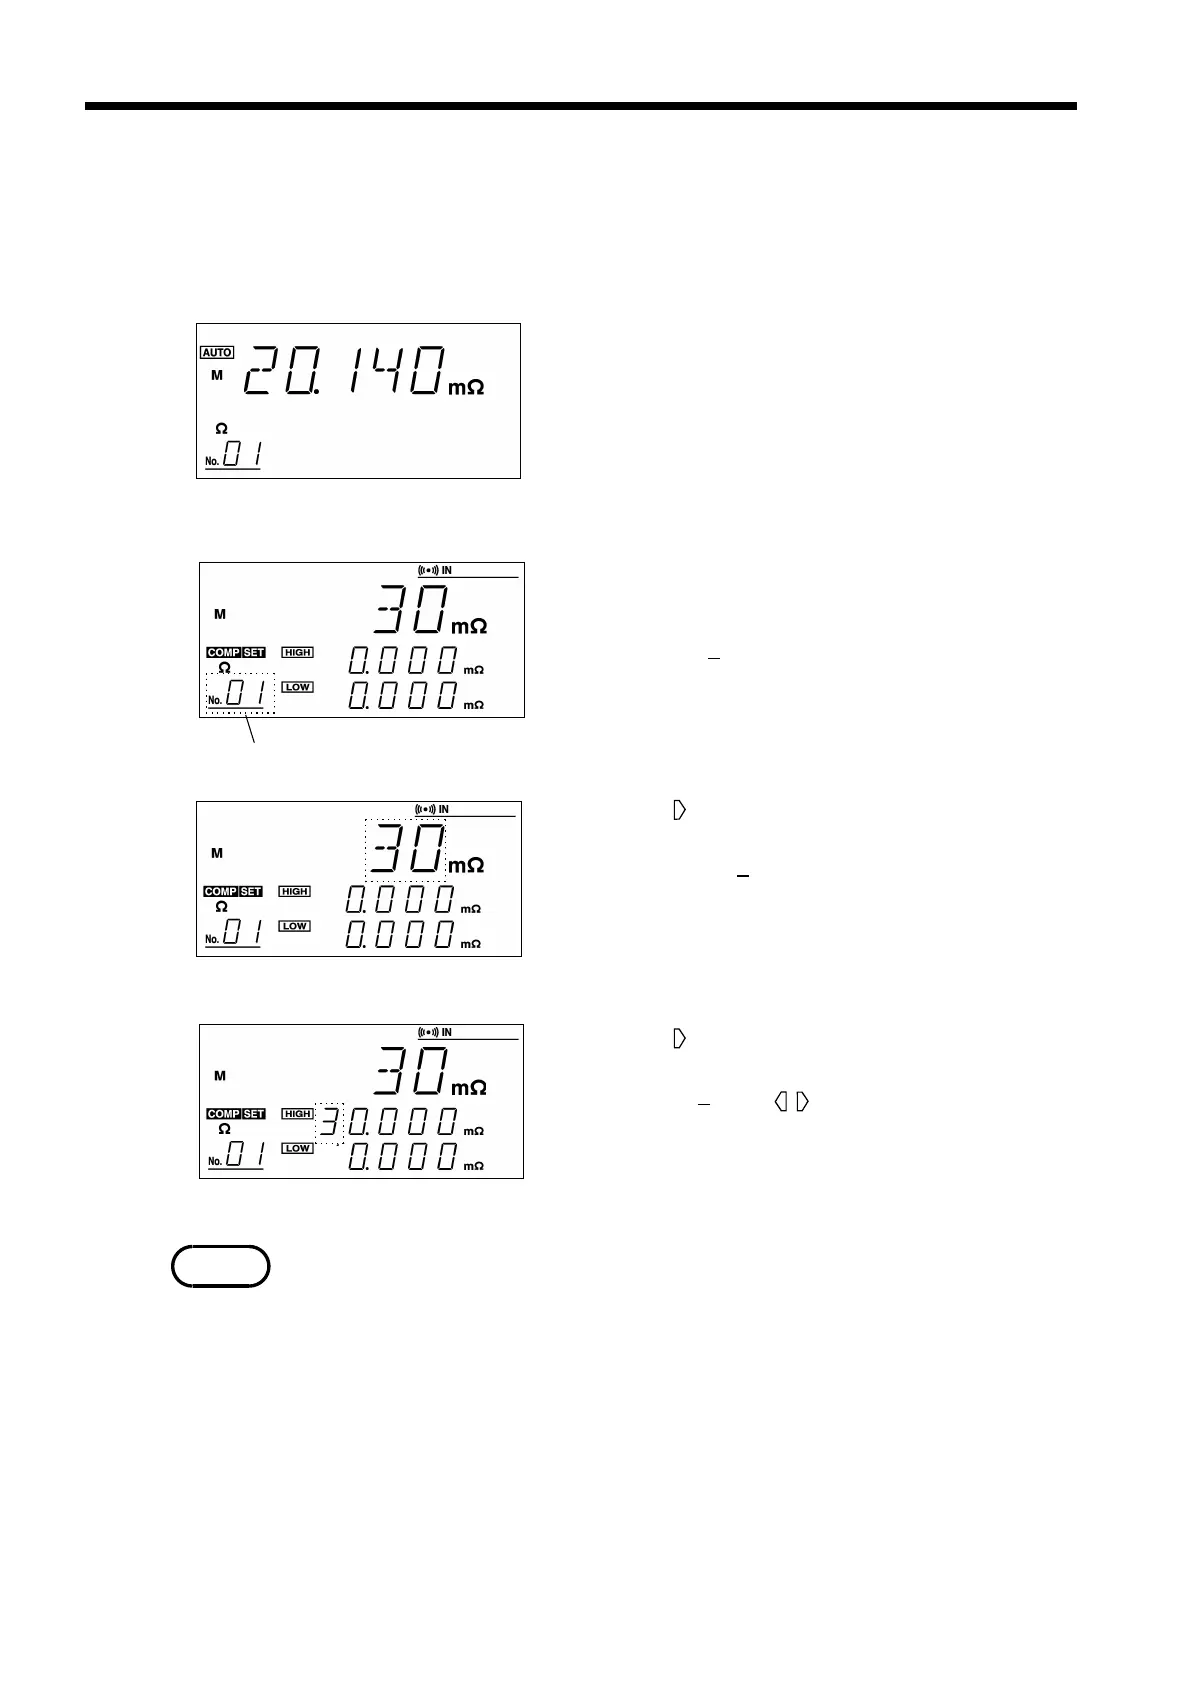
5.1 Resistance Measurement Mode
────────────────────────────────────────────────────
The comparator number blinks
NOTE
.1 Resistance Measurement Mode
(1) Setting start
1. Press the SHIFT key. "SHIFT" appears lit in the
display.
2. Press the
COMP (COMP SET) key. The display
switches to the comparator setup screen.
3. Press the
Ω/Ω・V key to select resistance mode.
In resistance mode, the screen displays only
the "Ω" symbol of "Ω・V" as lit.
(2) Setting the comparator number
On the comparator setup screen, "COMP SET" is
lit and the comparator number flashes.
Use the
+ and keys to select the desired
comparator number. You may select numbers in
the range from 01 to 30.
(3) Setting the resistance range
1. Use the (cursor right move) key to select the
resistance range setup field.
2. Use the
+ and keys to set the resistance
range. Select a value within the range 30 mΩ
to 3 kΩ.
(4) Setting the resistance value
1. Use the (cursor right move) key to select the
resistance upper limit setup field.
2. Use the
+, , and (cursor left and right
move) keys to set the upper resistance. Select
values in the effective range 0 to 31000.
3. Set the resistance lower limit.
Set these values so that the resistance lower limit is not higher than the
resistance upper limit. If the values set violate this rule, the instrument
will regard the smaller resistance as the lower limit and larger resistance
as the upper limit and execute the comparator function. Determine all
five digits for each limit value. If the sampling rate is set to FAST, the
comparator function is executed by rounding down the lowest digit. Auto-
range cannot be selected.