4 - 38
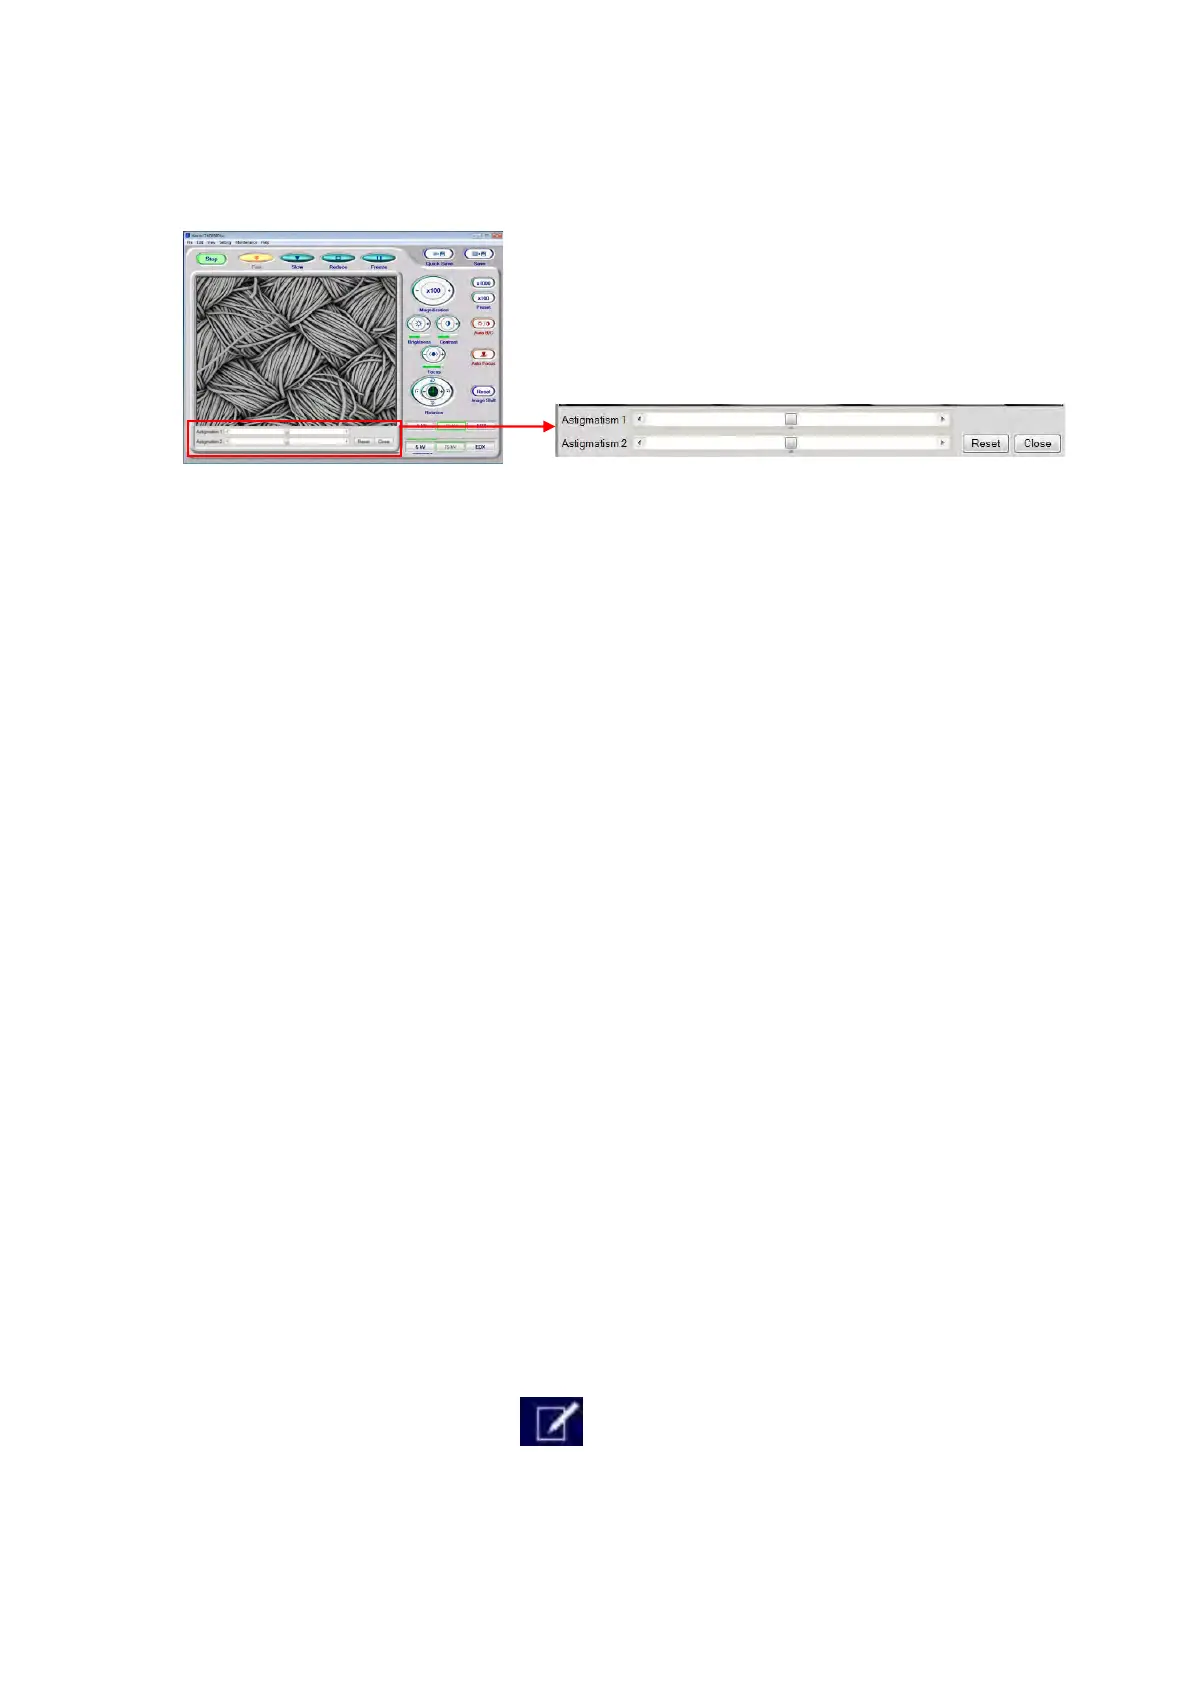
An astigmatism correction operation part is displayed in the Information / Comment
area of the operation window.
Figure 4.2.11-8 Astigmatism Correction Operation Part
2b. Using focusing adjustment, set the focus in the condition of (A) shown in
Figure 4.2.11-6. (A) is the intermediate position through which the image runs
vertically or obliquely.
2c. Adjust the image by dragging the slider of astigmatism 1 and 2 scroll bars so that the
image becomes more clearly visible. Verify that the image shows blurred concentric
circles even when the focus is moved back and forth from an optimal point (see
Figure 4.2.11-5) If the image ceases to run, the astigmatism correction was
succeeded. When changing the focus point, the image may run as in Figure 4.2.11-6.
In this case, the astigmatism is not appropriately corrected. Again, perform
astigmatism correction.
4.2.12 Saving the Image Data
After adjusting the focus, click the [Slow] button in [View mode settings area] to show an
image equivalent to an actual image to be saved, where you can check the detailed
structure. For changing brightness and/or contrast, perform adjustments by referring to 4.2.9
Adjusting the Brightness / Contrast.
To save the image data, perform the following steps:
1. In addition to the image, check any associated information to be saved (if the same
information as the previous save is used, no checking is necessary).
To revise the information, see Steps 1a through 1c below.
1a. Either click the [Edit] button on the Information / Comment area
(see Figure 4.3.2) or select [Setting for Save] from the [File] menu.