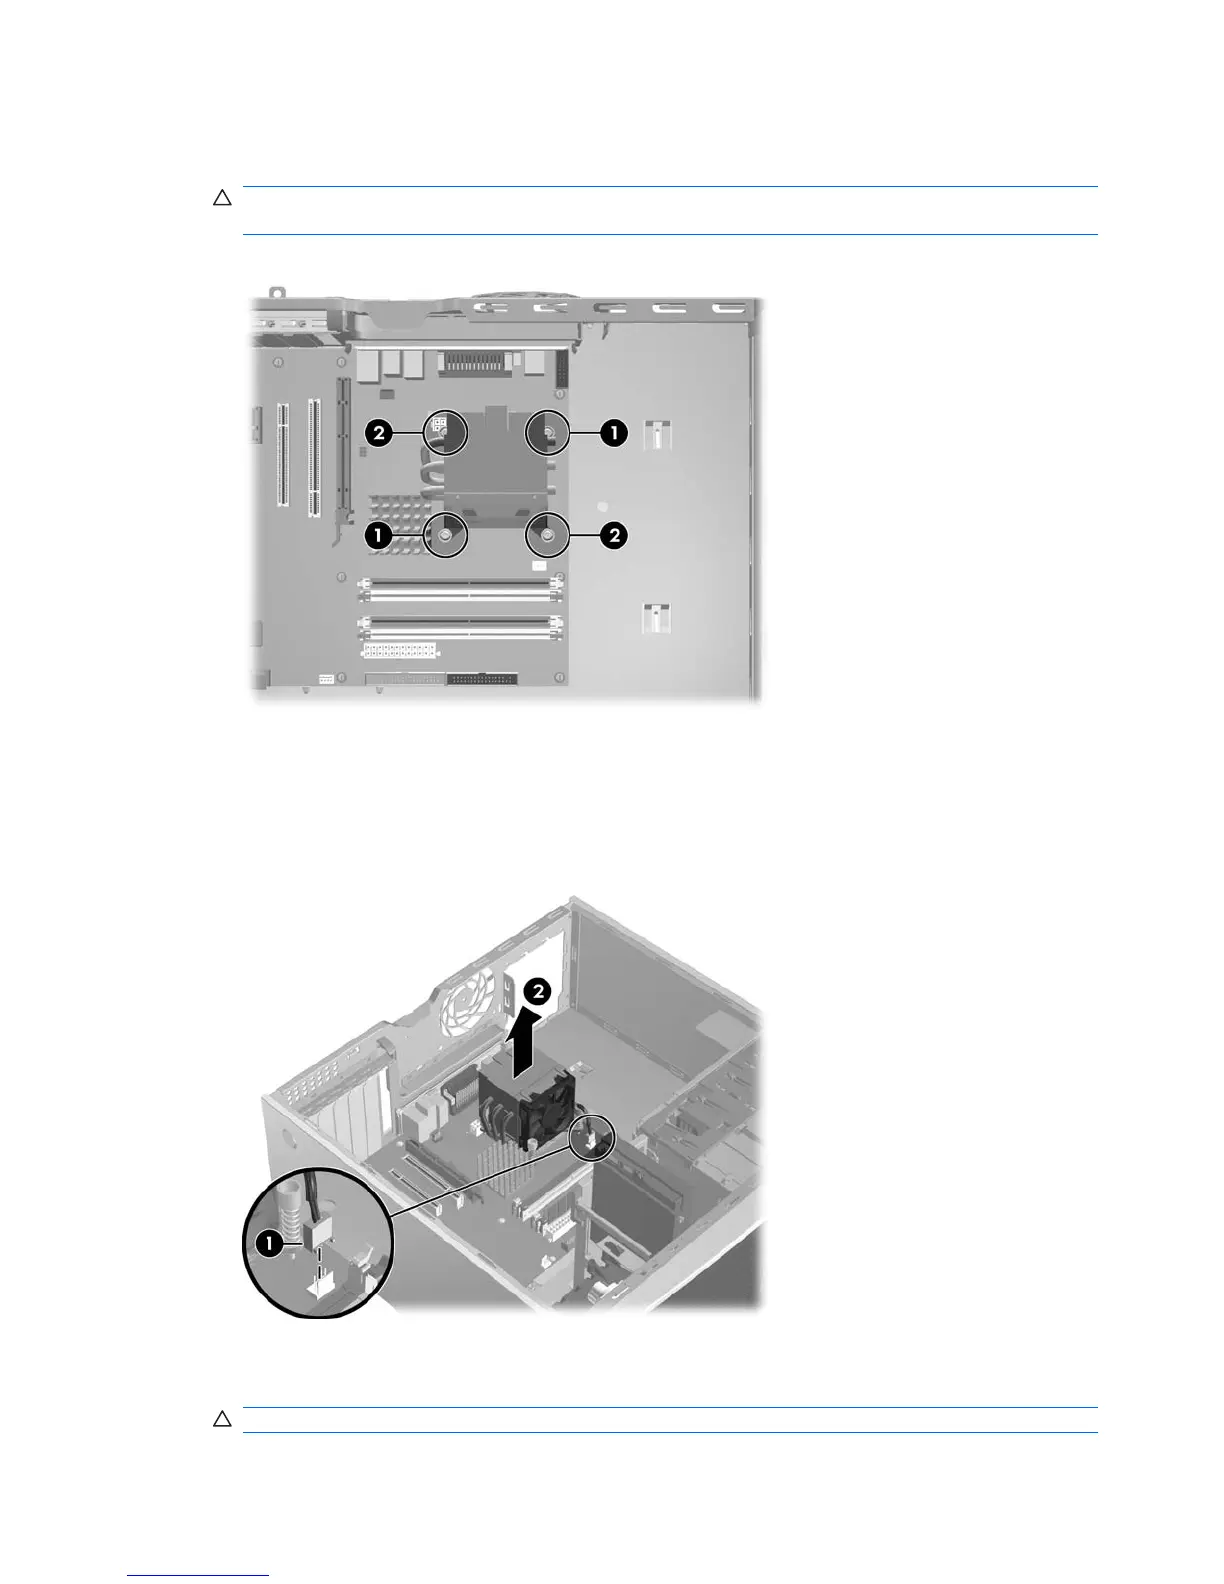
2. Slowly and evenly loosen one pair of diagonally opposite screws (1) from the processor until the
screw shanks disengage from the system board. Loosen the remaining pair (2).
CAUTION: Do not fully loosen one screw, and then move on to the next. Loosen all screws a
little at a time, ensuring that the processor remains level.
Figure 4-59 Identify proper screw loosening sequence
3. Disconnect the processor heatsink fan cable from the system board (1).
4. Gently twist the heatsink to break the thermal grease binding.
5. Lift the processor heatsink out of the chassis (2).
Figure 4-60 Removing the processor heatsink
6. Use alcohol and a soft cloth to clean all of the thermal interface residue from the processor and
the heatsink.
CAUTION: Allow the alcohol on the processor and processor heatsink to dry completely.
104 Chapter 4 Removal and replacement procedures ENWW

 Loading...


